
Tracer L4-116 1.9L SOHC (1991)
Brake Caliper: Service and Repair
Front
Disassembly and Assembly
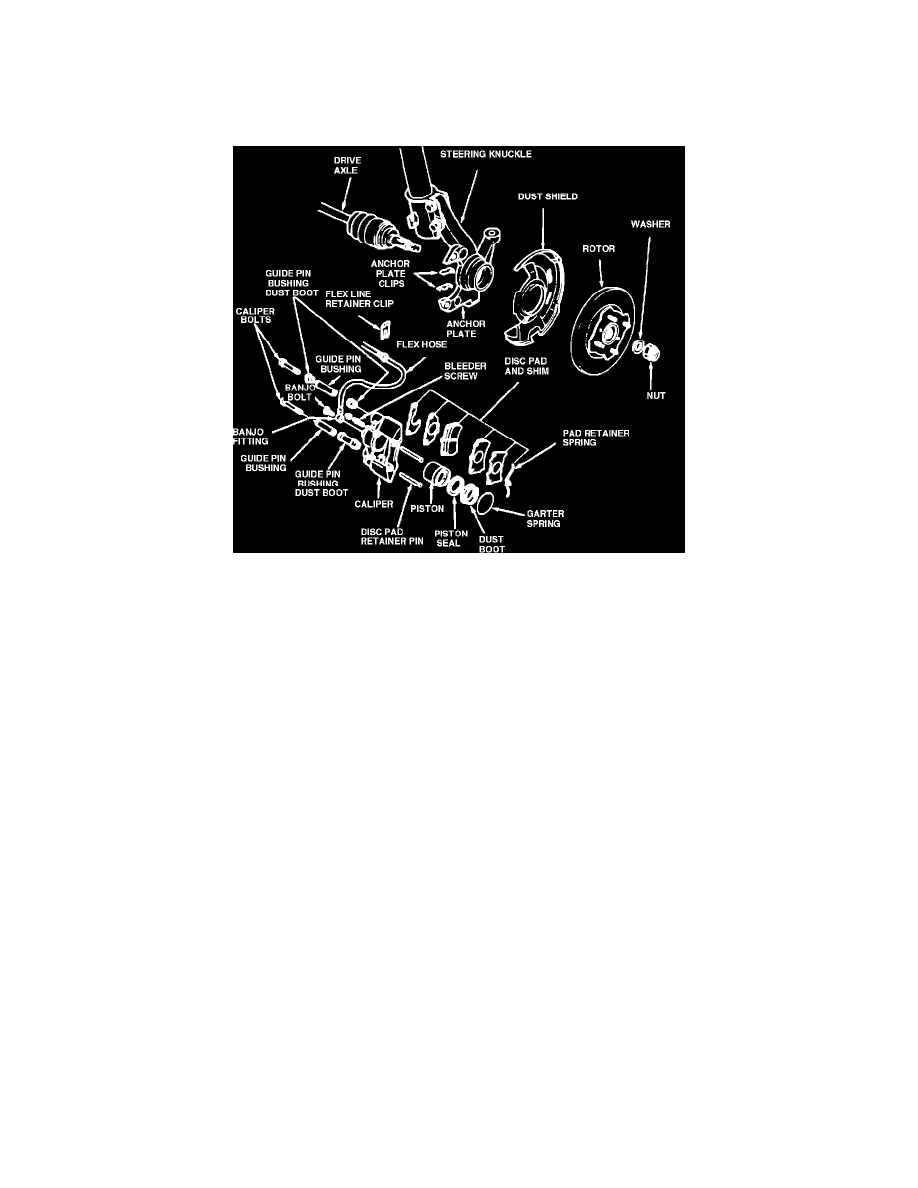
Fig. 4 Front Disc Brake Assembly
DISASSEMBLY
1.
Open caliper bleed screw and drain caliper, then close bleed screw.
2.
Remove caliper.
3.
Remove caliper guide bushing and dust boots, Fig. 4.
4.
Remove snap ring from caliper piston dust boot.
5.
Position a wooden block or shop towels between caliper and piston, then apply air pressure to brake hose fitting to remove piston from caliper.
Use only enough air pressure to ease piston from caliper bore. Keep hands and fingers away from piston, as personal injury may result.
6.
Remove dust boot from caliper, then using a wooden or plastic pick, remove piston seal from caliper bore.
INSPECTION
1.
Check piston for scratches, scoring or damage. Replace, if necessary.
2.
Check caliper bore for scratches, scoring or corrosion. Light scratches or slight corrosion can be polished out using crocus cloth.
3.
Check that bleeder screw and bleeder screw bore hole in caliper are fully open.
4.
Check caliper bushings for corrosion and dust boot retaining ring for damage or tension loss. Replace parts as necessary.
ASSEMBLY
1.
Lubricate piston seal with brake fluid, then position seal in caliper bore groove, Fig. 4.
2.
Lubricate piston and caliper bore with brake fluid.
3.
Install dust boot on piston, then install piston into caliper bore. Use a gentle rocking motion to bottom piston in caliper bore.
4.
Slide dust boot over caliper bore boss and install retaining ring.
5.
Install caliper assembly.
6.
After completing installation, perform system brake bleeding procedures, then cycle brake pedal several times to seat brake pads and to ensure
system is function properly.
Removal and Installation
REMOVAL
1.
Remove brake pads.