
Villager V6-181 3.0L SOHC VIN 1 EFI (1997)
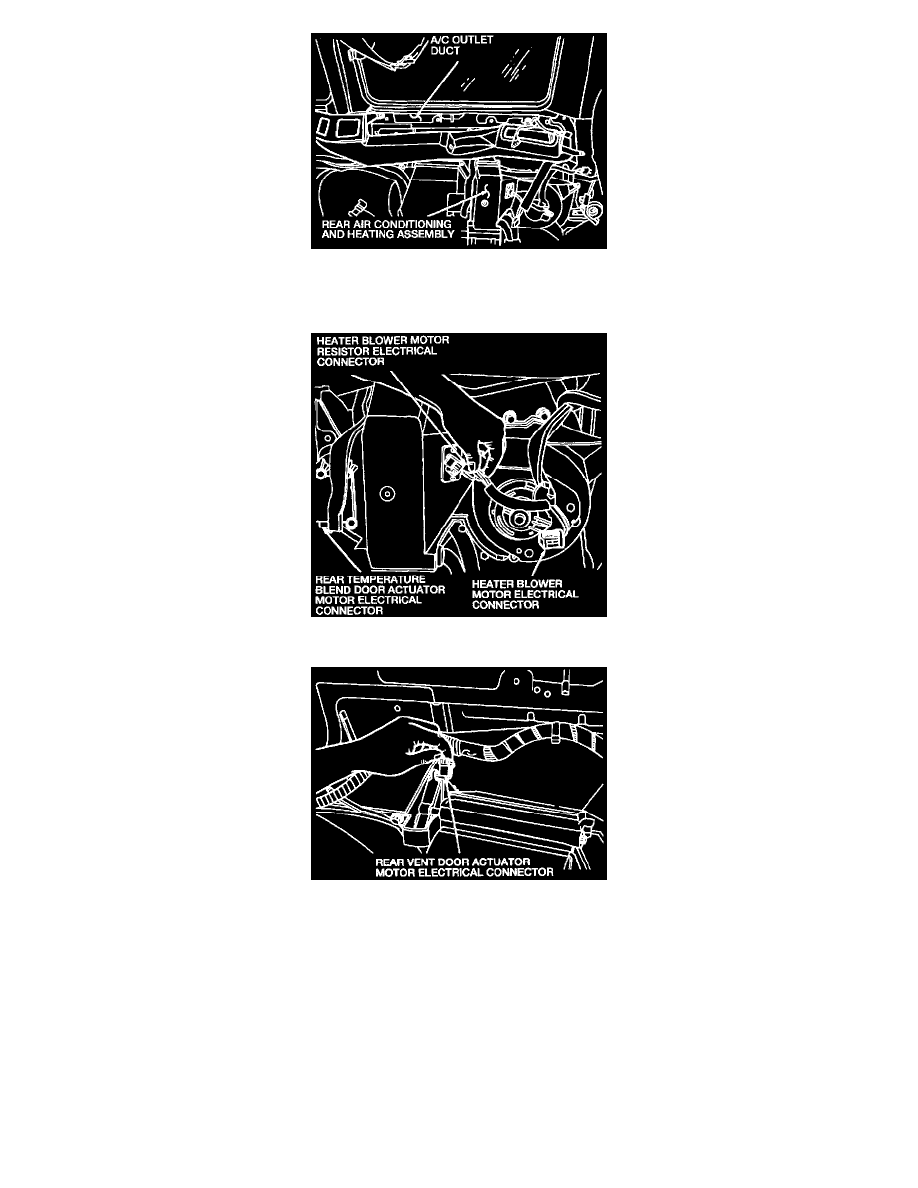
5. Remove the six rear air conditioning and heating assembly A/C outlet duct screws and the A/C outlet duct from the rear air conditioning and
heating assembly.
6. Disconnect the heater blower motor electrical connector and heater blower motor resistor electrical connectors.
7. Disconnect the rear temperature blend door actuator motor electrical connector and rear vent door actuator motor electrical connector.
8. Raise and support the vehicle.
9. Use A/C Spring Lock Coupling Disconnect Tool Set T84L-19623-B and disconnect the two A/C tube lock coupling springs from under the
vehicle.
10. Loosen the hose clamps and disconnect the two water hoses from the heater core.
11. Lower the vehicle.
12. Remove the four rear air conditioning and heating assembly bolts and remove the rear air conditioning and heating assembly from the vehicle.
INSTALLATION
1. Position the rear air conditioning and heating assembly in the vehicle. Install the four rear air conditioning and heating assembly bolts. Tighten the
four rear air conditioning and heating assembly bolts securely.
2. Raise and support the vehicle.
3. Connect the two water hoses to the heater core. Tighten the hose clamps.
4. Connect the A/C pipes to the A/C evaporator core by securing the A/C tube lock coupling springs.
5. Lower the vehicle.
6. Connect the rear temperature blend door actuator motor electrical connector and rear vent door actuator motor electrical connector.