
Villager V6-181 3.0L SOHC VIN 1 EFI (1997)
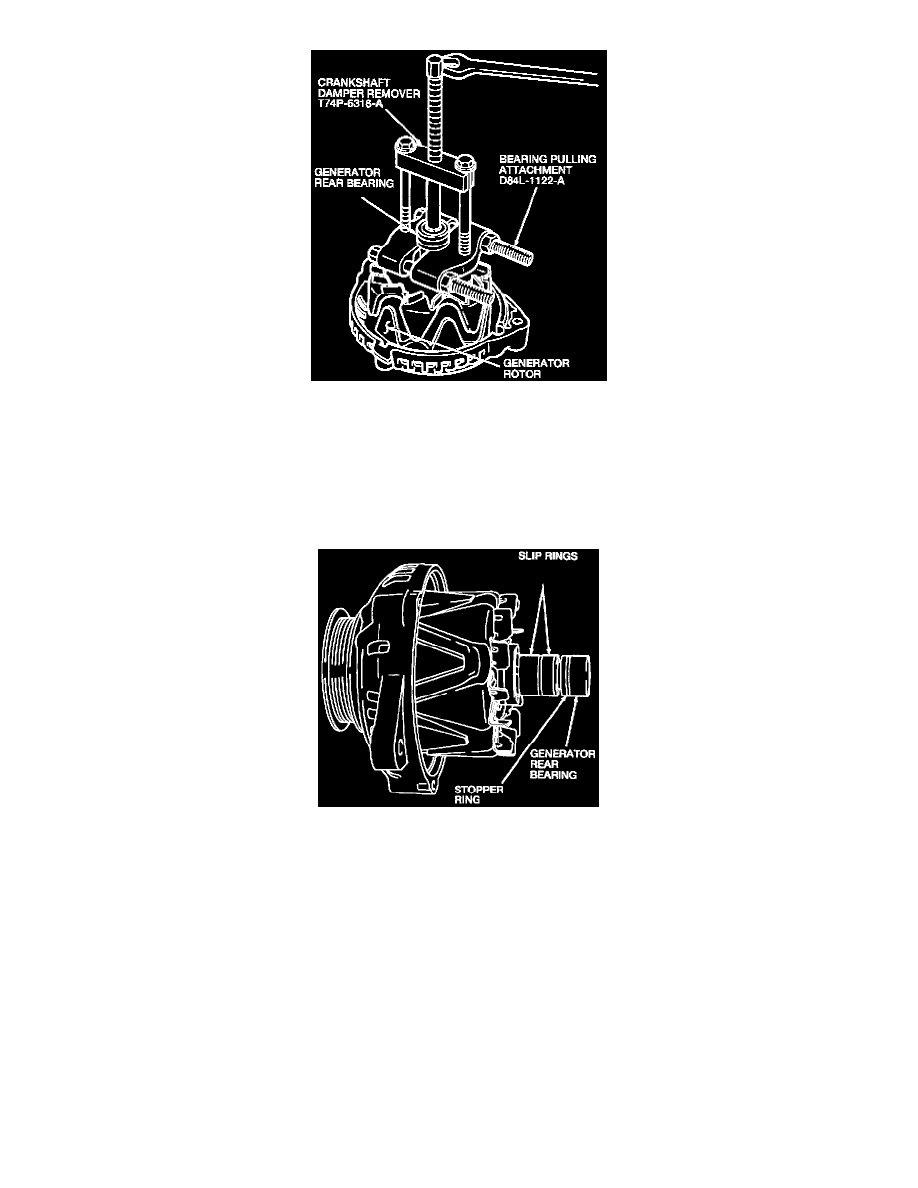
3. Use Bearing Pulling Attachment D84L-1122-A, or equivalent, and Crankshaft Damper Remover T74P-6316-A to remove the generator rear
bearing from the generator rotor shaft, as shown. Remove the stopper ring from the generator rear bearing.
ASSEMBLY
1. Position the new generator rear bearing on the end of the generator rotor shaft.
2. Place a socket or driver of the proper size on the generator rear bearing inner race.
3. Tap the generator rear bearing onto the generator rotor shaft with a soft-faced hammer.
4. Fit the stopper ring into the eccentric groove of the generator rear bearing circumference. The protruding part of the stopper ring should fit into the
deepest part of the eccentric groove. Note that for easy recognition, the edge of the deepest part of the eccentric groove is chamfered. By fitting the
stopper ring in this way, the amount of stopper ring protruding from the eccentric groove is lessened, making assembly easier.
5. Position the generator front housing and generator rotor assembly to the generator rear housing and stator and coil assembly.
6. Install the four generator housing bolts. Tighten the four generator housing bolts to 4-5 N.m (36-44 Lb-in).