Villager V6-181 3.0L SOHC VIN 1 EFI (1997)

Starter Drive/Bendix: Service and Repair
DISASSEMBLY
1. Remove the M-terminal nut securing the brush cable to the starter solenoid.
2. Remove the two starter solenoid screws from the drive end housing.
3. Remove the starter solenoid and the two adjusting plates from the drive end housing.
4. Remove the plunger and plunger spring from the starter solenoid.
5. Remove the dust cover and disc plate from the drive end housing.
6. Remove the nut and support bracket.
7. Remove the two thru bolts.
8. Remove the two brush holder screws securing the brush holder to the brush end plate.
9. Remove the brush end plate.
10. Remove the brush holder and brush spring assembly.
11. Remove the starter motor armature and starter frame from the drive end housing.
12. Remove the ball bearing.
13. Remove the starter motor armature from the starter frame.
14. Remove the three planet gears from the output shaft.
15. Remove the packing from the internal gear.
16. Remove the dust cap.
17. Insert the starter motor armature into the output shaft.
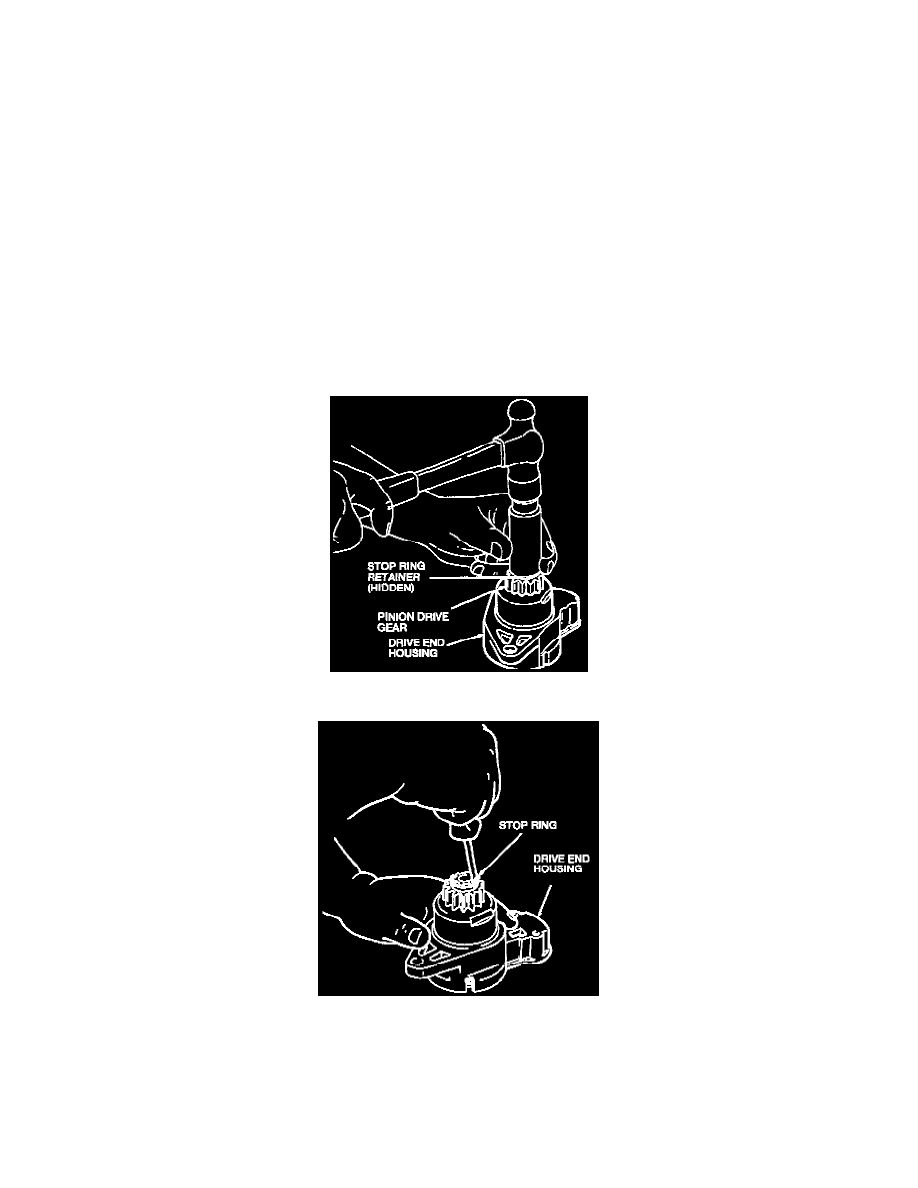
18. Use a socket and hammer and drive down the stop ring retainer to release the stop ring.
19.Use a screwdriver to remove the stop ring.
20.Remove the stop ring retainer, pinion drive gear, and pinion drive gear spring.
21. Remove the starter motor armature from the output shaft.
22. Remove the starter drive.
ASSEMBLY
1. Install the starter drive on the output shaft.
2. Install the stop ring retainer onto the output shaft.
3. Install the stop ring onto the output shaft.
