
Villager V6-201 3.3L SOHC VIN T SFI (1999)
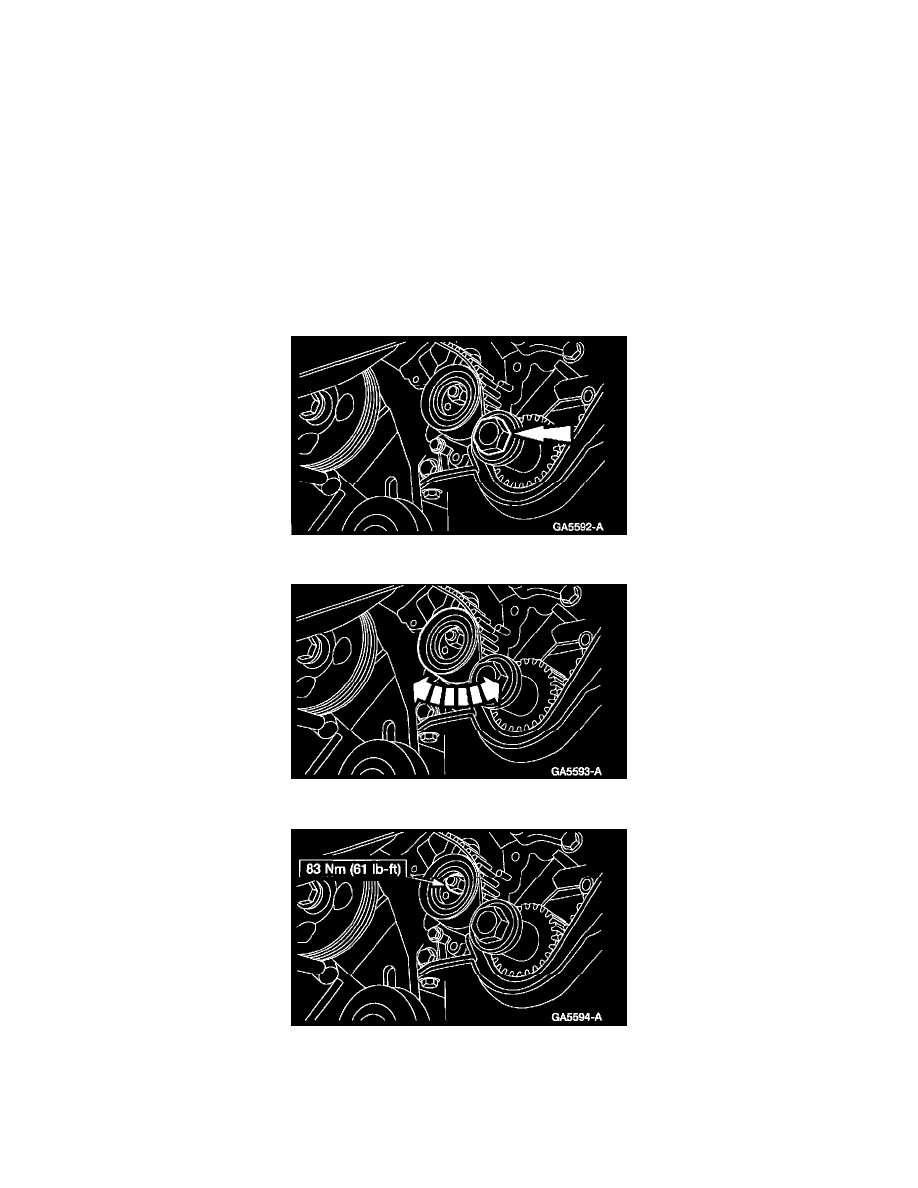
1. CAUTION: Make sure the arrow on the timing belt is pointing away from the engine when installed.
CAUTION: A new timing belt has three white timing marks that indicate the correct timing positions of the camshafts and the
crankshaft. These marks will help make sure that the engine is timed correctly. When the engine is correctly timed each white timing
mark on the timing belt will be aligned with the corresponding camshaft and crankshaft timing mark on the crankshaft sprocket and the
camshaft sprockets. There should be 40 timing belt teeth between the timing marks on the LH and RH camshaft sprockets and 43 teeth
between the timing mark on the LH camshaft sprocket and the timing mark on the crankshaft sprocket.
CAUTION: It is necessary to verify that the camshaft timing marks are aligned with the timing marks on the seal plate, and that the
crankshaft sprocket timing mark is aligned with the timing mark on the oil pump. When installing the timing belt, start at the crankshaft
sprocket moving around to the camshaft sprockets in a counterclockwise direction. Do not allow any slack in the timing belt between the
crankshaft sprocket and camshaft sprockets. After all of the timing marks are matched up with the timing belt installed, slip the timing
belt onto the timing belt tensioner.
Align the timing marks and install the timing belt.
2. Raise the vehicle.
3. Install the crankshaft pulley bolt.
4. Rotate the tensioner clockwise and counterclockwise a minimum of two times.
5. Tighten the tensioner lock nut.