
Achieva L4-144 2.4L DOHC VIN T SFI (1996)
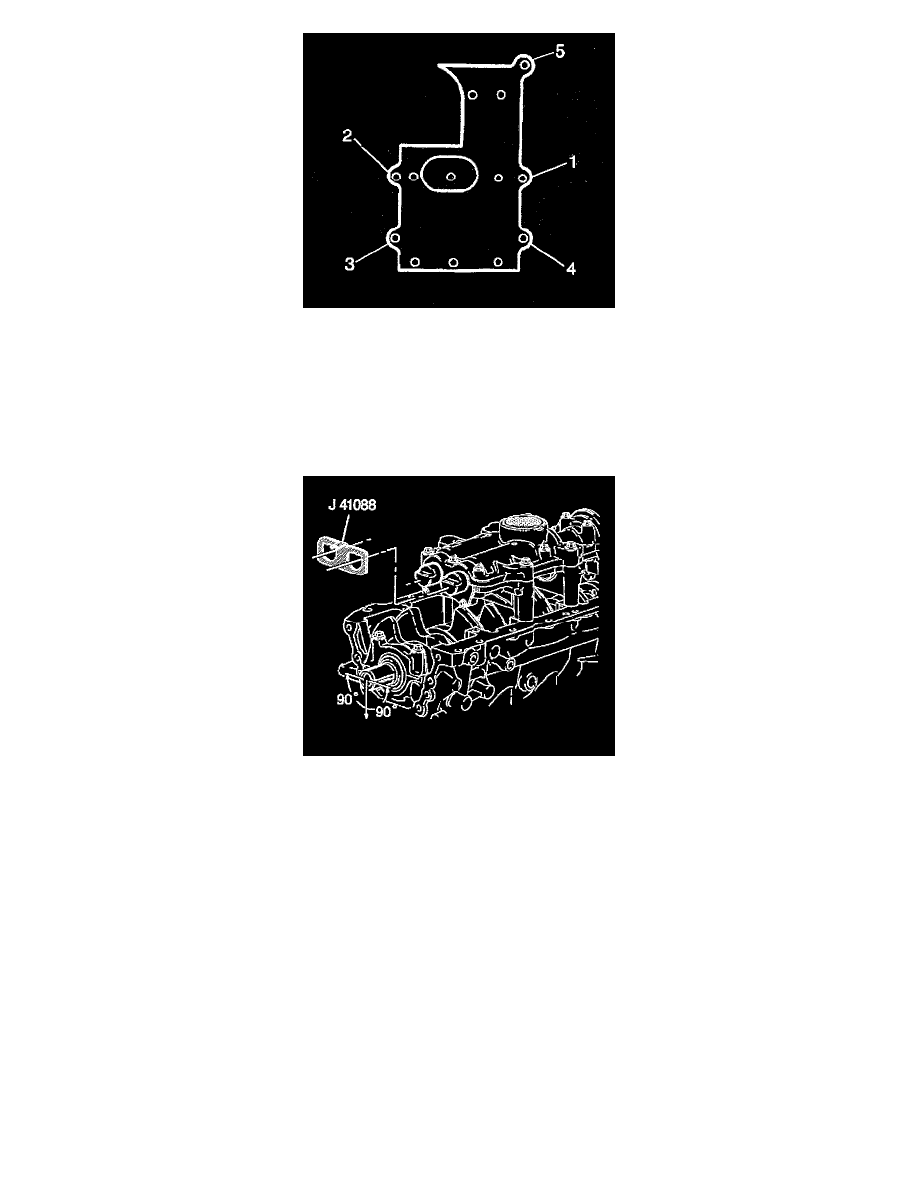
4. Tighten the housing assembly to block bolts in sequence.
-
Tighten bolts 1, 2, and 4 to 25 N - m (18 ft. lbs.) + 70 degrees.
-
Tighten bolt 3 to 40 Nm (30 inch lbs.) + 60 degrees.
-
Tighten bolt 5 to 53 Nm (39 ft. lbs.).
5. Ensure that the balance shafts spin freely.
6. If the balance shaft housing was disassembled, install the oil pump pick-up screen into the housing. Lightly tap the oil pump pick-up screen into
place with a plastic hammer.
7. Use the following steps to time the balance shaft to the engine:
7.1.
Place the number one piston at TDC.
7.2.
Rotate the crankshaft 90 degrees.
7.3.
Install the J 41088 on to the balance shaft assembly in order to ensure that the shafts do not rotate while the driven sprocket bolt is tightened.
IMPORTANT: If the balance shafts are not properly timed to the engine, the engine may vibrate or make noise.
8. Install the driven sprocket to the shaft.
IMPORTANT: The surface that was marked during disassembly of the driven sprocket must show if the drive sprocket is going to be reused. This
will insure that the chain continues to ride on the same surface. If a new driven sprocket will be installed, either surface can be placed against the
shaft.