
Aurora V8-4.0L VIN C (1996)
3. Position the camshaft bearing caps to the cylinder head.
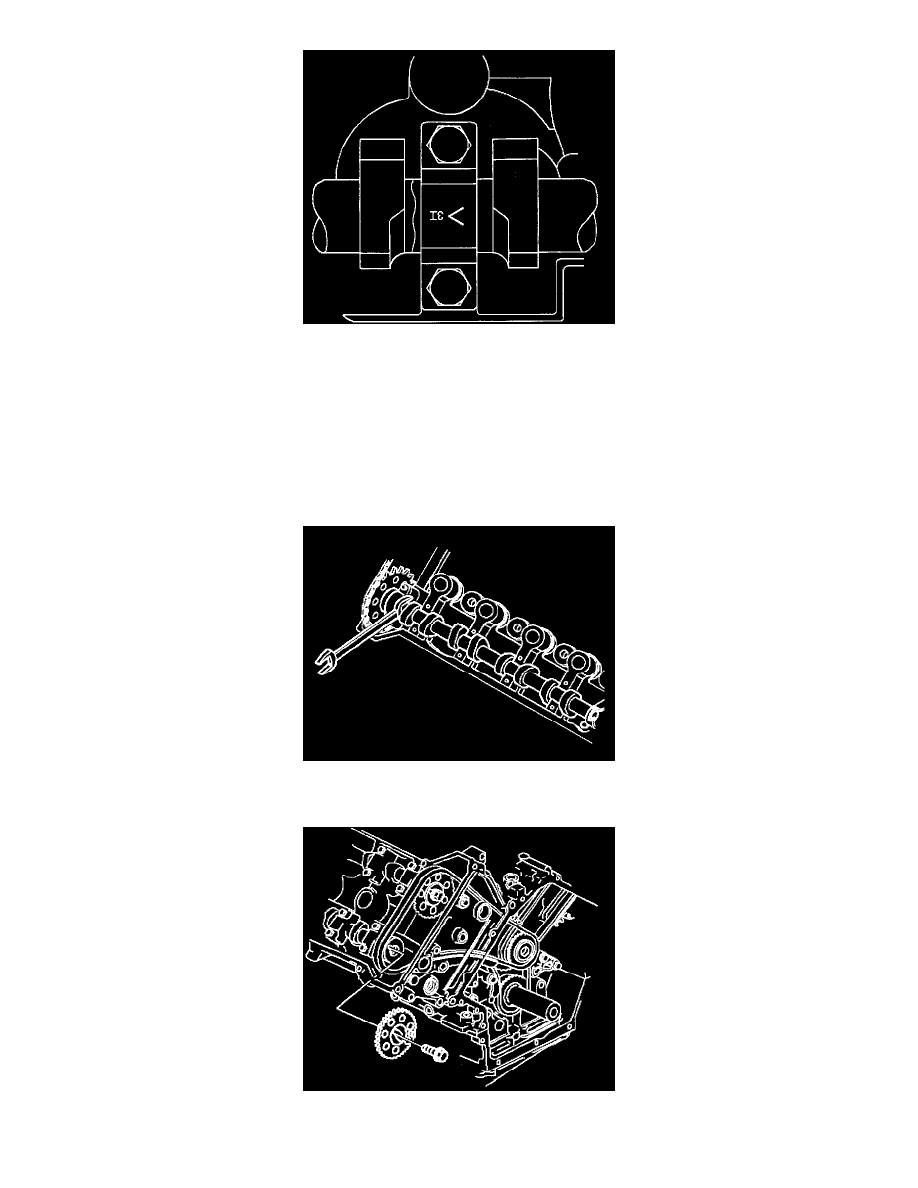
^
Each cap is identified for position and direction.
^
The arrow should point toward the front of the engine.
^
These caps are stamped for identification. The E indicates a cap for the exhaust camshaft. The I indicates a cap for the intake camshaft. The E1
or 11 is the first cap at the front of the engine.
4. Loosely install the camshaft bearing cap bolts.
5. Alternately tighten each bearing cap bolt a few turns at a time against the valve spring pressure until all bolts are snug.
^
Tighten the bolts to 12 Nm (106 inch lbs.).
NOTICE: Refer to Fastener Notice in Service Precautions.
6. Slide the camshaft sprockets onto the camshafts. Using the hex cast into the camshaft, rotate the camshafts until the drive pins are in the correct
position to engage the camshaft sprockets over the camshafts.
7. Install the camshaft sprocket retaining bolts.
^
Tighten the sprocket bolts to 120 Nm (89 ft. lbs.).