
Cutlass V6-189 3.1L VIN T FI (1990)
1. Raise and suitably support vehicle.
2. Support transaxle with jackstand.
3. Bolts attaching bracket to transaxle.
4. Nuts attaching bracket to mount.
5. Bracket. Refer to "Transaxle Bracket".
6. Bolts/nuts attaching mount support to frame.
7. Mount support.
8. Nuts attaching mount to support.
INSTALL OR CONNECT
1. Mount and attaching nuts to support.
TIGHTEN
^
Nuts to 48 Nm (35 lb. ft.).
2. Support and attaching bolts/nuts to frame.
3. Bracket and attaching nuts to mount.
4. Bracket to transaxle bolts.
5. Remove jackstand
6. Lower vehicle.
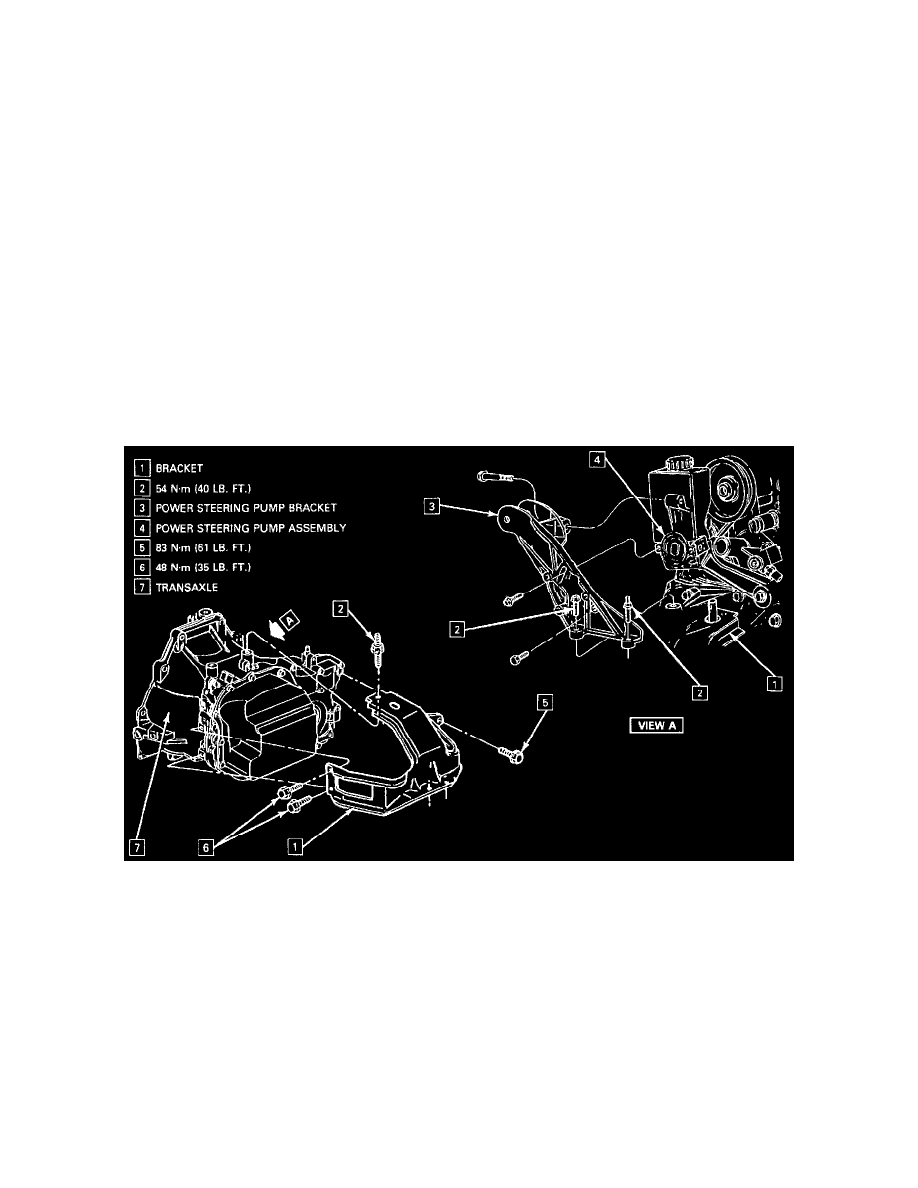
Transaxle Bracket
TRANSAXLE BRACKET 3T40 (125C)
Transaxle Bracket - 2.3L Engine/Hydra-Matic 3T40
TOOLS REQUIRED:
^
J 28467-A Engine Support Fixture
^
J 36462 Engine Support Adapter Leg
REMOVE OR DISCONNECT
1. Air cleaner.
2. Negative battery cable.
3. Install J 28467-A and J 36462.
4. Left-hand torque strut bracket from power steering pump.
5. Raise vehicle and suitably support.
6. Left front tire and wheel.
7. Left lower engine splash shield.
CAUTION: Failure to disconnect the intermediate shaft from the rack and pinion stub shaft can result in damage to the steering gear and/or