Cutlass V6-191 3.1L VIN M SFI (1998)

4. Seal protector J 29810 onto valve stub shaft.
5. Apply a small quantity of grease on seal (20).
^
Spool shaft seal (20) over protector and into gear assembly (30).
6. Retaining ring (17) into groove in gear assembly (30).
7. Lubricate stub shaft and dust seal area with grease.
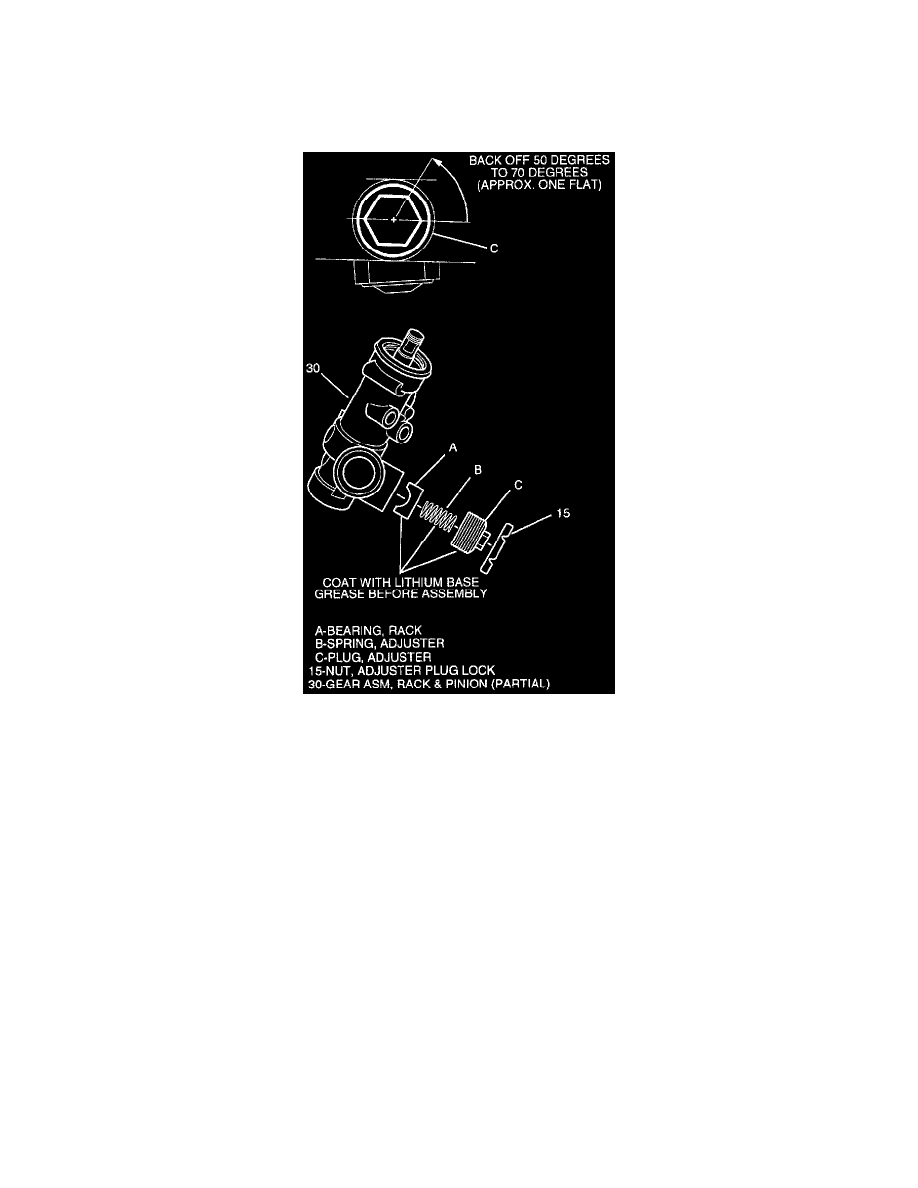
Rack Bearing Installation And Adjustment
8. Coat rack bearing, adjuster spring and adjuster plug with lithium base grease and install in gear assembly (30).
^
With rack centered in the gear assembly (30), turn adjuster plug clockwise until it bottoms in the gear assembly, then back off 50° to 70°
(approx. one flat). Check rotational torque on pinion. Maximum pinion preload torque is 1.8 Nm (16 inch lbs.).
9. Adjuster plug lock nut (15) to adjuster plug. Tighten firmly against gear assembly while holding adjuster plug stationary.
^
Tighten lock nut (15) to 68 Nm (50 ft. lbs.) while holding adjuster plug stationary.
10. Rack and pinion assembly into vehicle.
Important: Flush power steering system (hoses, reservoir and cooler lines) with power steering fluid GM Part #1050017 (or equivalent meeting
GM Specification #9985010.)
Service Precautions
NOTICE: Always use the correct fastener in the proper location. When you replace a fastener, use ONLY the exact part number for the application.
The manufacturer will call out those fasteners that require a replacement after removal. The manufacturer will also call out the fasteners that require
thread lockers or thread sealant. UNLESS OTHERWISE SPECIFIED, do not use supplemental coatings (paints, greases, or other corrosion inhibitors)
on threaded fasteners or fastener joint interfaces. Generally, such coatings adversely affect the fastener tightening specification and the joint clamping
force, and may damage the fastener. When you install fasteners, use the correct tightening sequence and specifications. Following these instructions can
help you avoid damage to parts and systems.
