
Cutlass Ciera V6-3300 3.3L MFI VIN N (1993)
Brake Master Cylinder: Service and Repair
Master Cylinder Power Unit Assembly
Removal
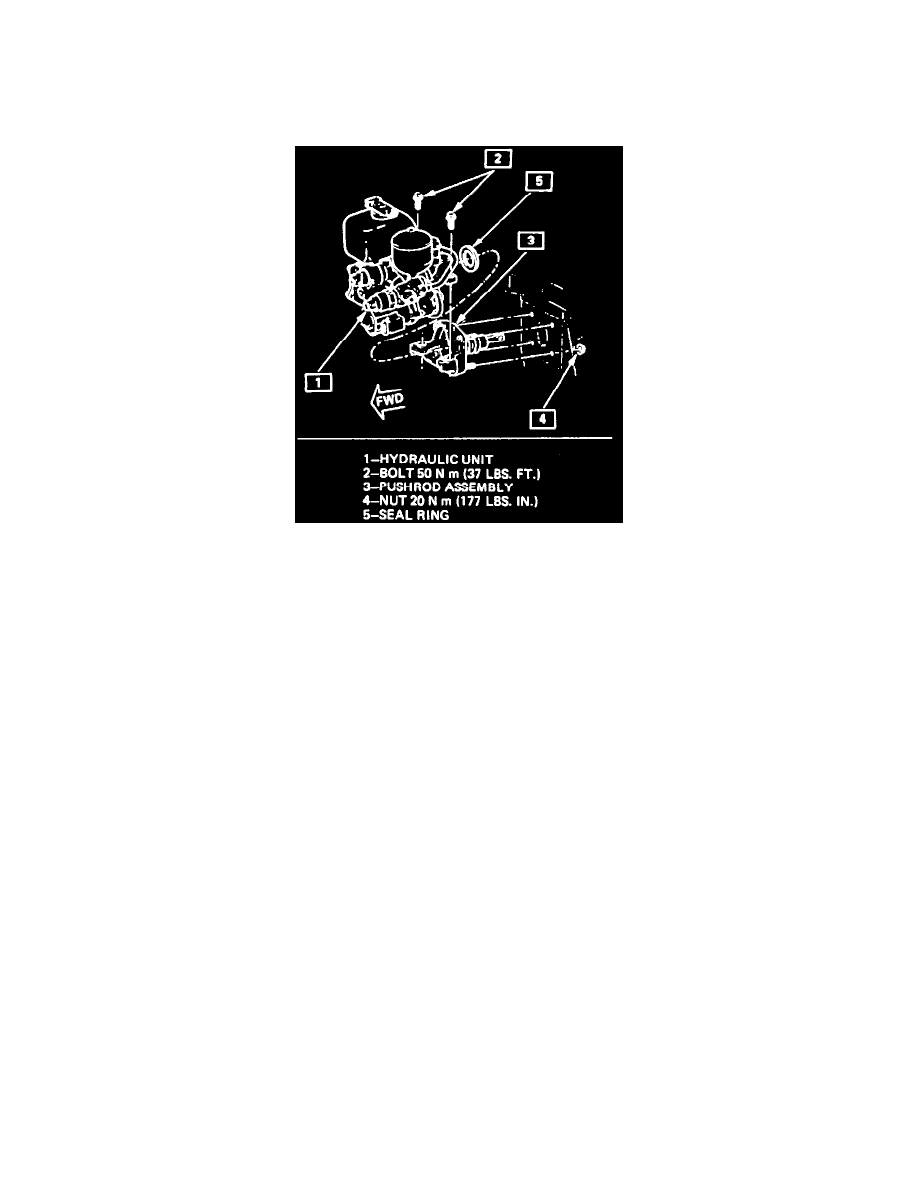
Hydraulic Unit To Cowl
WARNING: This brake system uses a hydraulic accumulator which, when fully charged, contains brake fluid at high pressure. Before
disconnecting any hydraulic lines, hoses or fittings, be sure that the accumulator is fully depressurized. Failure to depressurize the
hydraulic accumulator may result in personal injury.
DEPRESSURIZING HYDRAULIC ACCUMULATOR
With the ignition off, apply and release the service brake pedal firmly a minimum of 20 times. A noticeable change in pedal feel (from soft to
hard) will occur when the accumulator is completely discharged.
Do not turn ignition switch to the On or Start position after depressurizing until service operations have been completed.
REMOVAL
1. Remove negative battery cable.
2. Remove electrical connectors from the hydraulic unit.
3. Siphon brake fluid from fluid reservoir.
4. Remove wire clip from return hose fitting.
5. Remove return hose from pump.
^
Pull return hose fitting out of pump body.
6. Remove pressure hose bolt from pump.
7. Remove pressure hose and 0-rings from pump.
8. Remove pump mounting bolt.
9. Remove energy unit from hydraulic unit.
10. Remove four brake pipes from the valve block and hydraulic unit.
^
Use a backup wrench to prevent pipe twisting.
11. Remove pushrod from the brake pedal.
12. Remove rear half of the pushrod from the front half.
^
Remove push the dust boot forward, off the rear half of the pushrod.
^
Unthread the two halves of the pushrod.
13. Remove two hydraulic unit mounting bolts from the pushrod bracket.
14. Remove hydraulic unit from the pushrod bracket.
^
The front half of the pushrod will remain locked into the hydraulic unit.
Installation