
Cutlass Ciera Cruiser V6-3300 3.3L MFI VIN N (1993)
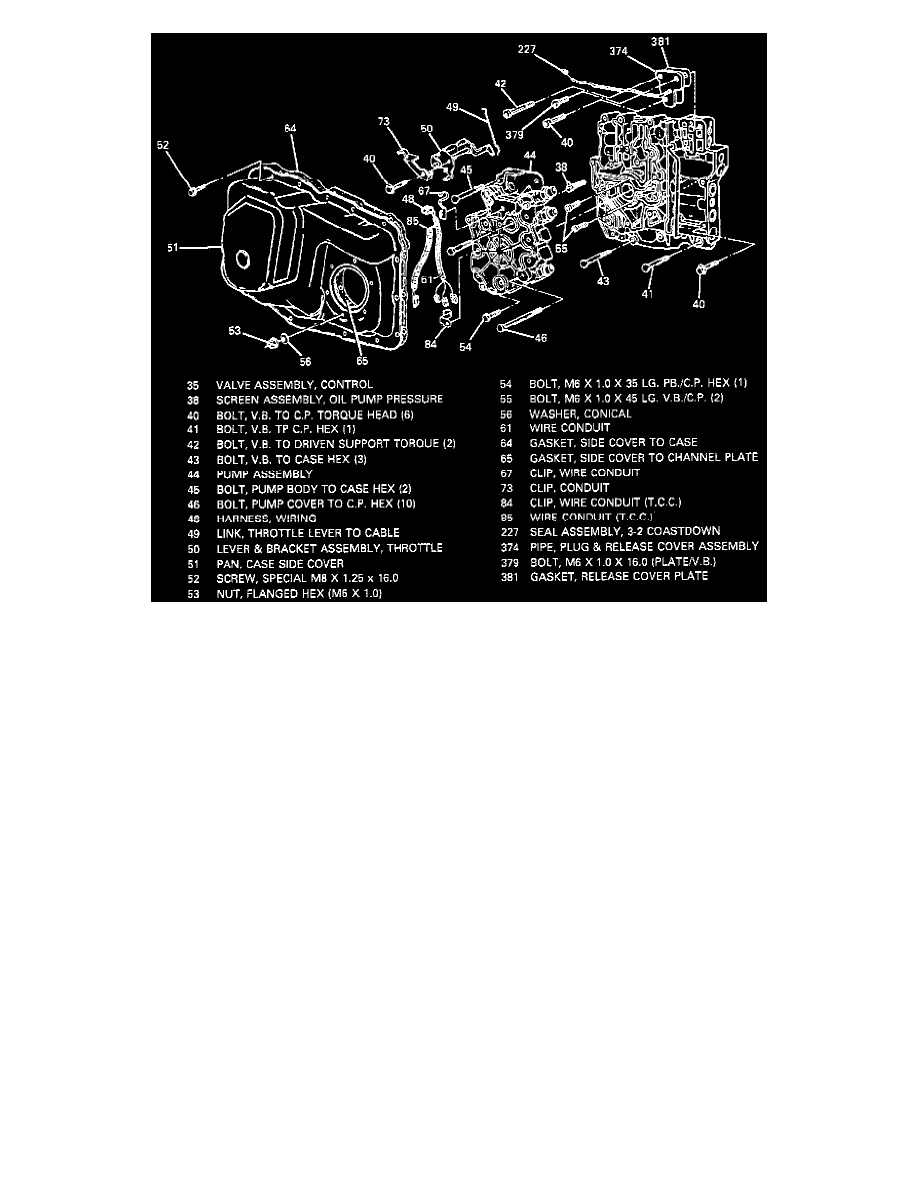
Case Side Cover Pump And Valve Body
TOOLS REQUIRED:
^
J 28467-A Engine Support Fixture
^
J 36462 Engine Support Adapter Leg
REMOVE OR DISCONNECT
1. Air cleaner assembly.
2. Negative battery cable.
3. Install J 28467-A, and J 36462.
4. Torque struts at engine mounts.
5. Two crossover pipe-to-left manifold bolts.
6. Loosen crossover pipe-to-right manifold clamp.
NOTICE: Do not pry on crossover pipe heat shield. If shield is bent, heat damage to other components may occur.
7. Two bolts at top of transaxle mount bracket. Pry crossover pipe to allow removal of front bolt.
8. Raise vehicle and suitably support.
9. Left front tire and wheel assembly.
10. Left front brake caliper and bracket and hang from vehicle.
IMPORTANT
^
DO NOT allow to hang from brake hose.
^
Install two lug nuts (flat side to rotor) to retain rotor.
11. Four bolts at hub and bearing assembly.
12. Left drive axle.
13. Left lower ball joint.
14. Left inner fender splash shield.
CAUTION: Failure to disconnect the intermediate shaft from the rack and pinion stub shaft can result in damage to the steering gear and/or