
Cutlass Ciera Cruiser V6-3300 3.3L MFI VIN N (1993)
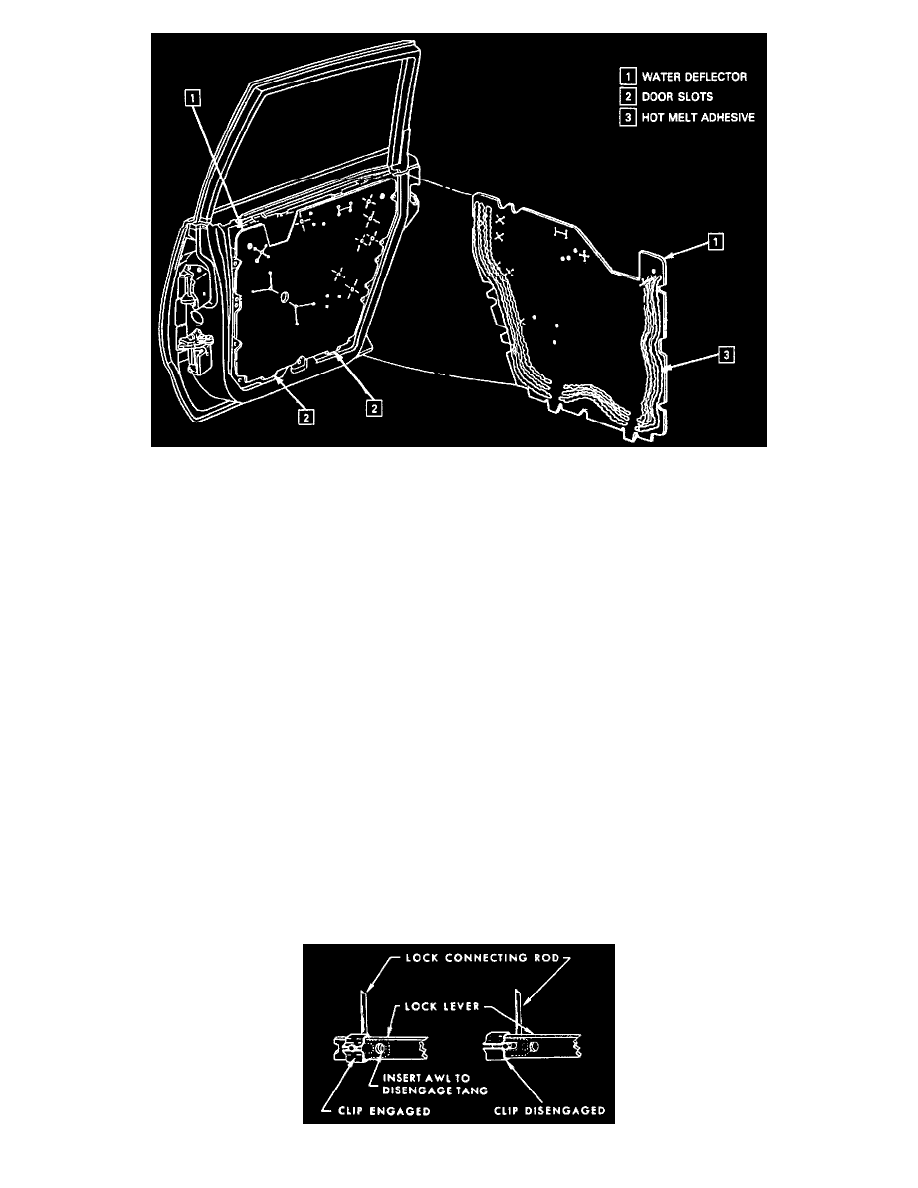
Rear Water Deflector
REMOVE OR DISCONNECT
1. Door trim panel.
2. Armrest hanger brackets and support.
3. Waterproof body tape securing top of water deflector to door inner panel.
4. Using a flat-bladed tool such as a putty knife, carefully break sealer body between water deflector and door inner panel. Make certain tool blade is
between inner panel and sealer.
5. Disengage water deflector from inner panel slots and remove primary and auxiliary water deflectors.
INSTALL OR CONNECT
^
Inspect water deflector and, where necessary, repair any tears or holes with waterproof body tape applied to both sides of deflector. If old sealer
does not provide a satisfactory seal, apply additional strip caulking to inner panel at unsealed areas. If a new deflector is to be installed, use old
deflector as a template.
1. Apply a 75 mm (3 inches) piece of tape to the upper outboard surface (with power windows) of the deflector or a 125 mm (5 inches) to the lower
surface (without power windows).
2. Apply hot melt adhesive or strip caulk to the inboard side of the deflector. Make sure adhesive bead is continuous and will guide water into drain
slots.
3. Position water deflectors to door inner panel and insert lower edge of deflector in retaining slots. Firmly roll or press edges of deflector to obtain a
good bond between deflector and door inner panel.
4. Apply 75 mm (3 inches) piece of tape to the upper middle edge of the deflector.
5. On inner panels armrest hanger brackets and support, seal attaching screw head and panel piercing with body caulking compound.
6. Door trim panel.
Connecting Rods and Locking Rods
CONNECTING RODS AND LOCKING RODS