
Delta 88 V6-3800 3.8L (1988)
Expansion Block/Orifice Tube: Service and Repair
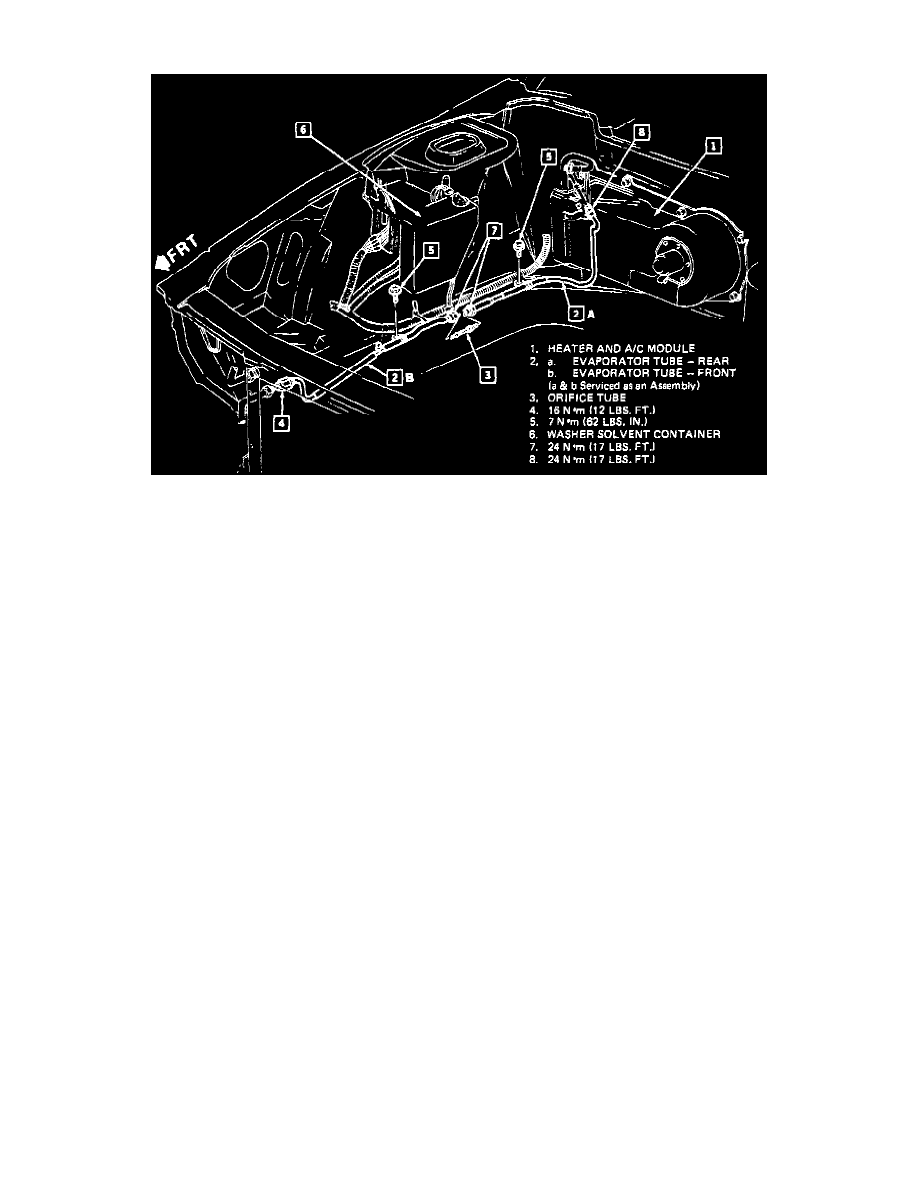
Orifice Tube Location
REMOVE OR DISCONNECT
Tool Required: J 26549-D Orifice Tube Remover
1. Discharge A/C system.
2. Right front sight shield. Refer to Engine Cover Replacement See: Engine, Cooling and Exhaust/Engine/Service and Repair.
3. Electrical connector and hose from washer solvent container.
4. Washer solvent container.
5. Front evaporator tube retaining clip.
6. Front evaporator tube from condenser outlet.
7. Front evaporator tube from rear evaporator tube and remove front evaporator tube and discard "O" ring seal.
8. Orifice tube using needle nose pliers or tool J 26549-D orifice tube remover.
INSTALL OR CONNECT
1. New orifice tube, with short screen towards evaporator.
2. Assemble hand tight in order:
a. Front evaporator tube to condenser outlet using a new "O" ring seal.
b. Front evaporator tube to rear evaporator tube.
c. Front evaporator tube retaining clip and fastener.
3. Torque in order:
a. Front to rear evaporator tube fitting 24 Nm (17 lbs. ft.).
b. Front evaporator tube to condenser outlet 17 Nm (13 lbs. ft.).
c. Retaining clip fastener 7 Nm (62 lbs. in.).
4. Washer solvent container, torque fasteners 6 Nm (53 lbs. in.).
5. Electrical connector and hose to washer solvent container.
6. Right front sight shield. Refer to Engine Cover Replacement See: Engine, Cooling and Exhaust/Engine/Service and Repair.
7. Evacuate charge and leak test.