
Silhouette V6-191 3.1L VIN D TBI (1995)
Compressor/Pump: Service and Repair
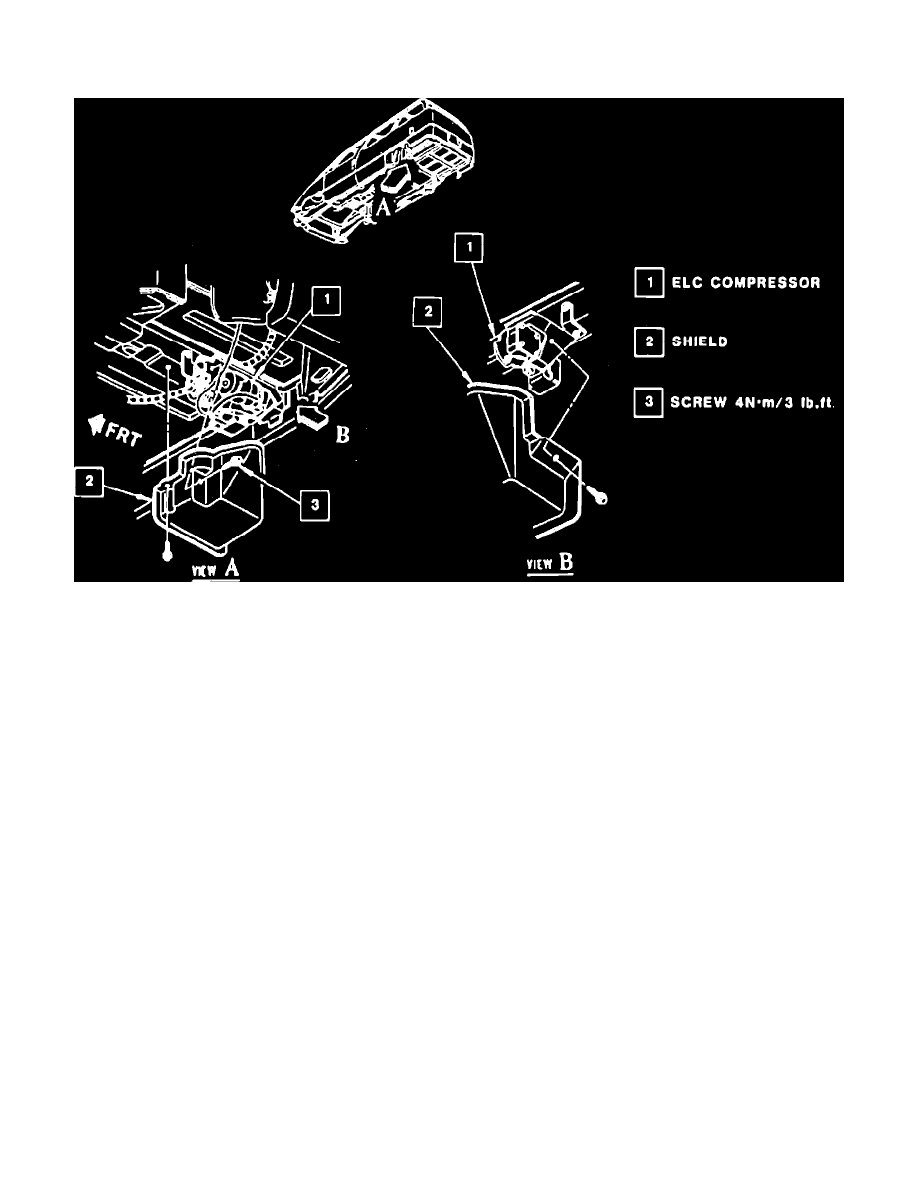
Shield, Compressor & Bracket
Fig. 1 ELC Compressor Location & Mounting
CAUTION: When repair or adjustment procedures require that vehicle be raised on a hoist, it is important that the rear axle assembly remains in
the normal trim height position at all times. When a frame contact hoist is used, two additional jack stands should be used to support the rear axle
or control arms in the normal trim height position.
1. Disconnect battery ground cable.
2. Raise and support vehicle.
3. Remove compressor shield then deflate system.
4. Disconnect high pressure line at air dryer by revolving spring clip 90° while holding connector end and removing tube assembly.
5. Disconnect electrical connector from compressor pigtail harness.
6. Remove three compressor mounting screws, then the compressor.
7. Remove three compressor mounting bracket screws, then the bracket.
8. If replacing compressor assembly, remove dryer and dryer bracket.
9. Reverse procedure to install, noting the following:
a. Torque dryer bracket attaching screws to 20 inch lbs.
b. Torque mounting bracket attaching screws to 35 inch lbs.
c. Torque compressor mounting screws to 35 inch lbs.
d. After connecting battery ground cable, cycle ignition switch, then test system operation, looking for air leaks at dryer.