
Silhouette FWD V6-3.4L VIN E (2004)
1. Install the push-in retainer to the overhead console post to keep the 2 halves of the overhead console together (single storage).
2. Press the overhead console into the headliner.
3. Install the locking nuts to the locating posts.
Notice: Refer to Fastener Notice in Cautions and Notices.
4. Install the screw to the rear of the overhead console.
Tighten the screw to 2 N.m (18 lb in).
5. Install the headliner. Refer to Headliner Replacement (See: Headliner/Service and Repair/Headliner Replacement) .
6. Connect the electrical connectors to the interior lamp/multifunction switch.
7. Align the retaining tabs on the interior lamp/multifunction switch/reading lamp housing with the overhead console.
8. Press up on the interior lamp/multifunction switch/reading lamp housing in order to press the housing into the overhead console.
Key and Lock Cylinder Coding
KEY AND LOCK CYLINDER CODING
KEY IDENTIFICATION AND USAGE
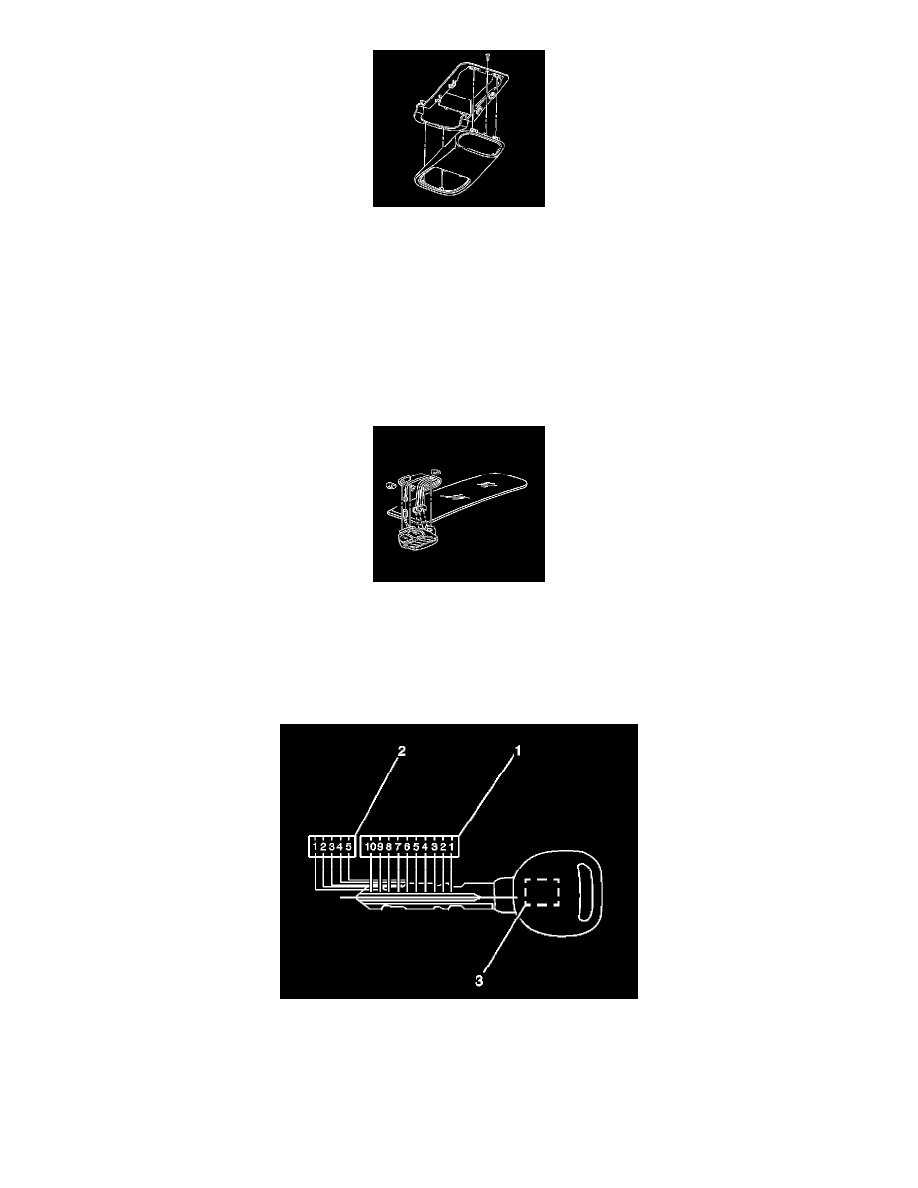
The keys are double sided and reversible. The master key and valet key contain transponders that are read by the theft deterrent system when the keys are
used in the ignition. The keys have 10 cut positions (1) with five different depths (2). The keys that may be furnished with the vehicle consist of the
following:
-
The master key, which contains a transponder (3). This key will operate all of the locks on the vehicle.
-
The valet key, which contains a transponder (3). This key will operate the front door locks and the ignition lock only.
-
The emergency key, which does not contain a transponder. This key will operate the door locks, rear compartment lock and the I/P storage
compartment lock only. This key is intended for emergency use only.