
Colt L4-1597cc 1.6L VIN 3 2-BBL (1983)
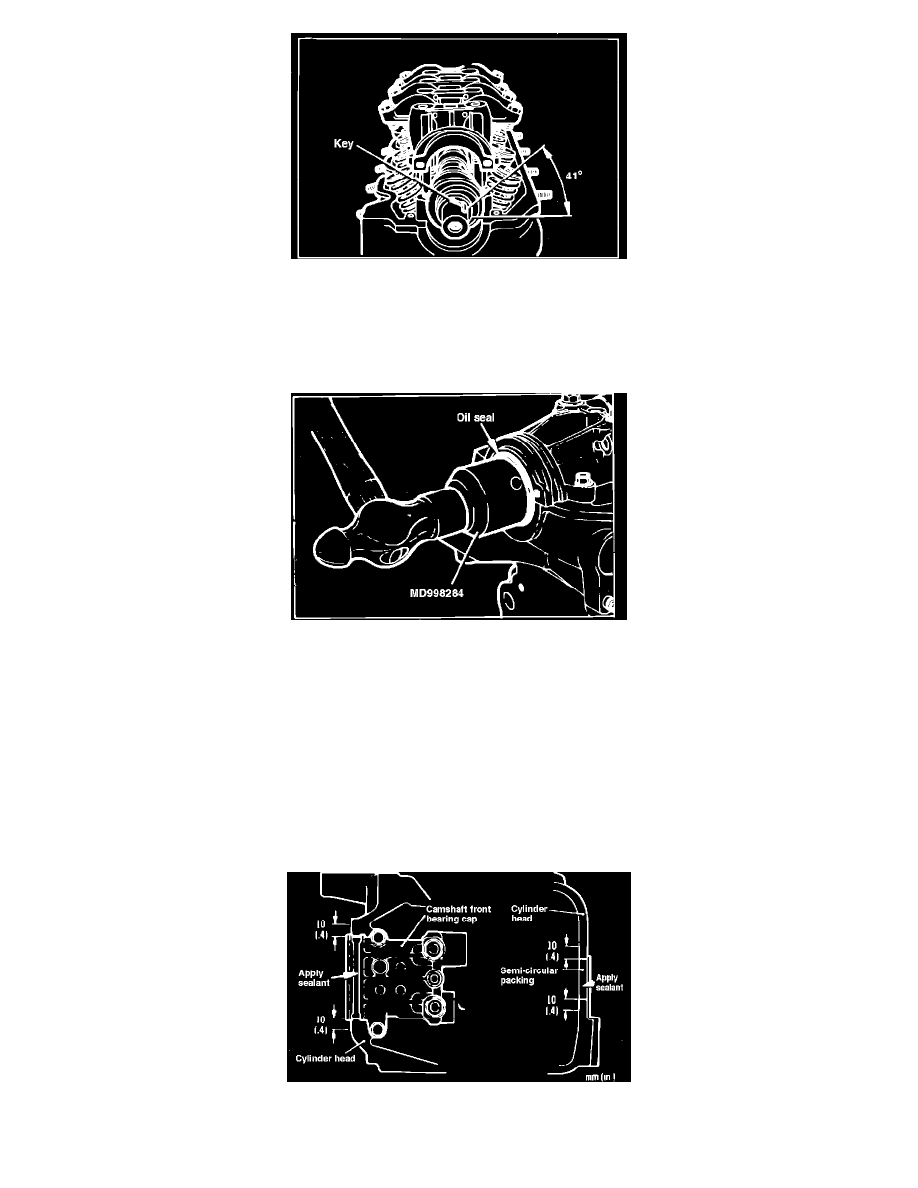
Fig. 18 Camshaft installation. 1600cc engine
6. Position camshaft so that camshaft key is 41° from cylinder head rocker arm cover mounting surface, as viewed from front of engine, Fig. 18.
7. On all models, position rocker arm assemblies on cylinder head, then install camshaft bearing cap attaching bolts. Torque camshaft bearing cap
bolts to 7 ft. lbs., starting at the center bearing cap and working outward and alternating from side to side. Torque bolts to a final toque of 14-15 ft.
lbs. in the same sequence.
Fig. 19 Camshaft front oil seal installation. 1600cc engine
8. Lubricate camshaft front oil seal lips with engine oil, then install seal into camshaft front bearing bore using tool MD998284 or equivalent, Fig.
19. Tap seal into bore until tool contacts distributor drive gear.
9. Install upper timing belt under cover, then lubricate camshaft spacer with engine oil and install spacer on camshaft.
10. Pull camshaft sprocket upward and install on camshaft. If dowel hole on camshaft sprocket cannot be aligned with dowel on camshaft spacer, use a
screwdriver at the two projections located to the rear of the No. 2 exhaust cam lobe to rotate the camshaft slightly to align dowel and dowel hole.
11. Install camshaft sprocket bolt and torque to 44-57 ft. lbs. on 1984-85 models or 59-72 ft. lbs. on 1986-88 models. Check to ensure that
crankshaft pulley, camshaft sprocket and timing belt to camshaft sprocket marks are aligned.
12. Set valves to cold clearance of .003 inch for intake and jet valves and .007 inch for exhaust valves. Refer to ``Valves, Adjust.''
13. Temporarily install rocker arm cover.
14. Start engine and allow to reach operating temperature, then adjust valves to warm clearance, referring to ``Valves, Adjust'' and Valve
Specifications Chart.
Fig. 20 Applying sealer for rocker cover installation. 1600cc engine
15. Remove rocker arm cover and apply sealer at locations indicated in Fig. 20.