
Grand Fury/Salon V8-318 5.2L VIN S 4-BBL (1984)
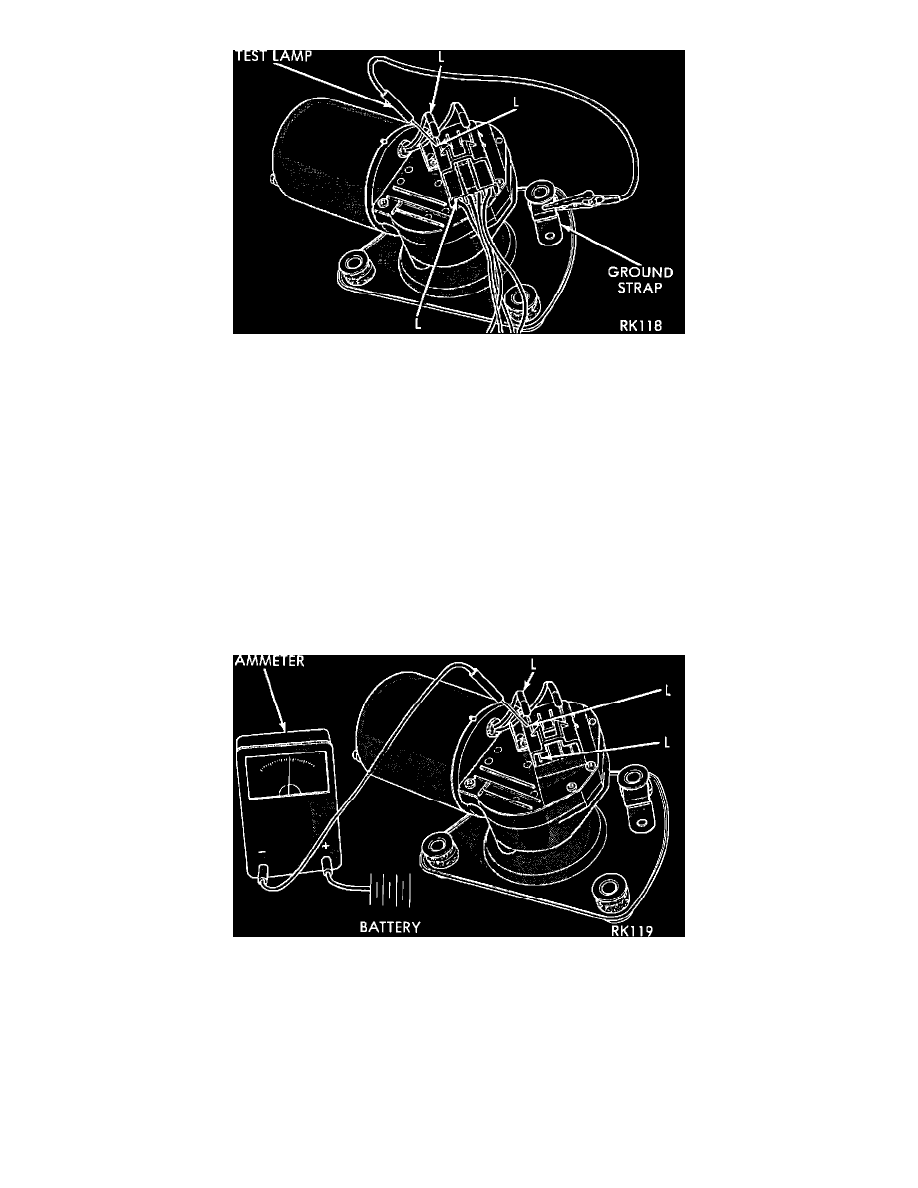
FIGURE 4 - TEST LAMP BETWEEN TERMINAL "L" & GROUND
4.
Connect a voltmeter or a test lamp between motor terminal "L" and ground strap (Figures 3 and 4). If there is no voltage, check wiring and switch.
If there is approximately 12 volts at terminal "L" or test lamp lights, problem is:
a.
An open ground circuit. Make sure the motor mounting is free of paint and nuts are tight.
b.
A faulty motor assembly.
5.
Disconnect motor wiring connector and replace fuse.
a.
If fuse does not blow, motor is defective.
b.
If fuse blows, switch or wiring is at fault.
Condition
Motor runs slowly at all speeds.
FIGURE 5 - AMMETER BETWEEN TERMINAL "L" & BATTERY
Procedure
1.
Disconnect wiring harness connector at motor. Remove wiper arms and blades. Connect an ammeter between, battery and terminal "L" on motor
(Figure 5).
2.
If motor runs and average ammeter reading is more than 6 amps, check to see if wiper linkage or pivots are binding or caught. Disconnect drive
link from motor. If motor now runs and draws less than 3 amps, repair linkage system.
3.
If motor continues to draw more than 3 amps, replace motor assembly.