
Prowler V6-3.5L VIN G (1999)
Intake Manifold: Service and Repair
Lower Manifold Replacement
WARNING: RELEASE FUEL SYSTEM PRESSURE BEFORE SERVICING SYSTEM COMPONENTS. SERVICE VEHICLES IN WELL
VENTILATED AREAS AND AVOID IGNITION SOURCES. NEVER SMOKE WHILE SERVICING THE VEHICLE.
Removal
1. Perform fuel pressure release procedures.
2. Drain cooling system.
3. Remove upper intake manifold.
4. Disconnect electrical connectors to fuel injectors and coolant temperature sensor.
5. Disconnect heater hose from heater tube at rear of manifold.
6. Disconnect fuel supply hose from fuel rail.
7. Remove bolts attaching fuel rail.
8. Remove fuel rail and injectors as an assembly.
9. Remove bolts attaching lower intake and remove intake manifold.
Installation
1. Clean all sealing surfaces.
NOTE: Gaskets can be reused provided they are free of tears, cuts, or deformation.
2. Inspect gaskets for tears, cuts, or deformation. Replace as necessary.
3. Position gasket and intake manifold on cylinder head surfaces.
4. Install fuel rail with injectors.
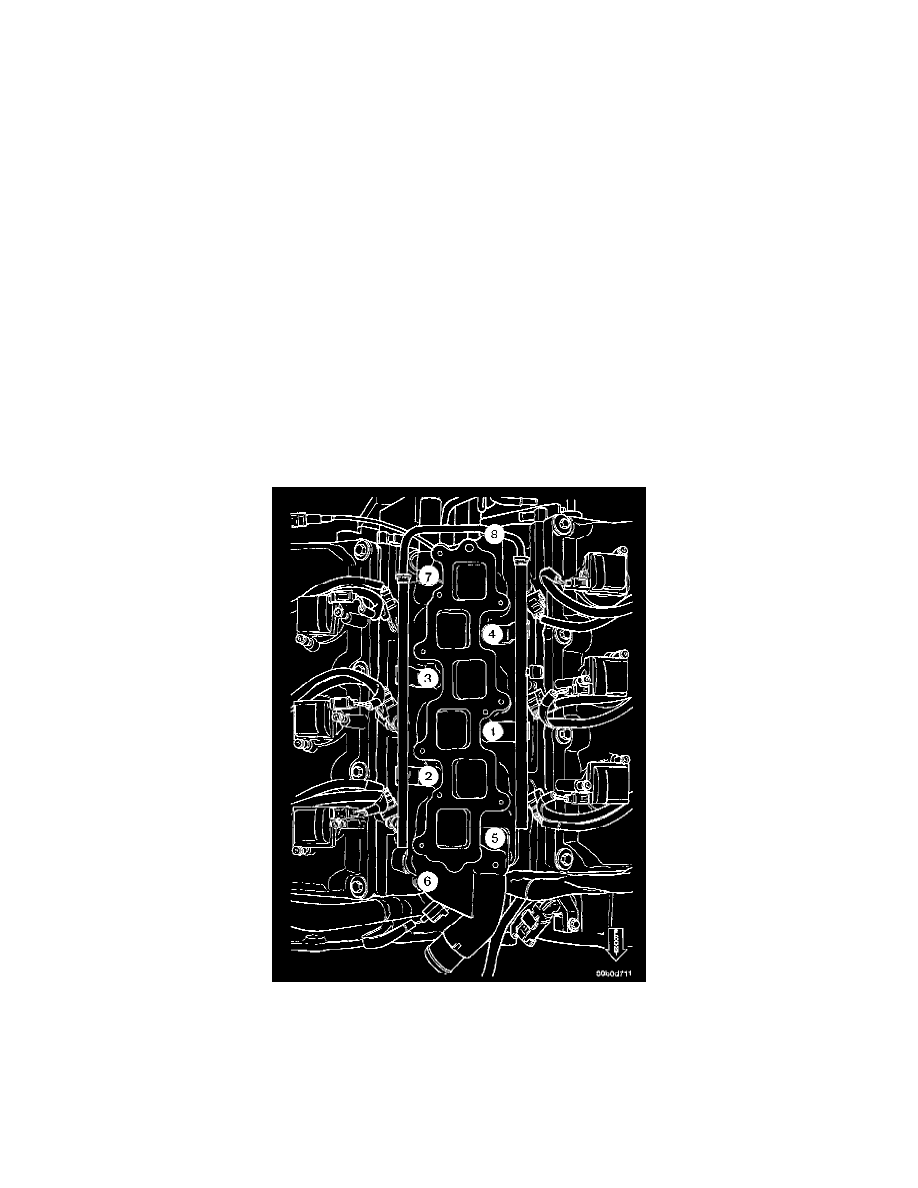
Lower Intake Manifold Tightening Sequence
5. Install intake manifold bolts, and gradually tighten in sequence until a torque of 28 Nm (250 inch lbs.) is obtained.
6. Connect fuel supply hose to fuel rail.
7. Connect heater hose to heater tube at rear of manifold.
8. Connect electrical connectors to fuel injectors and coolant temperature sensor.
9. Install upper intake manifold.
10. Fill cooing system.
11. With the DRB scan tool use ASD Fuel System Test to pressurize system to check for leaks.