
Prowler V6-3.5L VIN G (1999)
Timing Belt: Service and Repair
Timing Belt Removal and Installation
Removal
CAUTION: The following procedure can only be used when the camshaft sprockets HAVE NOT BEEN LOOSENED or removed from the
camshafts. If sprocket(s) or camshaft(s) have been loosened or removed, perform Camshaft Sprocket and Engine Timing procedures.
CAUTION: This is NOT a freewheeling engine. Therefore, care should be taken not to rotate the camshafts or crankshaft with the timing belt
removed.
1. Disconnect negative cable from battery.
2. Remove upper radiator crossmember.
3. Disconnect fan module electrical connector.
4. Remove fan module.
5. Remove accessory drive and air conditioning drive belts.
6. Remove crankshaft damper and front timing belt covers.
7. Mark belt running direction, if timing belt is to be reused.
CAUTION: When aligning timing marks, always rotate engine by turning the crankshaft. Failure to do so will result in valve and/or piston
damage.
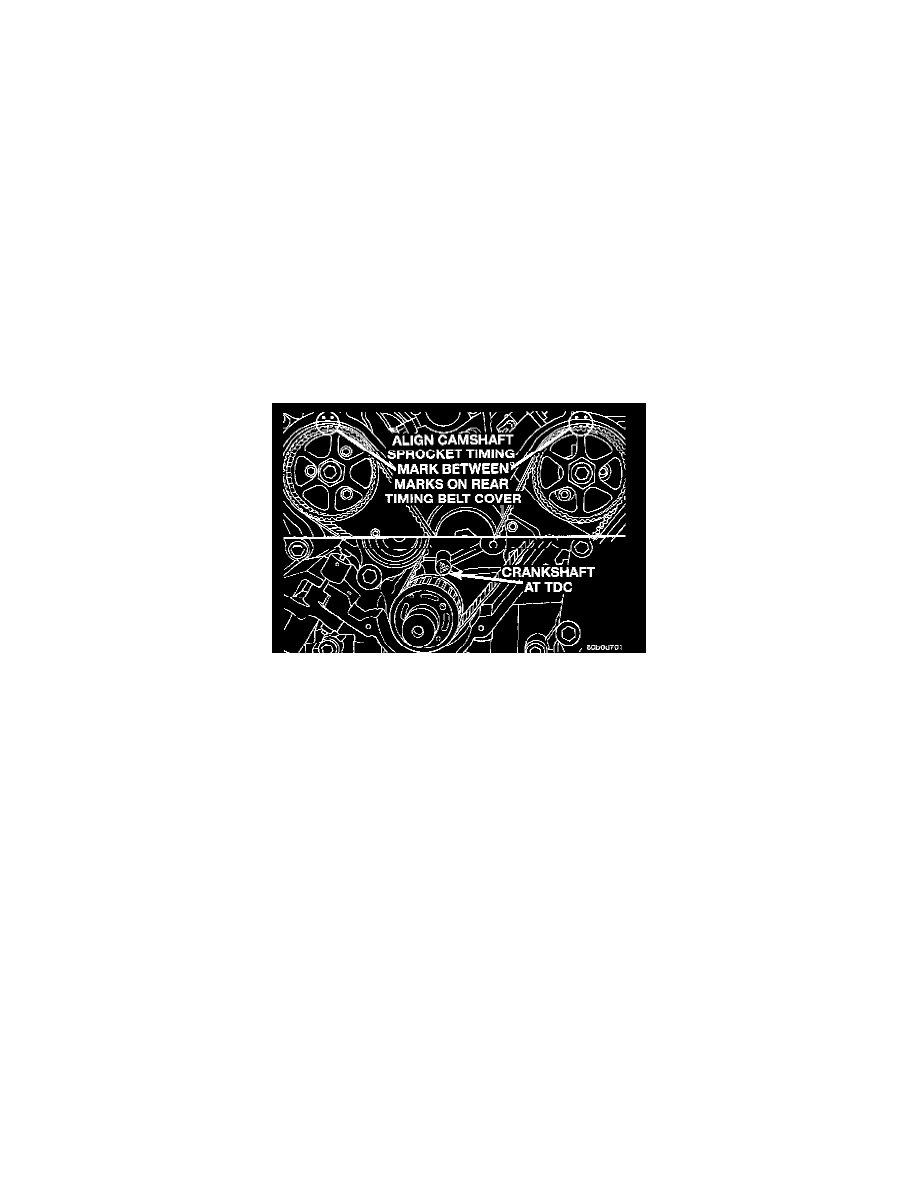
Engine Timing Mark Alignment
8. Rotate engine clockwise until crankshaft mark aligns with the TDC mark on oil pump housing and the camshaft sprocket timing marks are between
the marks on the rear covers.
CAUTION: Align the camshaft sprockets between the marks on rear belt covers before timing belt removal or damage to valve and/or pistons
could occur.
9. Using a ink or paint marker; mark the exact position of the camshaft sprocket timing mark relative to the two timing marks on the rear timing
cover.
NOTE: When timing belt tensioner is removed from engine, always store in the vertical (plunger facing upward) position.