
Prowler V6-3.5L VIN G (1999)
Fluid Pan: Service and Repair
This procedure involves removing the transaxle oil pan to drain the transaxle fluid.
1. Bring the vehicle up to normal operating temperature. Drive the vehicle a minimum of 10 miles.
2. Raise the vehicle on the hoist.
3. Loosen the transaxle oil pan and drain the fluid into a suitable container.
4. Remove the pan and clean all sealant from the pan and transaxle mating surfaces. Clean the magnet and the inside of the pan.
5. Apply a 1/8 inch bead of MOPAR RTV Sealant to the mounting flange of the transaxle oil pan. Apply RTV Sealant to the underside of the
attaching bolts. Attach the oil pan to the transaxle. Tighten the bolts to 19 Nm (165 inch lbs.).
6. Lower the vehicle and add 4 Quarts of MOPAR ATF+4 Type 9602 transaxle fluid.
7. Start the engine and allow it to idle for a minimum of one minute. With the parking brake applied, press your foot on the service brake and cycle
the transaxle from park to all gear positions ending in neutral or park.
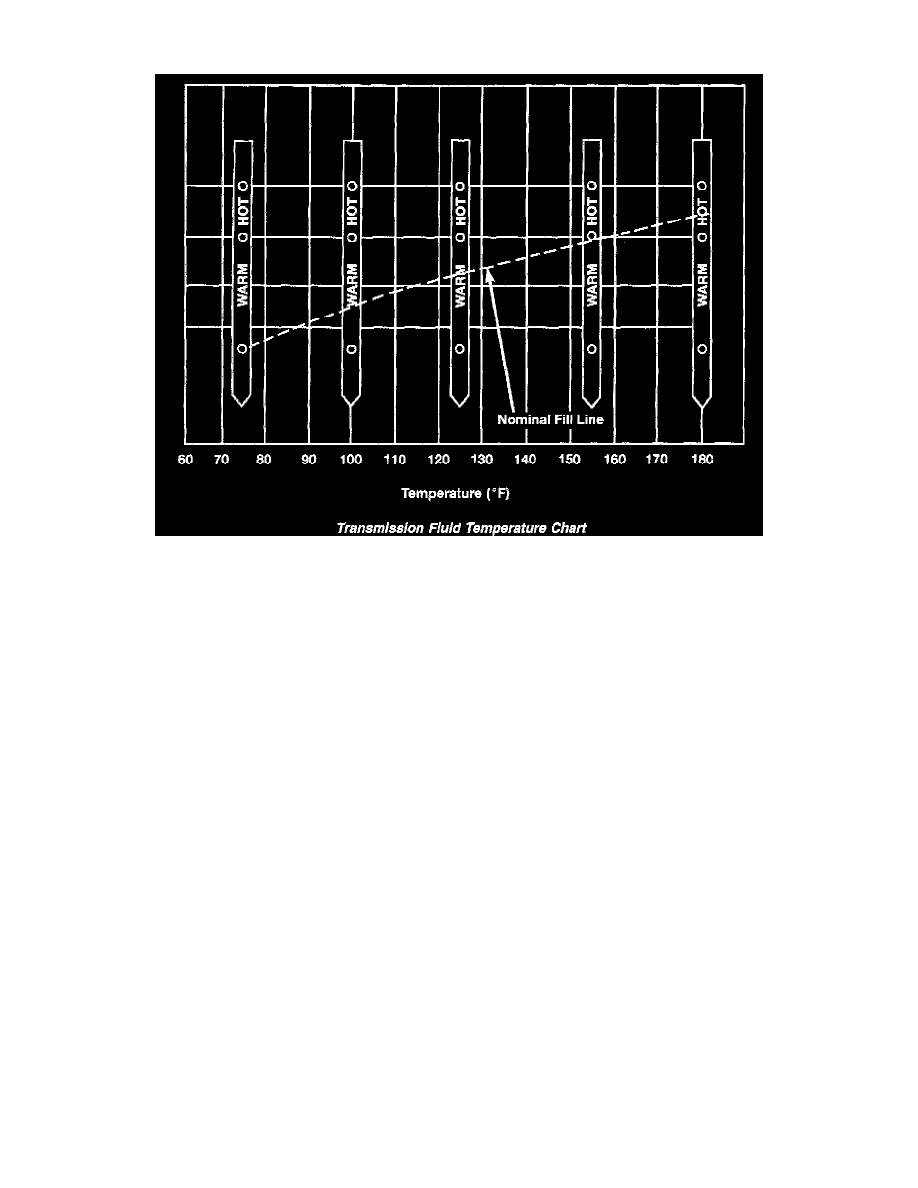
8. Check the transaxle fluid level and add an appropriate amount to bring the transaxle fluid level to 3mm (1/8 inch) below the ADD mark on the
dipstick.
9. Recheck the fluid level after the transaxle is at normal operating temperature. The level should be in the HOT range. Drive the vehicle a minimum
of 10 miles.
10. Raise the vehicle on the hoist.
11. Check for leaks around the transaxle oil pan sealing surfaces.
12. Recheck the fluid level. The level should be in the HOT range.