
Reliant L4-156 2.6L SOHC (1984)
Front Door Window Motor: Service and Repair
REMOVAL
Conventional Regulator
Power Window Regulator Mounting
1.
Raise the window to the "full up" position and place a block under the window glass to securely hold it in this position.[1]
2.
Disconnect the wiring harness from the power window motor.
3.
Remove the screw that secures the motor tie down bracket to the inner door panel (if applicable).
4.
Remove the three mounting screws that attach the window motor to the regulator. There are holes provided in the inner door panel to access the
mounting screws.
5.
Remove the window motor from the regulator by pulling it away from the regulator with a slight rocking or twisting motion.
6.
Remove the power window motor from the door.
Remarks
[1] Extreme caution should be used when working with any regulator that has a counterbalance spring. If the window is not secured in the "full up"
position, removal of the power window motor will allow the counterbalance spring to move the sector gear very quickly. This could result in either
personal injury or damage to the vehicle.
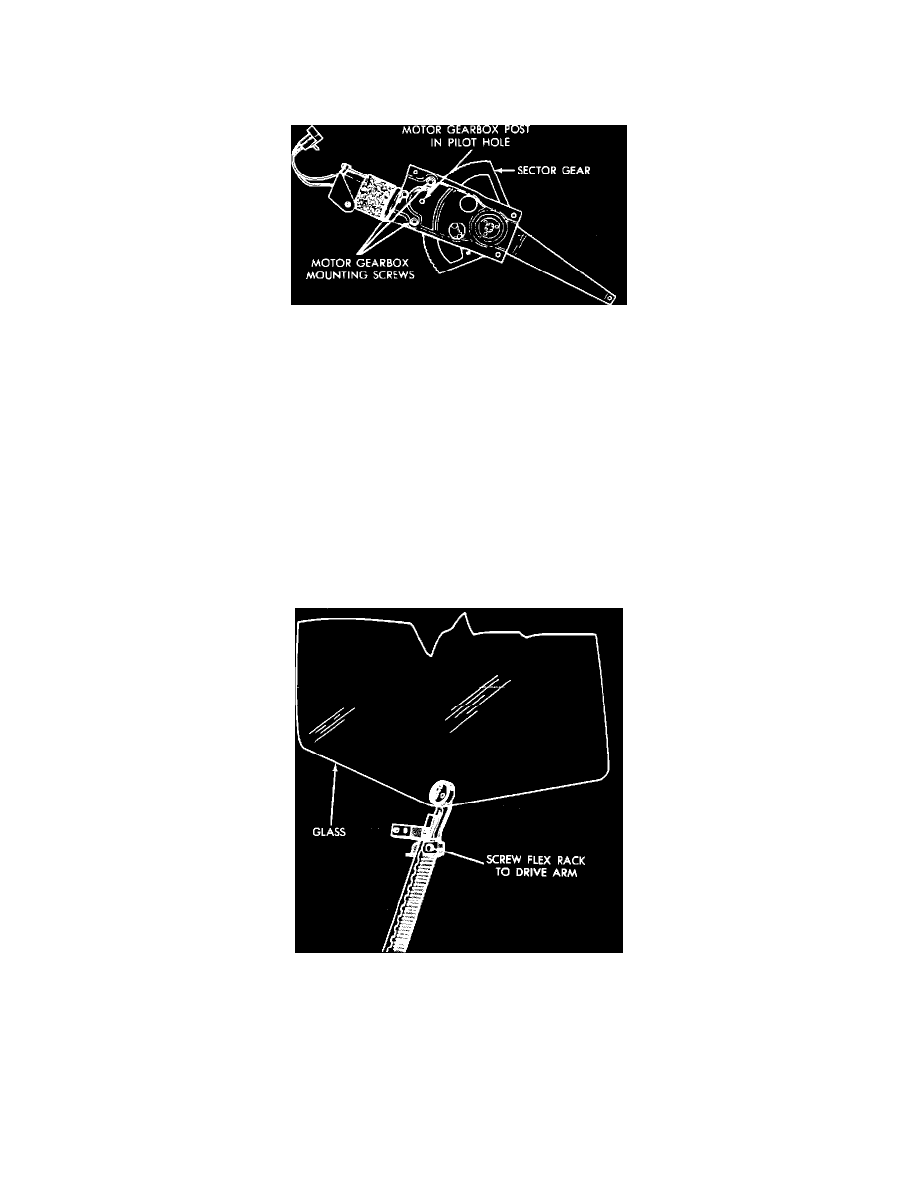
Flex Drive Regulator
Power Window Regulator Flex Track To Drive Arm
1.
Raise or the lower the window until the screw that attaches the flex track to the drive arm is in alignment with the access hole.
2.
Remove the flex track attaching screw from the drive arm.
3.
Manually move the window to the "full up" position and secure with a block under the window glass.