
Voyager V6-3.0L VIN 3 (1998)
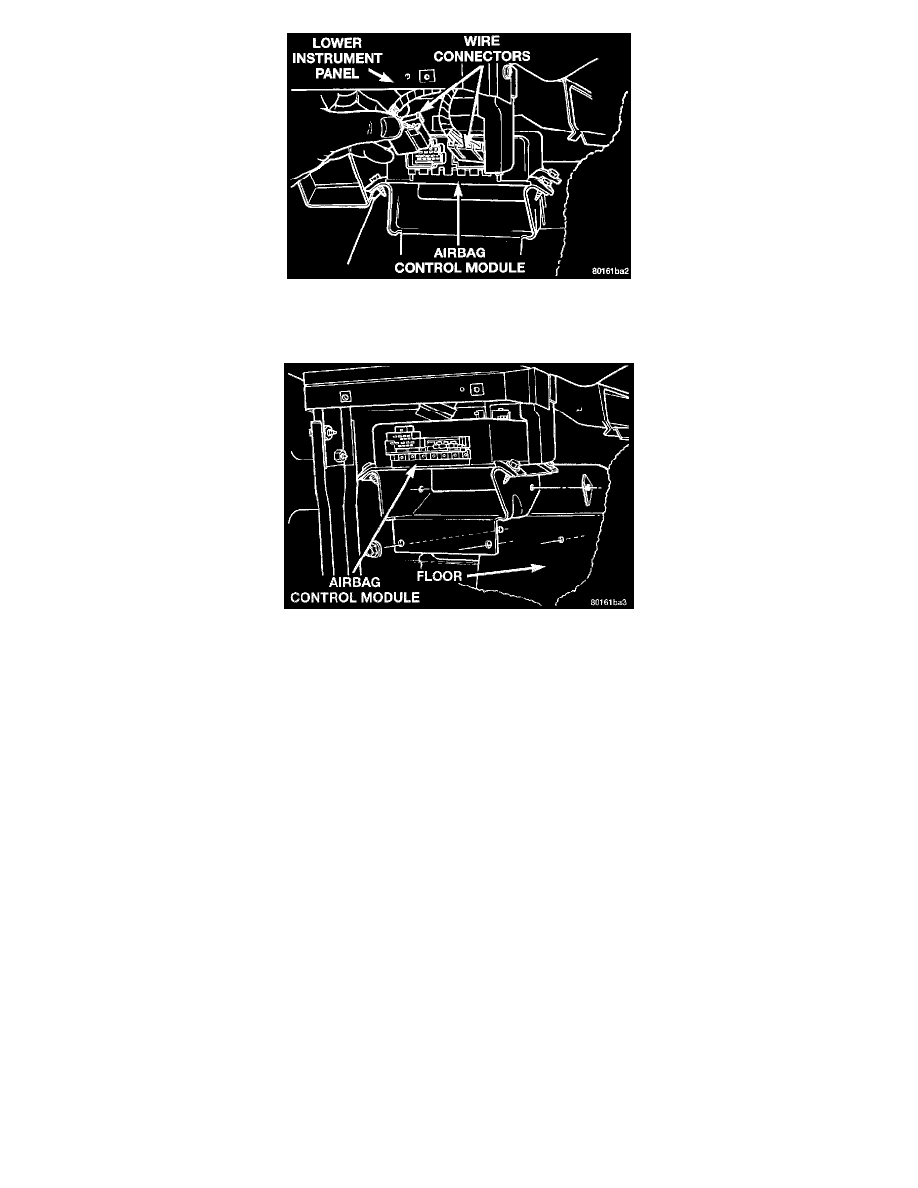
ACM Connectors
8. Disconnect two wire connectors from ACM.
9. Remove four bolts holding the ACM bracket assembly to floor.
10.
Remove the ACM from vehicle.
INSTALLATION
WARNING: DO NOT REMOVE THE BOLTS HOLDING THE ACM TO THE ACM BRACKET THESE BOLTS ARE SAFETY
TORQUED AT THE MANUFACTURING FACILITY AND SHOULD NOT BE REMOVED FOR ANY REASON. THE NEW ACM WILL
COME WITH A NEW BRACKET INSTALLED.
CAUTION: USE CORRECT SCREWS WHEN INSTALLING THE ACM
For installation, reverse the above procedures. Attach the ACM bracket assembly to vehicle with the proper screws and tighten to 805 to 11.9 N.m (75
to 105 in. lbs.) torque. Do not connect battery negative cable. Refer to Diagnosis and Testing for Airbag System Test procedures.