
Bonneville V6-231 3.8L VIN 3 SFI (1988)
Control Module HVAC: Service and Repair
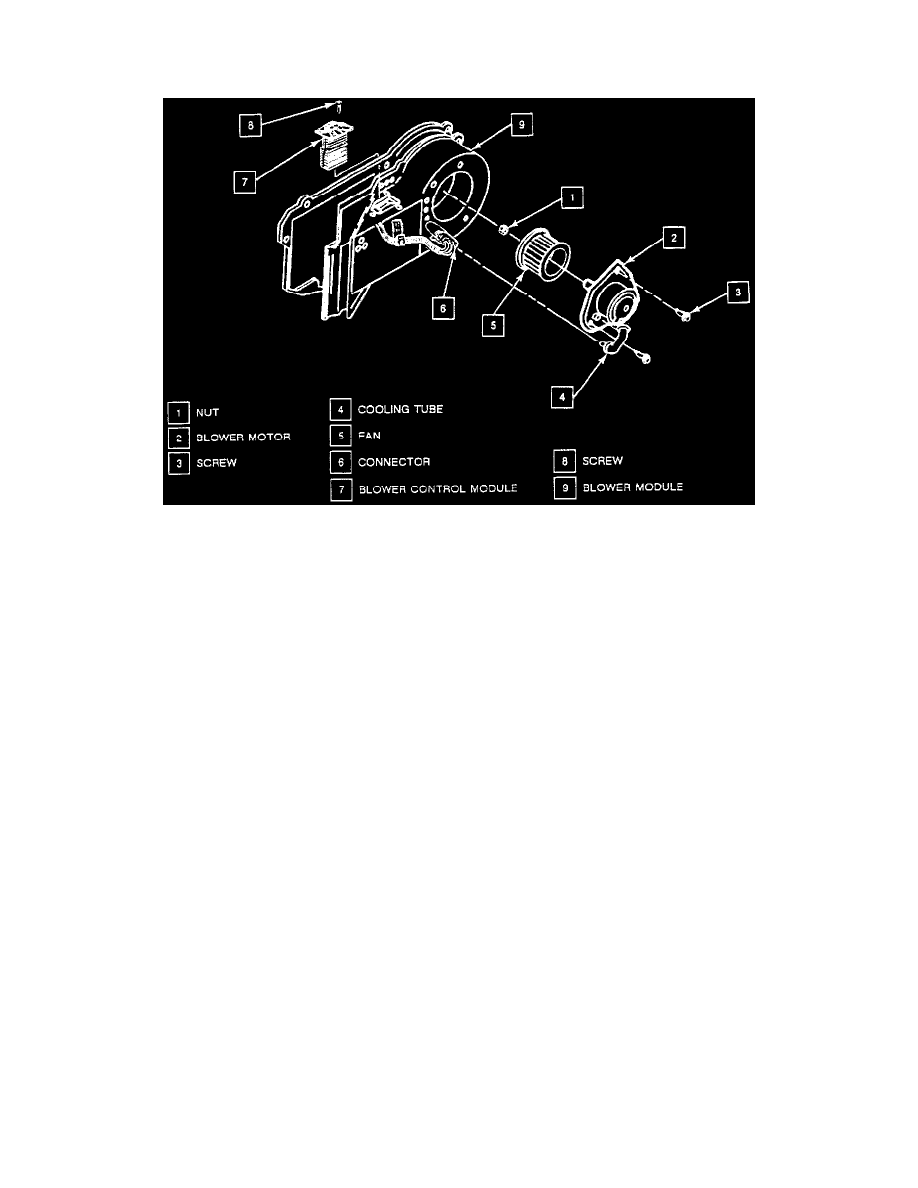
Blower Control Module
Blower Motor And Fan
REMOVE OR DISCONNECT
1. Negative battery cable.
2. Rear engine sight shield. Refer to Engine Cover Replacement See: Engine, Cooling and Exhaust/Engine/Service and Repair.
3. Center bolt and positive battery cable from multi-use relay and fuse bracket.
4. Underhood fuse blocks and relays from bracket and position aside.
5. Nuts attaching multi-use relay and fuse bracket to front of dash, and bracket from vehicle.
6. Connector Position Assurance (CPA) Pin and electrical connector from blower control module.
7. Screws attaching blower control module to blower module assembly.
8. Blower control module from vehicle.
INSTALL OR CONNECT
1. Screws attaching blower control module to blower module assembly after positioning in vehicle.
^
Tighten Screws to 1.4 Nm (12 lb. in.).
2. Electrical connector to blower control module and CPA.
3. Nuts attaching multi-use relay and fuse bracket to front of dash after positioning on vehicle.
^
Nuts to 3.8 Nm (34 lb. in.).
4. Position fuse blocks and relays to bracket and snap in.
5. Center bolt attaching positive battery cable to multi-use relay and fuse bracket after positioning cable.
^
Tighten Bolt to 10 Nm (89 lb. in.).