
Firebird V6-3.8L VIN K (1995)
Brake Master Cylinder
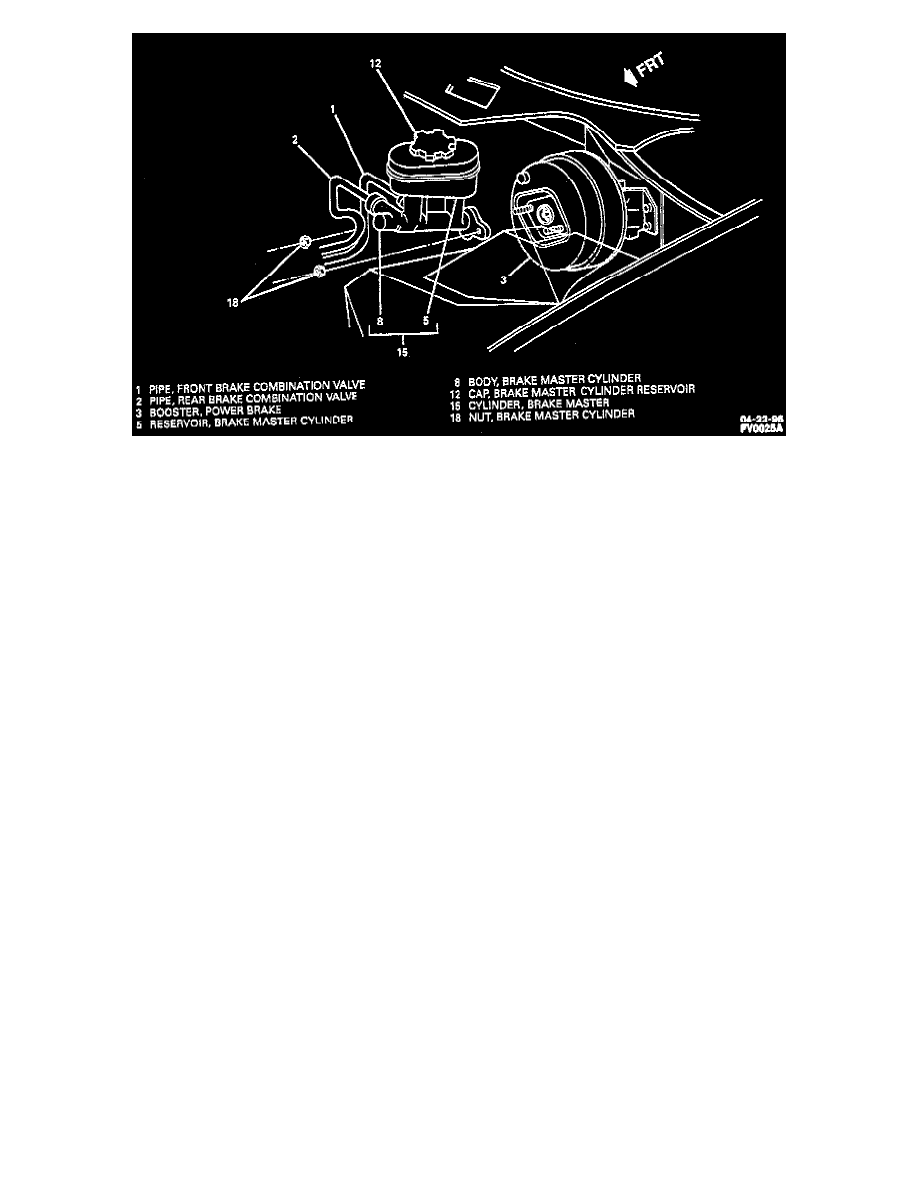
REMOVE OR DISCONNECT
1. Brake fluid from reservoir. Discard old fluid.
2. Brake combination valve pipes. Plug brake combination valve pipes to prevent fluid loss and contamination.
3. Master cylinder nuts.
4. Master cylinder.
INSTALL OR CONNECT
1. Bench bleed master cylinder.
2. Master cylinder.
3. Master cylinder nuts. Tighten brake master cylinder nuts to 29 Nm (21 ft. lbs.).
4. Fill master cylinder reservoir.
5. Brake combination valve pipes to master cylinder one at a time.
a. Remove locally fabricated plugs.
b. Install brake pipe fitting finger tight.
c. Have assistant depress brake pedal to remove air at loose brake pipe fittings. Tighten brake combination valve pipe fittings to 32 Nm (24 ft.
lbs.).
7. Have assistant quickly release and pump brake pedal several times.
8. If brake pedal remains high and firm, start vehicle. If brake pedal still feels firm, test drive vehicle. If brake pedal feels soft or spongy, bleed entire
brake hydraulic system.
Gear Tension Relief Sequence (with ABS)
When the displacement cylinder pistons are in their topmost position, each motor has prevailing torque due to the force necessary to ensure each piston is
held firmly at the top of its travel. This torque results in "gear tension," or force on each gear that makes motor pack separation difficult. To avoid injury,
or damage to the gears, the "Gear Tension Relief Sequence" briefly reverses each motor to eliminate the prevailing torque.
Always perform the "Gear Tension Relief Sequence" with the scan tool prior to removing the hydraulic modulator/master cylinder assembly from the
vehicle.
Master Cylinder Disassembly/Assembly