Firebird V8-305 5.0L (1982)

23.
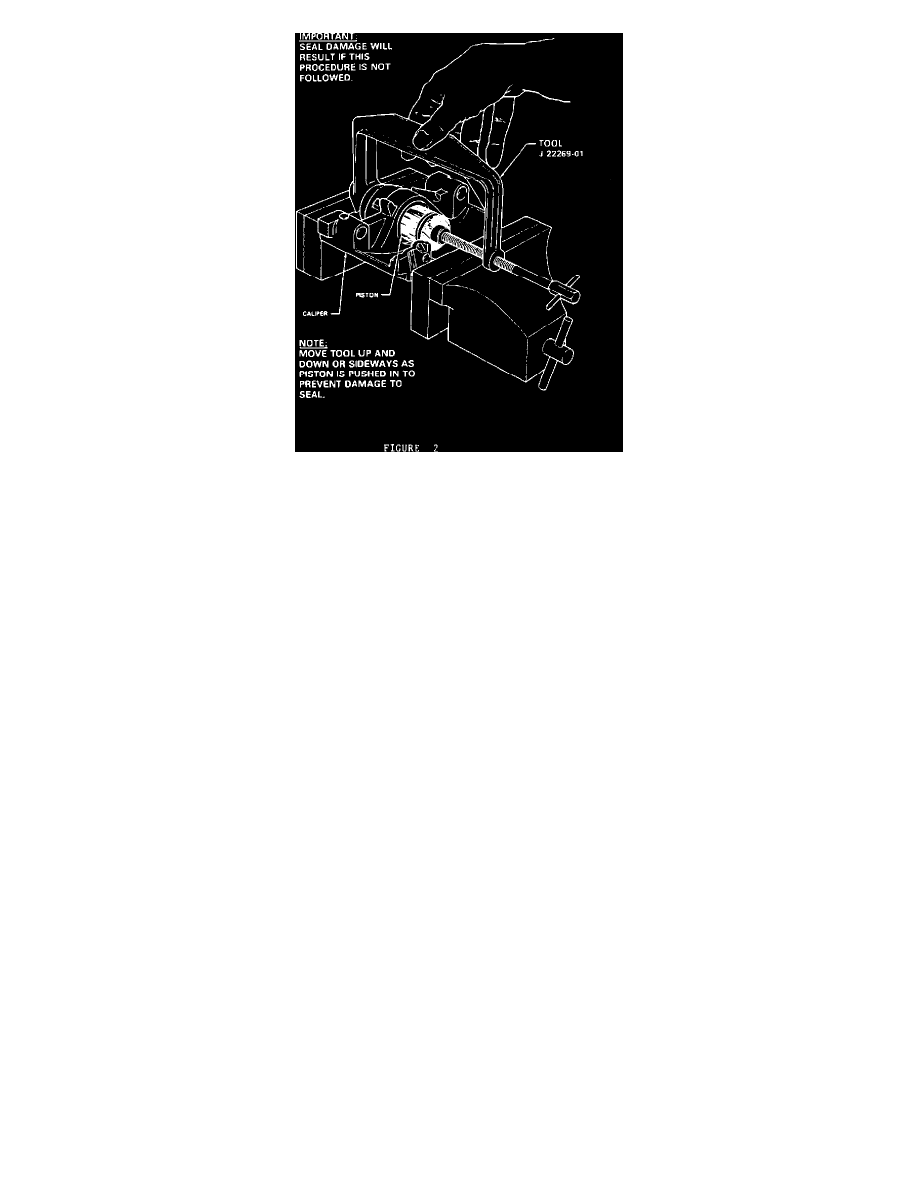
Use tool # J-22269-01 to install the piston through the piston seal. Shake the tool to align the piston to seal while gently turning the jack screw to
push piston through the seal to the bottom of the caliper bore (Figure 2).
24.
Install the lubricated anti-friction washer and lever seal over the end of actuator screw.
Note:
The sealing bead on the lever seal should be against the housing.
25.
Install the lever on actuator screw. Rotate lever away from stop slightly and hold while installing nut to 48 N-m (35 lbs.ft.). Then rotate lever back
to contact stop.
26.
Seat boot into caliper housing counter bore using tool # J-38898.
27.
Install new brake pad dampening spring in groove on end of piston
^
All Firebird models require a new spring, P/N 18019098.
^
1984 - 87 Fiero models require a new spring, P/N 18011729.
^
1983-88 6000 (STE) models use the same spring, P/N 18011729.
28.
Clean, lubricate, and reinstall sleeves, bushings, and caliper mounting bolts.
29.
Reinstall brake pads.
G.
Reinstall caliper(s), per shop manual.
H.
Install hydraulic fitting and bolt using 2 new brass washers, and torque to 33 N-m (24 lbs.ft.).
I.
Bleed brake system as required (power or manual) per shop manual.
J.
Apply approximately 778 N (175 lbs.) force 3 times to the brake pedal to seat the linings.
K.
Clinch outboard shoe to caliper, per shop manual.
L.
Readjust park brake cable, per shop manual.
M.
Reinstall wheel(s) and tire(s), per shop manual.
Parts List and Labor Operation
