
Firebird V8-305 5.0L (1982)
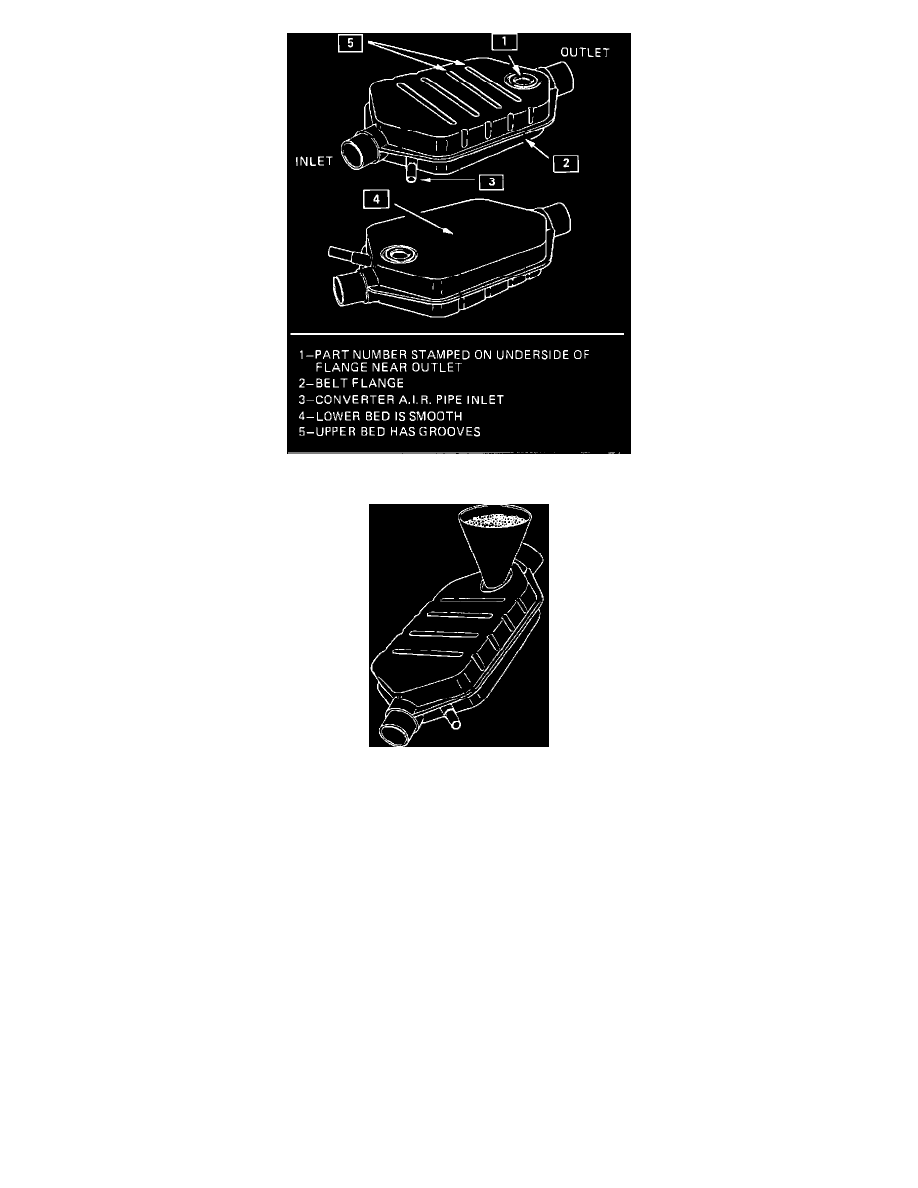
Figure 1
Figure 2
6.
Using a hammer and chisel, remove the upper bed fill hole plug (refer to Figure 1 for description of upper and lower beds) from the old converter
by driving chisel between the converter shell and rim of fill plug. Deform the fill plug until it can be removed with a pliers..
7.
Hold the converter over a clean pan (J-34155-2) and empty catalyst beads into the pan by shaking and tapping the converter belt flange (refer to
Figure 1) with rubber mallet.
NOTICE:
If the upper bed is empty or near empty (a cupful or less) of catalyst beads, the converter is considered to be damaged (internally) or
expanded and are not to be used in the new converter shells. Unusable beads and dust can be returned via the normal exchange
program.
8.
Pour upper bed beads into sifting pan (J-34155-1) to sift out any broken (smaller) beads into a clean box. Pour the sifted beads into the first pan
(J-34155-2) and set aside until later.
9.
Prop the new converter shell up to a 45~ angle with the upper bed fill hole at the top (refer to Figure 1). Tap funnel (J-34155-3) into the converter
upper bed fill hole with a rubber mallet (see Figure 2 below).
10.
Pour a packet of new upper bed beads (kit part number 25056590) into the upper bed of the new converter shell.