
Firebird V8-305 5.0L (1982)
Idler Arm: Service and Repair
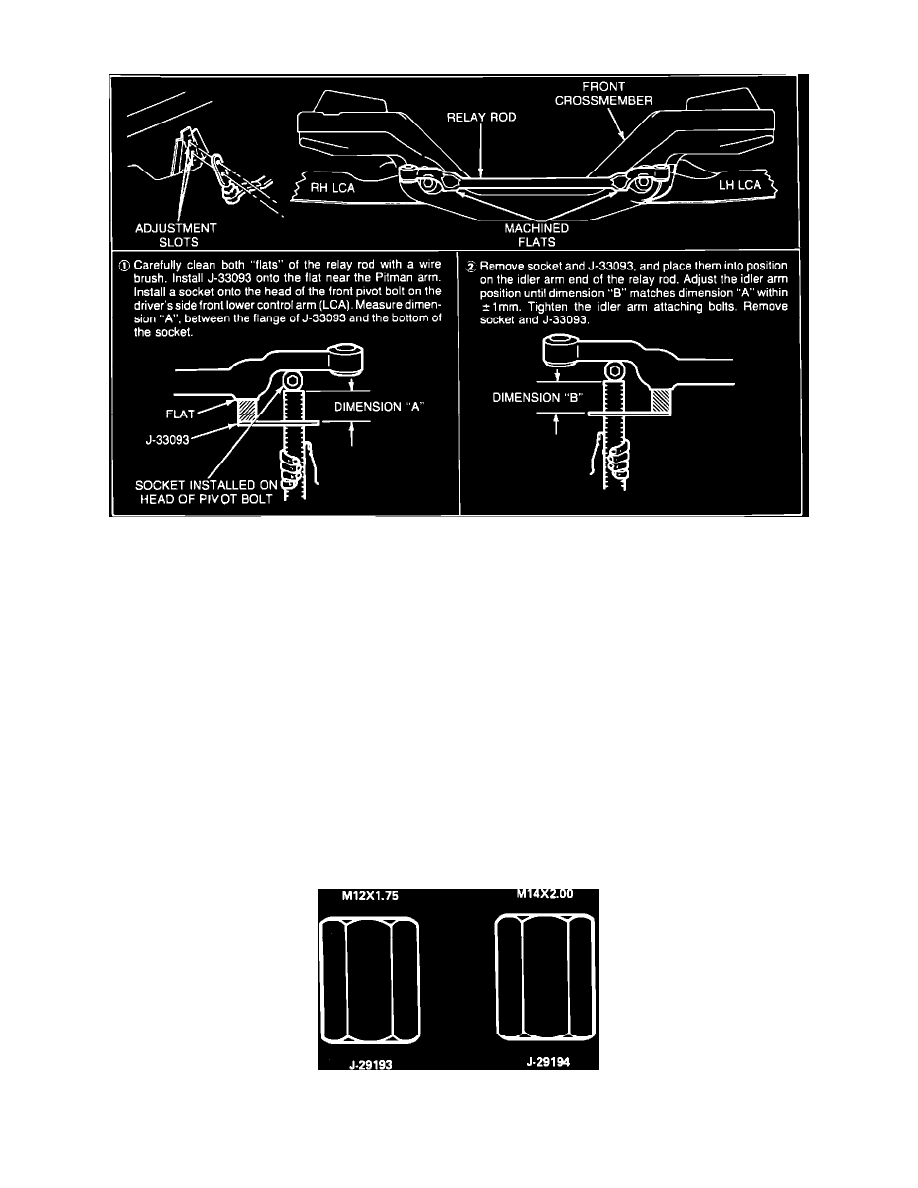
Setting Relay Rod Height
NOTE: During production, the installed position of the relay rod is carefully controlled to assure that the rod is at the proper height. Both the left end
and the right end of the relay rod MUST be held at the same height. The side-to-side height is controlled by adjusting the position of the idler
arm. Whenever disconnecting the relay rod assembly, it is important to first scribe the position of the idle arm-to-frame, and to reinstall the idler
arm in the same position. Be sure to prevent the idler support from turning in the bushing. Since that motion could result in improper relay rod
height. Whenever replacing the relay rod, or the idler arm, or the pitman arm, it is mandatory to establish the correct height by following the
procedure shown.
REMOVAL
1.
Raise vehicle on hoist
2.
Remove idler arm to frame nuts, washers and bolts
3.
Remove nut from idler arm to relay rod ball stud
4.
Remove relay rod from idler arm by using J-24319-01 or similar puller
5.
Remove idler arm
INSTALLATION
1.
Position idler arm on frame and LOOSELY install mounting bolts, washers and nuts
Tools Used To Seat The Tapers
2.
Install relay rod to idler arm, making certain seal is on stud. Use J-29193 or J-29194 as shown to seat the tapers. A torque of 20Nm is required.