
Firebird V8-5.7L VIN G (2001)
Compressor Clutch: Service and Repair
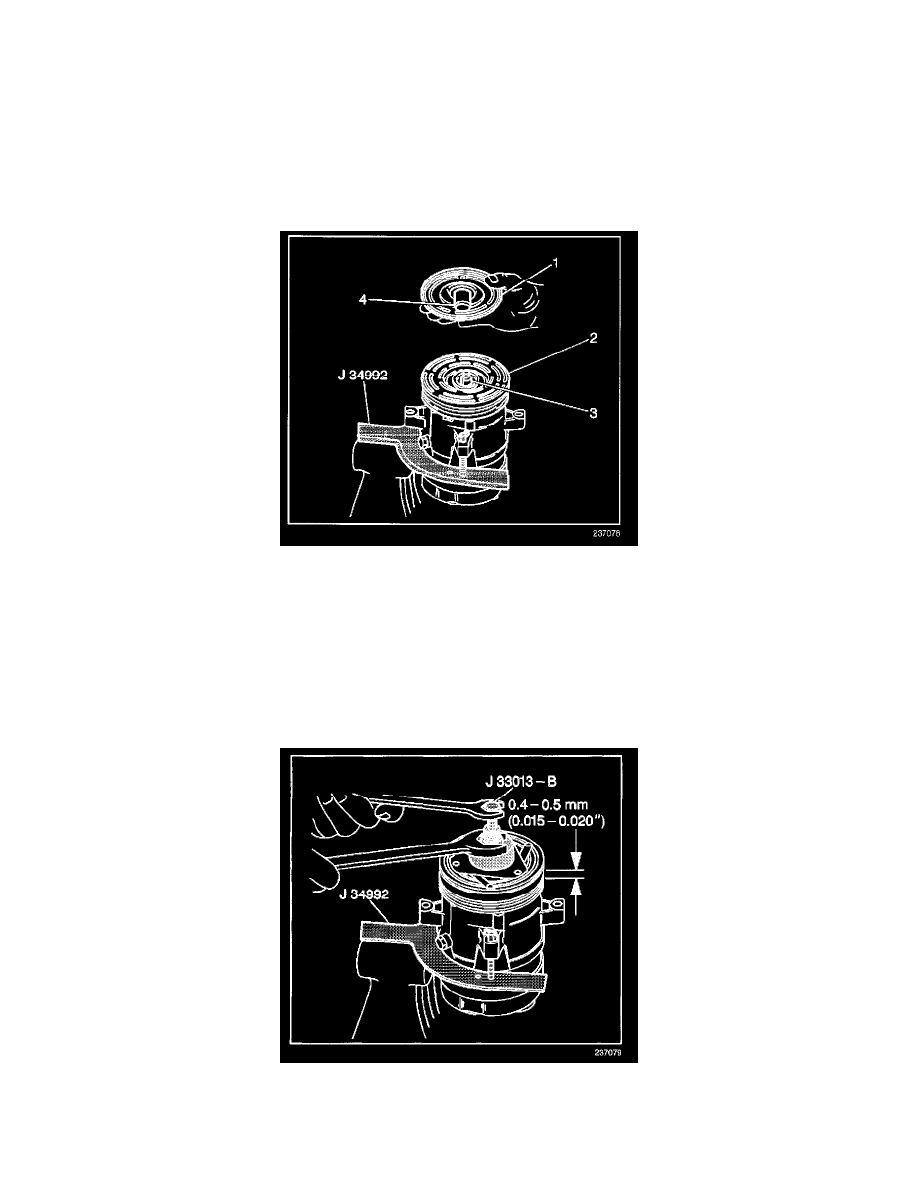
Compressor Clutch Plate/Hub Assembly Install
V5 - Conventional Mount
TOOLS REQUIRED
^
J 33013-B Hub and Drive Plate Remover and Installer
^
J 33022 6-Point 13 mm Socket
^
J 33027-A Clutch Hub Holding Tool
^
J 34992 Compressor Holding Fixture
1. Install the compressor into the J 34992.
2. Install the shaft key (4) into the key groove of the clutch plate and hub (1).
^
Allow the key to project 3.2 mm (0.126 in) out of the key groove.
^
The shaft key is curved slightly in order to provide an interference fit in the key groove of the hub.
3. Clean the frictional surfaces of the clutch plate and hub and the clutch pulley rotor (2).
4. Align the shaft key with the shaft keyway (3).
NOTE: Do not drive or pound on the clutch hub or the shaft. Internal damage to the compressor may result.
5. Place the clutch plate and hub assembly onto the compressor shaft.
6. Remove the center screw from the J 33013-B.
7. Reverse the body direction of the center screw of the J 33013-B.
8. Install the J 33013-B with the bearing.
9. Back off the body of the J 33013-B in order to allow the center screw to be threaded onto the end of the compressor shaft.