
G6 V6-3.5L (2009)
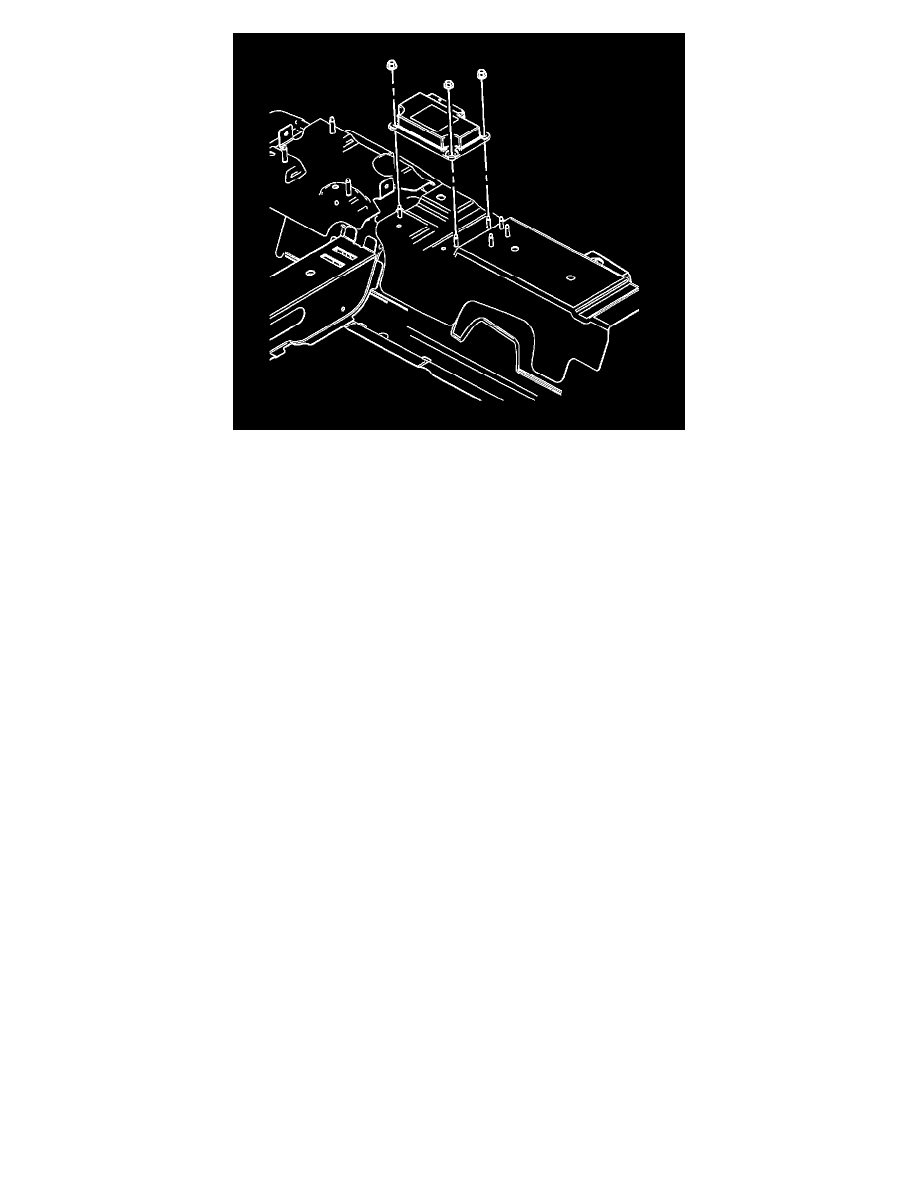
1. Point the arrow on the SDM toward the front of the vehicle.
2. Install the inflatable restraint sensing and diagnostic module.
3. Install the inflatable restraint sensing and diagnostic module wire harness connector.
Caution: Refer to Fastener Caution (See: Service Precautions/Vehicle Damage Warnings/Fastener Caution).
4. Install the inflatable restraint sensing and diagnostic module nuts.
Tighten the nuts to 10 Nm (89 lb in).
5. Install the automatic transmission shift control, if equipped. Refer to Transmission Control Replacement (See: Transmission and
Drivetrain/Automatic Transmission/Transaxle/Shifter A/T/Service and Repair/4T45-E - Automatic Transmission/Transmission Control
Replacement).
6. Install the park brake lever assembly. Refer to Parking Brake Lever Replacement (See: Brakes and Traction Control/Parking Brake
System/Parking Brake Lever/Service and Repair/Parking Brake Lever Replacement).
7. Install the console. Refer to Console Replacement (See: Body and Frame/Interior Moulding / Trim/Console/Service and Repair).
Note: The AIR BAG indicator may remain ON after the SDM has been replaced. DTC B1001 may set requiring the SDM part number to be set in
multiple modules. If the indicator remains ON after enabling the SIR system, perform the diagnostic system check and follow the steps thoroughly
to ensure that the SDM is set properly. Refer to Control Module References (See: Testing and Inspection/Programming and Relearning).
8. Enable the SIR system. Refer to SIR Disabling and Enabling (See: Body and Frame/Interior Moulding / Trim/Dashboard / Instrument Panel/Air
Bag(s) Arming and Disarming/Service and Repair).
9. Program the inflatable restraint sensing module after replacement. Refer to Control Module References (See: Testing and
Inspection/Programming and Relearning).