
G6 V6-3.6L (2007)
2. Install the control solenoid valve body and TCM assembly (5).
3. Rotate the control solenoid valve spring (7) into position.
Notice: Refer to Fastener Notice.
Important: Install all bolts before tightening, then tighten in specified sequence.
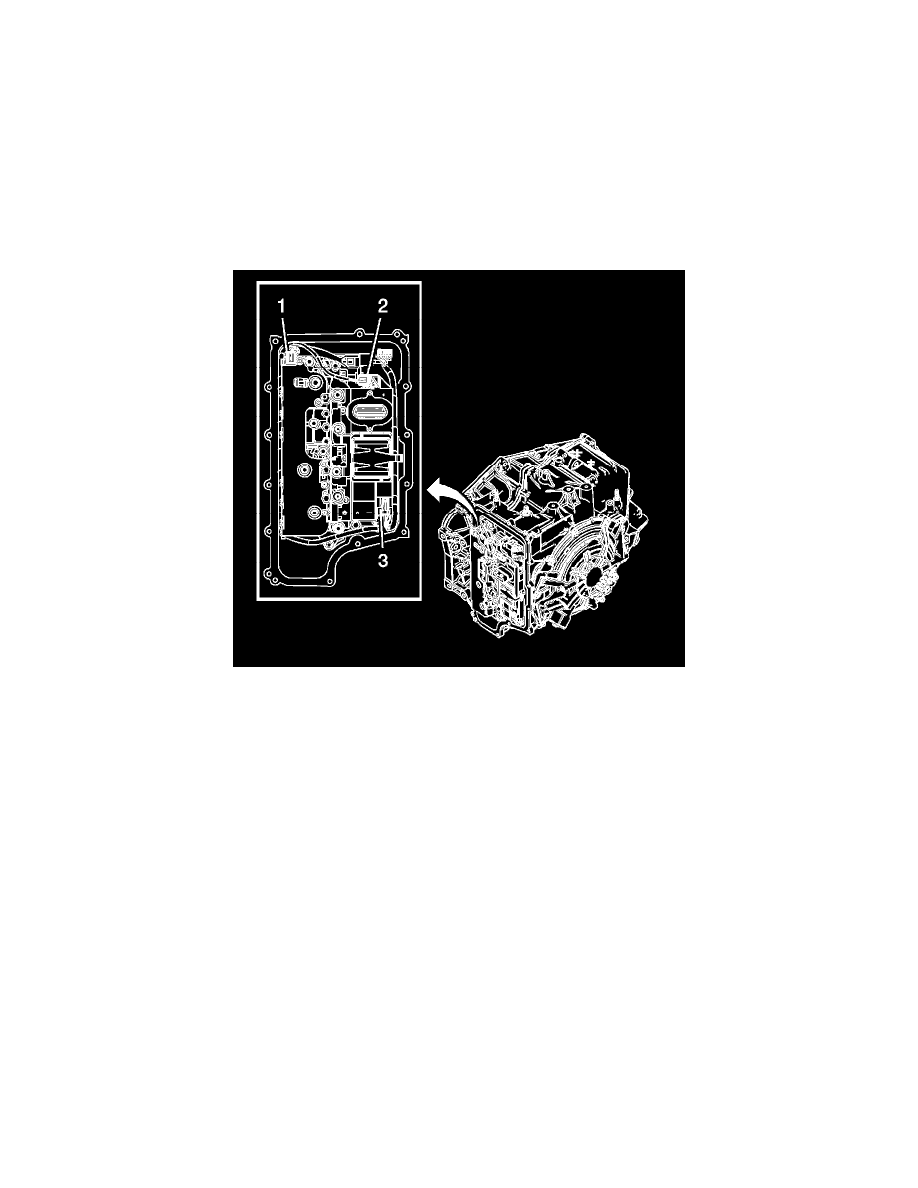
4. Install the control valve body bolts (1) M6 x 80 (Quantity: 4).
5. Install the control valve body bolt (6) M6 x 55 (Quantity: 1).
6. Install the control valve body bolts (2) M6 x 95 (Quantity: 3).
7. Install the control valve body bolt (3) M6 x 42 (Quantity: 1).
8. Install the control valve body bolts (4) M6 x 65 (Quantity: 2).
Tighten the bolts in sequence to 12 N.m (106 lb in).
9. Connect the input speed sensor electrical connector (1).
10. Connect the output speed sensor electrical connector (2).
11. Connect the shift position switch electrical connector (3).
12. Install the control valve body cover.
13. For transmission control module programming and setup. Refer to Control Module References.
Important: After an internal transmission repair or internal part replacement the service fast learn adapt procedure should be
performed.
14. Perform the service fast learn adapt procedure. Refer to Service Fast Learn Adapts.