
G8 V6-3.6L (2008)
Important: Twisting or tilting of the transmission control module electrical connector while connecting may result in bent or misaligned
electrical terminal pins.
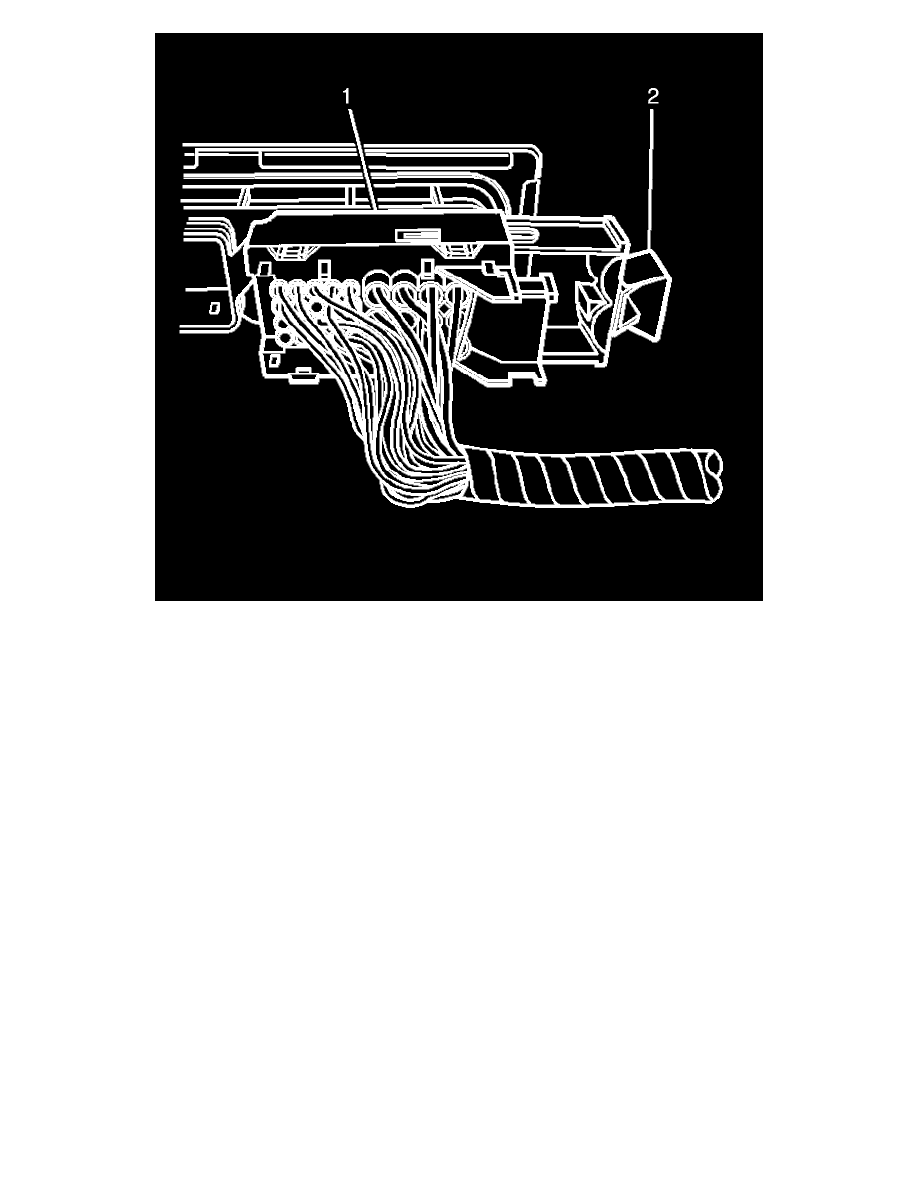
4. Carefully connect the transmission control module electrical connector (1) to the transmission control module.
5. Lock the transmission control module electrical connector securely to the transmission control module by pushing the retainer (2) toward the
electrical connector (1) until fully seated.
6. Install the right side hinge pillar trim on the vehicle. Refer to Body Hinge Pillar Trim Panel Replacement (See: Body and Frame/Interior
Moulding / Trim/Trim Panel/Service and Repair) .
7. Install the knee bolster assembly. Refer to Knee Bolster Replacement (See: Body and Frame/Interior Moulding / Trim/Dashboard / Instrument
Panel/Service and Repair) .
8. If re-programming is required. Refer to Control Module References (See: Testing and Inspection/Programming and Relearning) .
Important: It is recommended that transmission adaptive pressure (TAP) information be reset.
Resetting the TAP values using a scan tool will erase all learned values in all cells. As a result, The ECM or TCM will need to relearn
TAP values. Transmission performance may be affected as new TAP values are learned.
9. Reset the TAP values. Refer to Transmission Adaptive Functions (See: Description and Operation/5L40-E/5L50-E - Automatic
Transmission/Transmission Adaptive Functions) .