
Grand Prix V6-191 3.1L VIN M SFI (1998)
1. Attach the J22850-01 to the new booster using the nuts.
^
Tighten the nuts to 27 Nm (20 ft. lbs.).
IMPORTANT: Carefully push the pushrod eye through the hole so that you do not damage or dislodge the insulator boot.
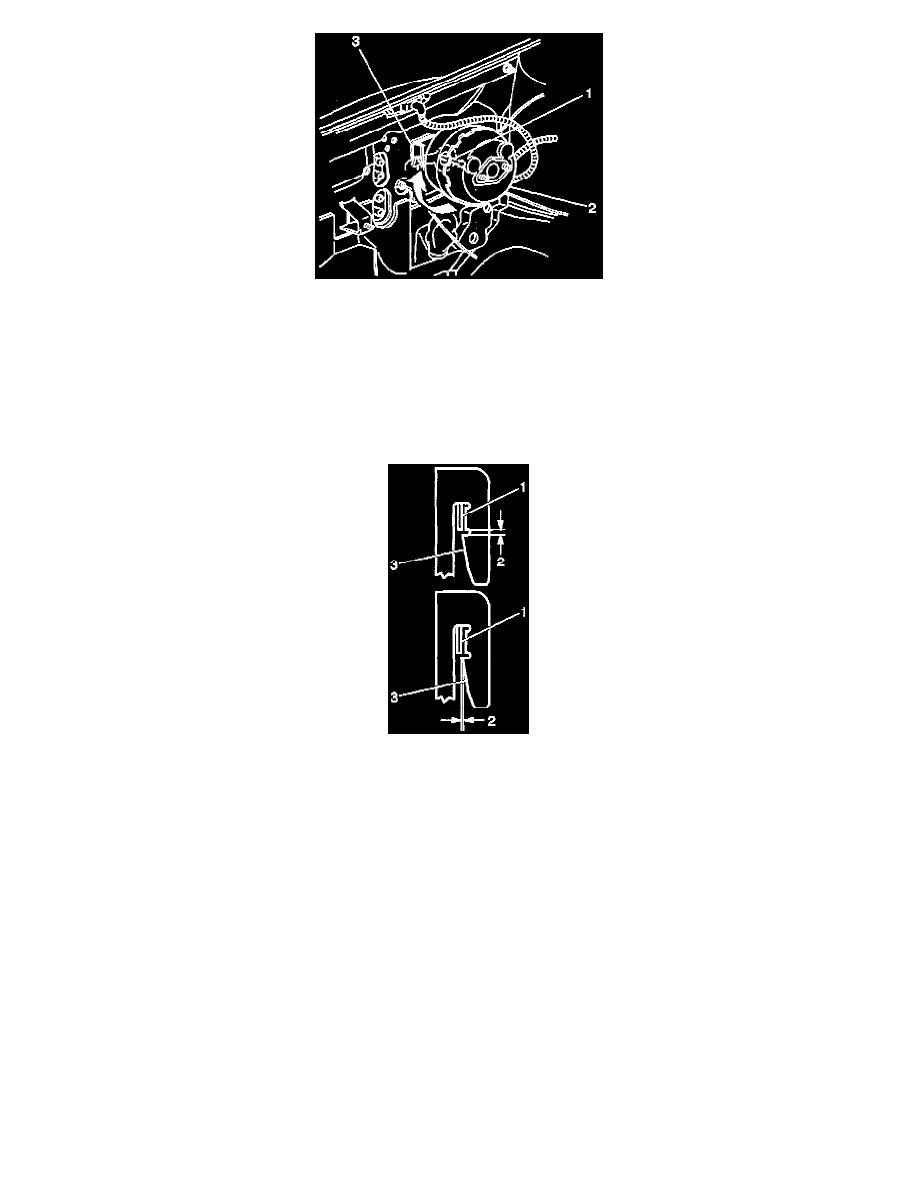
2. Place the booster (3) on the cowl counterclockwise from the final installation position so that the locking flanges on the booster and on the
mounting engage.
IMPORTANT: Ensure that the locking tab (1) and the flanges are in the fully engaged position.
3
Turn the booster clockwise with the wrench on the J22850-01.Do not use a screwdriver in the locking tab in order to install the booster. When the
booster is correctly installed, the locking tab (1) slides up the flange and snaps in the locking notch (3).
4. Connect the brake booster pushrod (1) to the brake pedal.
5. Connect the vacuum hose to the brake booster.
6. Install the EGR heat shield on the 3800 engine only.
7. Install the transmission fluid filler tube.
8. Install the ABS hydraulic modulator and the master cylinder.
9. Install the brake pressure modulator valve bracket.
10. Install the brake pressure modulator valve.
11. Install the fuel injector sight shield (3800 engine only). Refer to Engine Cover Replacement See: Engine, Cooling and Exhaust/Engine/Service and
Repair.