
GTO V8-6.0L VIN U (2005)
Brake Master Cylinder: Service and Repair
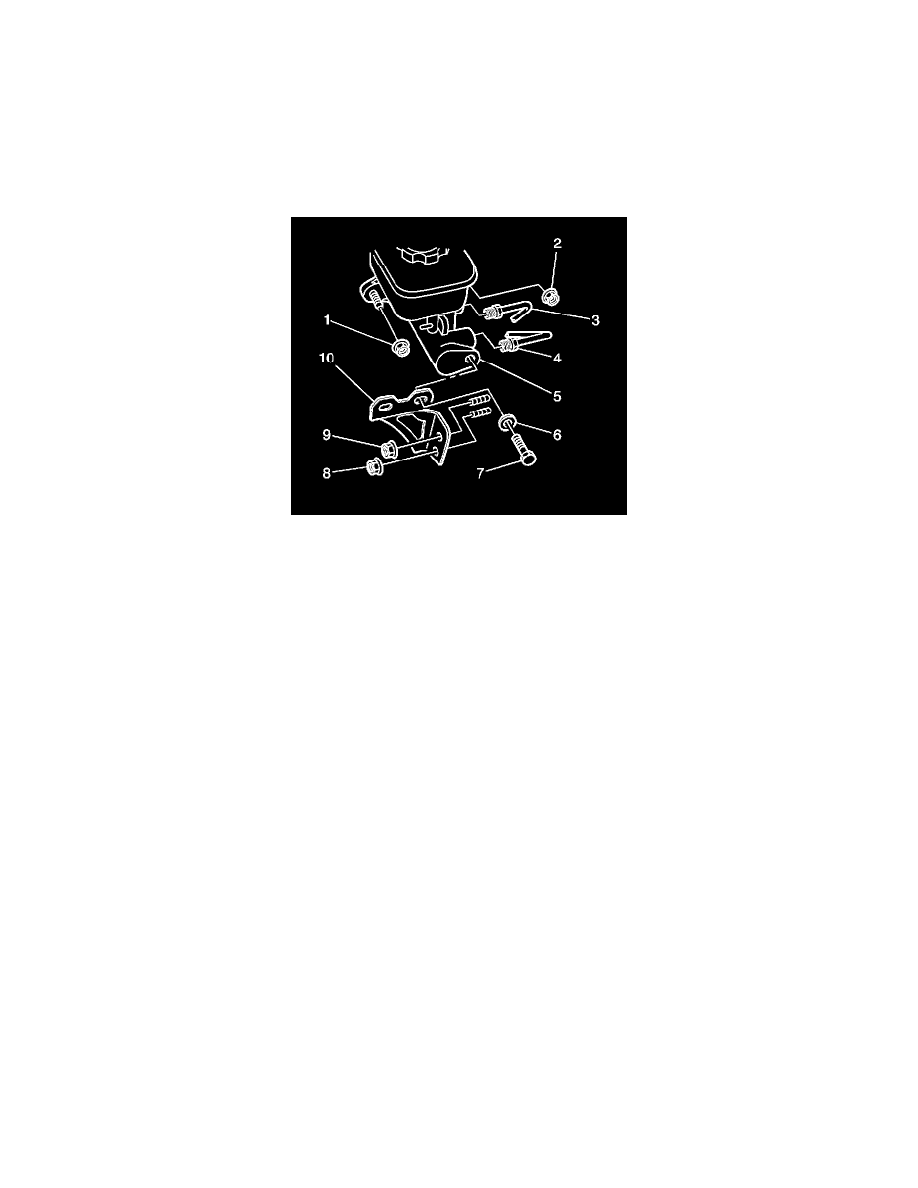
Master Cylinder Replacement
Master Cylinder Replacement
Removal Procedure
1. Apply the brake pedal at least 5 times in order to exhaust the vacuum in the brake booster.
2. Remove the front suspension support brace.
3. Clean the following components:
^
The brake fluid reservoir cap
^
The brake fluid reservoir
^
The master cylinder (5)
^
The brake pipes (3,4) around the master cylinder
4. Use a flat-bladed tool in order to lift the connector security clip on the brake fluid level switch connector.
5. Disconnect the brake fluid level switch connector.
6. Place a container below the master cylinder in order to catch the brake fluid.
7. Remove the reservoir cap.
8. Remove the cap seal.
9. Caution: Refer to Brake Fluid Irritant Caution in Service Precautions.
Notice: Refer to Brake Fluid Effects on Paint and Electrical Components Notice in Service Precautions.
Remove the brake fluid with the syringe.
10. Loosen the 2 flare nuts and separate the 2 brake pipes from the master cylinder.
11. Install caps or plugs to the brake pipes in order to prevent brake fluid loss and contamination.
12. Install caps or plugs to the master cylinder ports in order to prevent contamination.
13. Remove the 2 nuts (8,9) from the bracket (10).
14. Remove the bolt (7) and the washer (6) from the bracket.
15. If the vehicle has a manual transmission, use a tie strap, or equivalent, in order to secure the bracket and the clutch fluid reservoir in an upright
position.
16. If the vehicle has an automatic transmission, remove the bracket.
17. Remove the 2 nuts (1,2) from the master cylinder.