
Lemans FWD L4-121 2.0L (1989)
Intake Manifold: Service and Repair
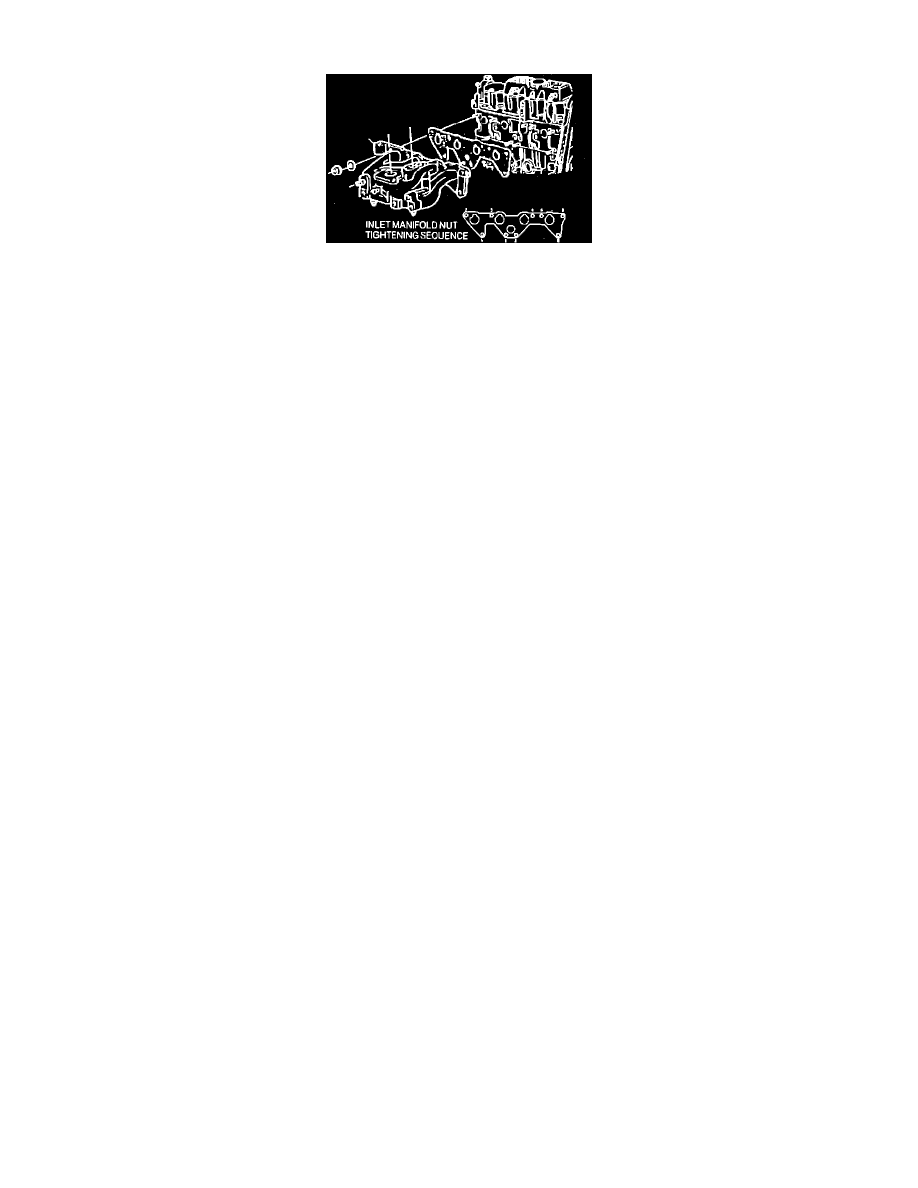
Fig. 3 Intake Manifold Replacement & Bolt Tightening Sequence
1.
Remove fuel pump fuse from fuse panel, then start and operate engine until it stalls. After stalling, crank engine for approximately 3 seconds to
deplete fuel pressure in fuel lines.
2.
Disconnect battery ground cable, then drain cooling system.
3.
On 1990-91 models, remove air cleaner and serpentine belt.
4.
On all models, remove alternator and bracket from camshaft carrier.
5.
Remove power steering pump bracket to intake manifold attaching bolts, then position pump and bracket aside with hoses attached.
6.
Remove ignition coil and bracket assembly.
7.
Disconnect throttle cable from intake manifold bracket and throttle body.
8.
Disconnect TV cable and electrical connectors from throttle body.
9.
Disconnect power brake unit vacuum hose at filter.
10.
Disconnect fuel lines at throttle body. Place shop towel over fuel line and fitting when disconnecting.
11.
Disconnect water pump to intake manifold coolant bypass hose and inlet tube.
12.
Disconnect ECM electrical connector to provide access to intake manifold lower attaching nuts.
13.
Remove intake manifold attaching nuts and intake manifold.
14.
Reverse procedure to install. Tighten intake manifold attaching nuts in sequence shown in Fig. 3.