Torrent AWD V6-3.4L VIN F (2006)

Crankshaft Main Bearing Seal: Service and Repair
Crankshaft Rear Oil Seal Replacement
^
Tools Required
-
J 34686 Rear Main Seal Installer
Removal Procedure
Important: Do not damage the crankshaft or seal bore.
1. Remove the engine flywheel.
2. Remove the crankshaft rear oil seal. Pry the crankshaft rear oil seal out using a suitable tool.
Installation Procedure
Notice: Do not apply or use any oil lubrication on the crankshaft rear oil seal, or the seal installer. Do not touch the sealing lip of the oil seal once
the protective sleeve is removed. Doing so will damage/deform the seal.
Notice: Clean the crankshaft sealing surface with a clean, lint free towel. Inspect lead-in edge of crankshaft for burrs/sharp edges that could
damage the rear main oil seal. Remove burrs/sharp edges with crocus cloth before proceeding.
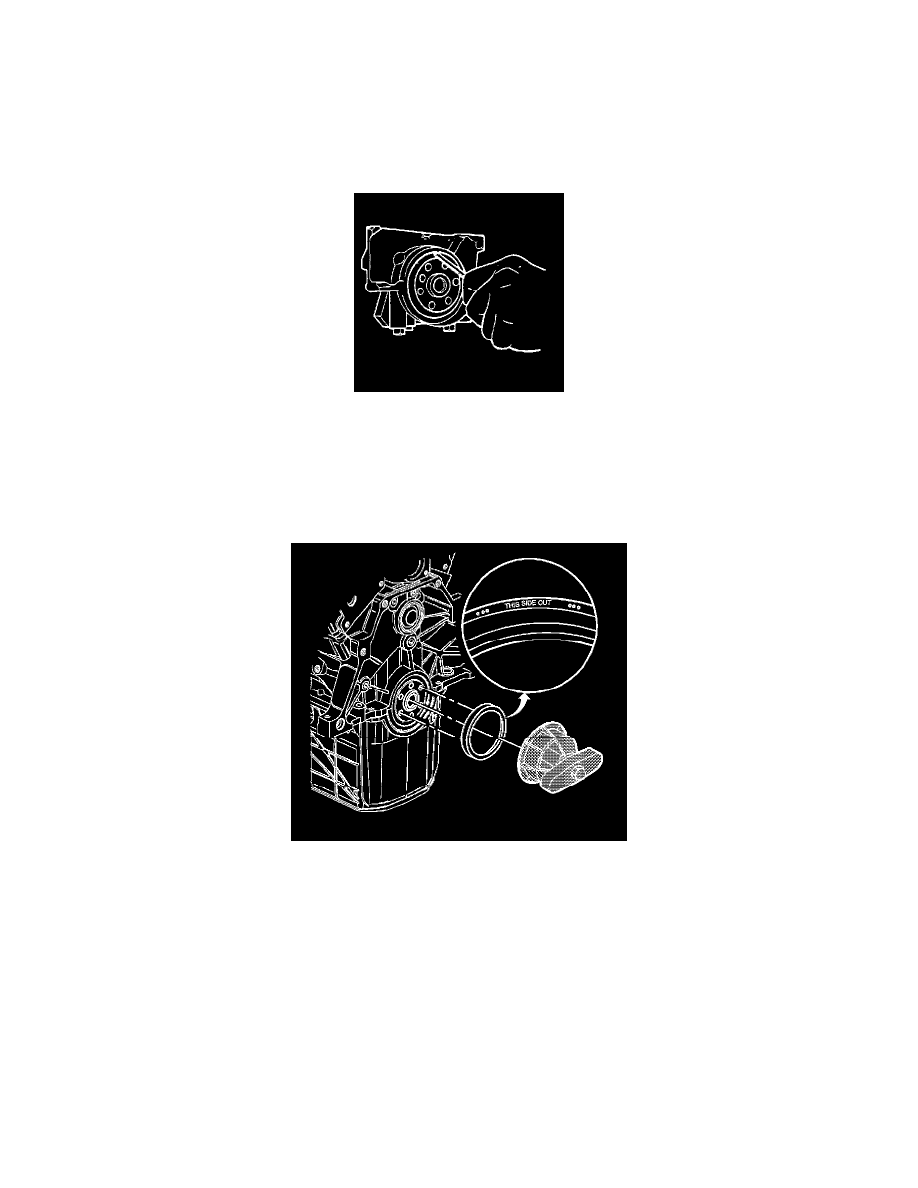
Important: Notice the direction of the rear oil seal. The new design is a reverse style as opposed to what has been used in the past. "THIS SIDE
OUT" has been stamped into the seal as shown in the graphic.
1. Carefully remove the protection sleeve from the new crankshaft rear oil seal.
2. Install the crankshaft rear oil seal onto the J 34686 by sliding the crankshaft rear oil seal over the mandrel using a twisting motion until the back of
the crankshaft rear oil seal bottoms squarely against the collar of the tool.
Notice: Refer to Fastener Notice in Service Precautions.
3. Perform the following steps in order to install the crankshaft rear oil seal:
A. Align the dowel pin of the J 34686 with the dowel pin in the crankshaft.
