
Vibe AWD L4-2.4L (2009)
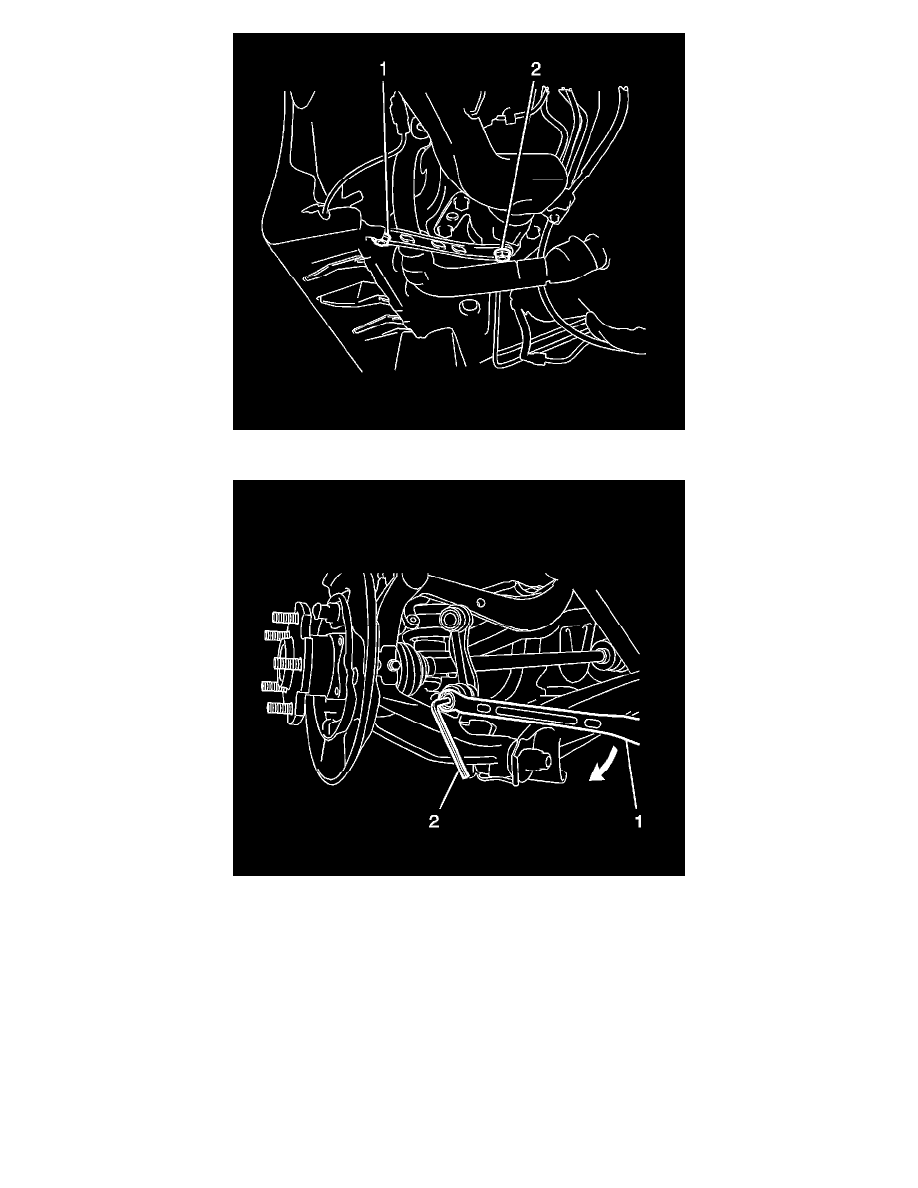
6. Install the rear floor side member brace with the 2 bolts (1, 2) and tighten to 30 Nm (22 lb ft).
7. Install the lower stabilizer shaft link stud to the lower control arm.
8. Install the nut to the stud. Use a wrench (2) in order to hold the stud. Tighten the nut to 44 Nm (32 lb ft).
9. Remove the jack and the block of wood.
10. Install the rear tire and wheel assembly. Refer to Tire and Wheel Removal and Installation (See: Wheels and Tires/Service and Repair).
11. Lower the vehicle.
12. Install the rear quarter lower trim panel. Refer to Quarter Lower Rear Trim Panel Replacement (See: Body and Frame/Interior Moulding /
Trim/Trim Panel/Service and Repair).
13. Raise and support the vehicle on an alignment rack or a lift that places the weight of the vehicle on the tires. Refer to Lifting and Jacking the
Vehicle (See: Wheels and Tires/Vehicle Lifting/Service and Repair).
14. With the weight of the vehicle on the tires, push down on the rear bumper 3 times.