
Vibe FWD L4-1.8L VIN 8 (2004)
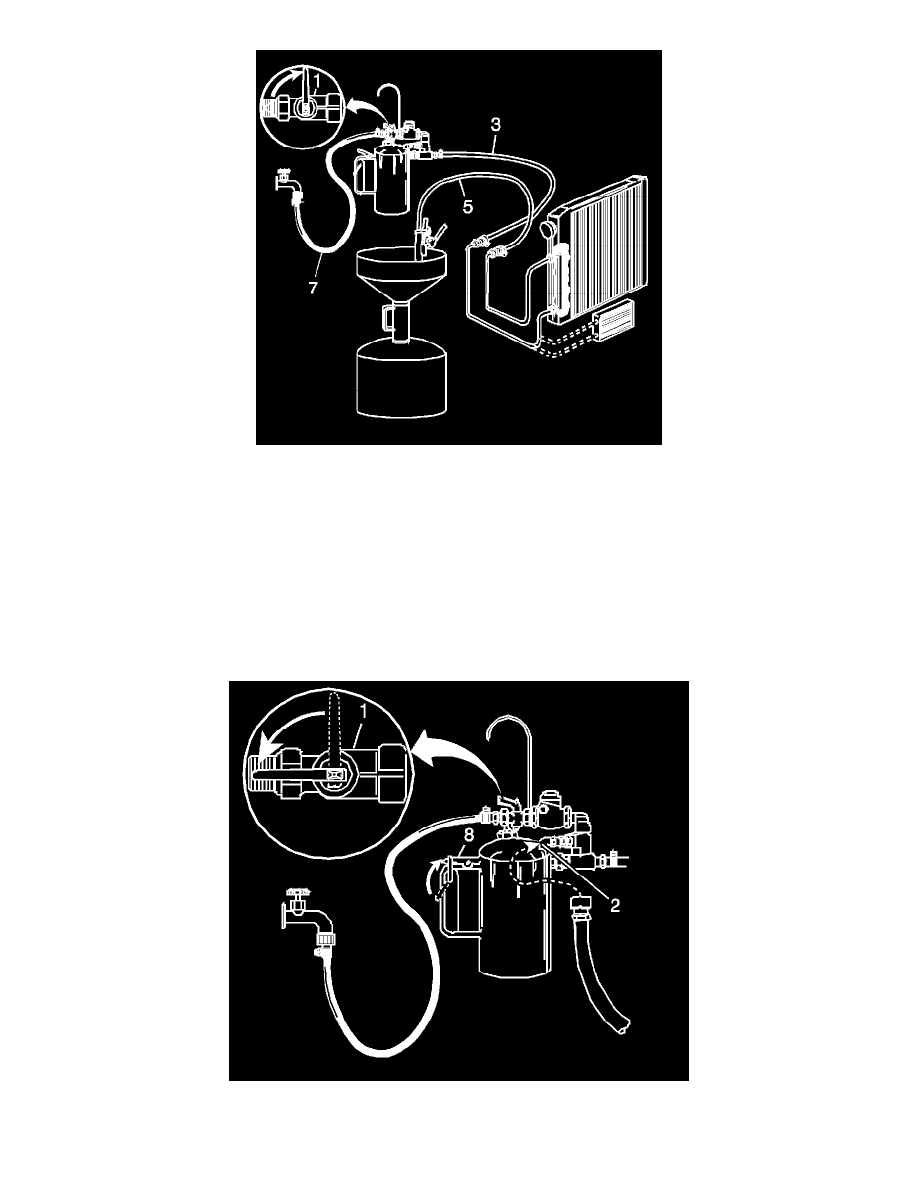
4. Connect the discharge hose (5) to the oil cooler return pipe, horizontal/bottom connector.
5. Clip the discharge hose (5) onto the oil drain container.
6. Attach the to the undercarriage of the vehicle with the hook provided and connect the flushing system feed supply hose (3) from the to the oil
cooler feed pipe, vertical/top connector.
7. With the water supply valve (1) on the in the OFF position, connect the water supply hose (7) from the to the water supply at the faucet.
8. Turn ON the water supply at the faucet.
Initial Flush
1. Turn the water supply valve (1) to the ON position and allow water to flow through the oil cooler and pipes for 10 seconds to remove any
remaining transmission fluid. If water does not flow through the oil cooler and pipes, the cause of the blockage must be diagnosed and the plugged
component must be repaired or replaced. Continue with the cooler flushing and flow check procedure once the blockage is corrected.
2. Turn the water supply valve (1) to the OFF position and clip the discharge hose (5) onto a 19 liter (5 gallon) pail with a lid, to avoid splashback.
3. Turn the water supply valve (1) to the ON position and depress the trigger (8) to mix cooler flushing solution into the water flow. Use the clip
provided on the handle to hold the trigger (8) down. The discharge will foam vigorously when the solution is introduced into the water stream.