
911 Carrera 2 Targa F6-3600cc 3.6L SOHC (1992)
Brake Caliper: Service and Repair
Rear
1.
Raise and support vehicle.
2.
Remove wheels and brake pads.
3.
Disconnect brake hydraulic line. Using a suitable device, depress and hold brake pedal to restrict flow of brake fluid from reservoir.
4.
Remove caliper retaining bolts, caliper, and metal shield.
5.
Loosen bleeder valve and carefully blow hydraulic fluid out of caliper. The recommended air pressure for fluid removal is 14 psi.
6.
Position the caliper in a soft jaw vise and remove the clamping ring and dust boot.
Fig. 5 Brake Caliper Piston Removal
7.
Depress one caliper piston with tool P83 and position a wood block approximately 1/3 inches thick between the tool arm and the piston being
removed, Fig. 5. Apply pressure. Start with 29 psi, and raise the pressure as necessary. Keep fingers clear of caliper slot. Repair cylinders
one at a time since pressure cannot be built up with one removed.
8.
Remove piston seal with a plastic pin to prevent damage to cylinder bore groove.
9.
Clean parts in alcohol. Disassemble calipers only if the O-rings which seal the fluid passages between both caliper halves are defective and
leak.
10.
Check cylinder bore, piston, and slot surfaces for damage.
11.
Coat cylinder bore, piston, and piston seal with ATE brake paste.
12.
Install piston seal into cylinder bore groove.
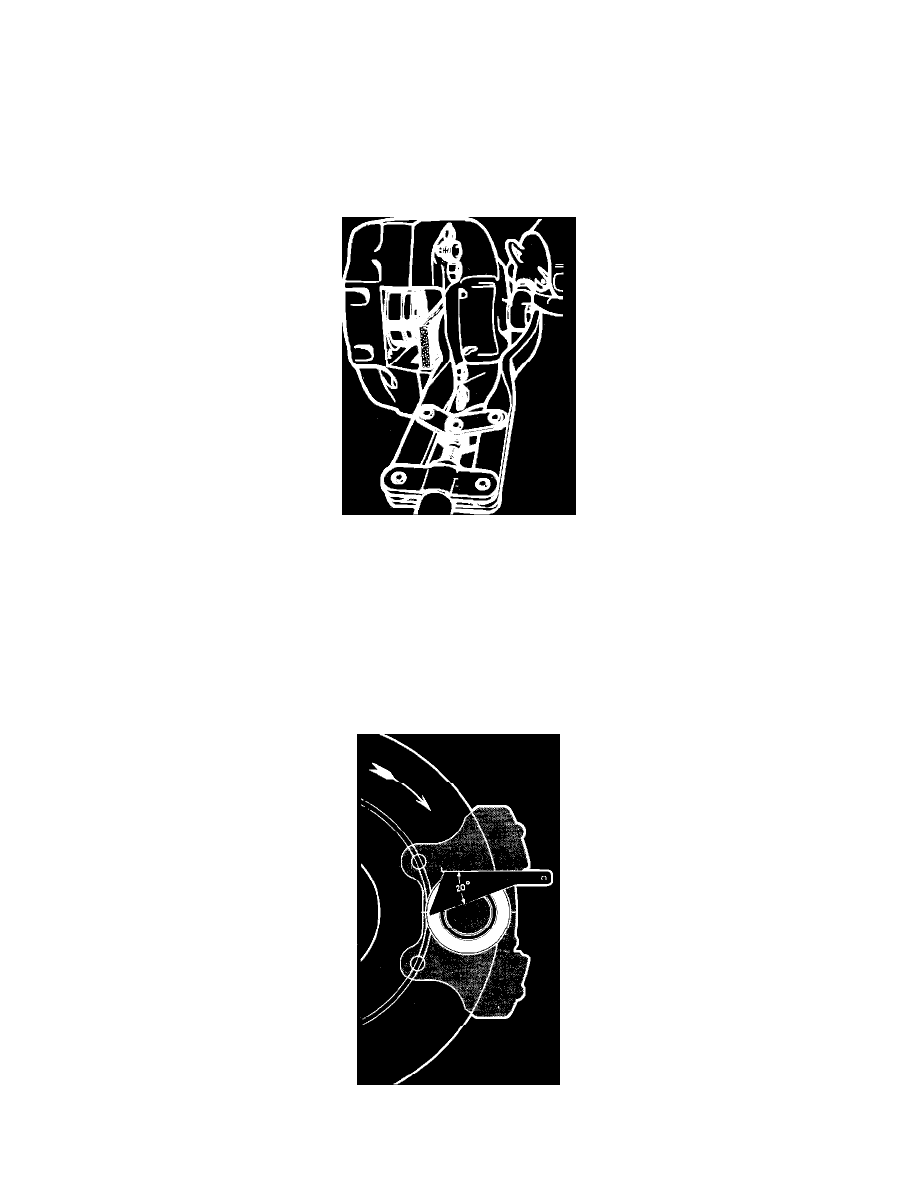
Fig. 6 Aligning Piston In Caliper Cylinder