
911 Carrera 2 Targa F6-3600cc 3.6L SOHC (1992)
Note!
^
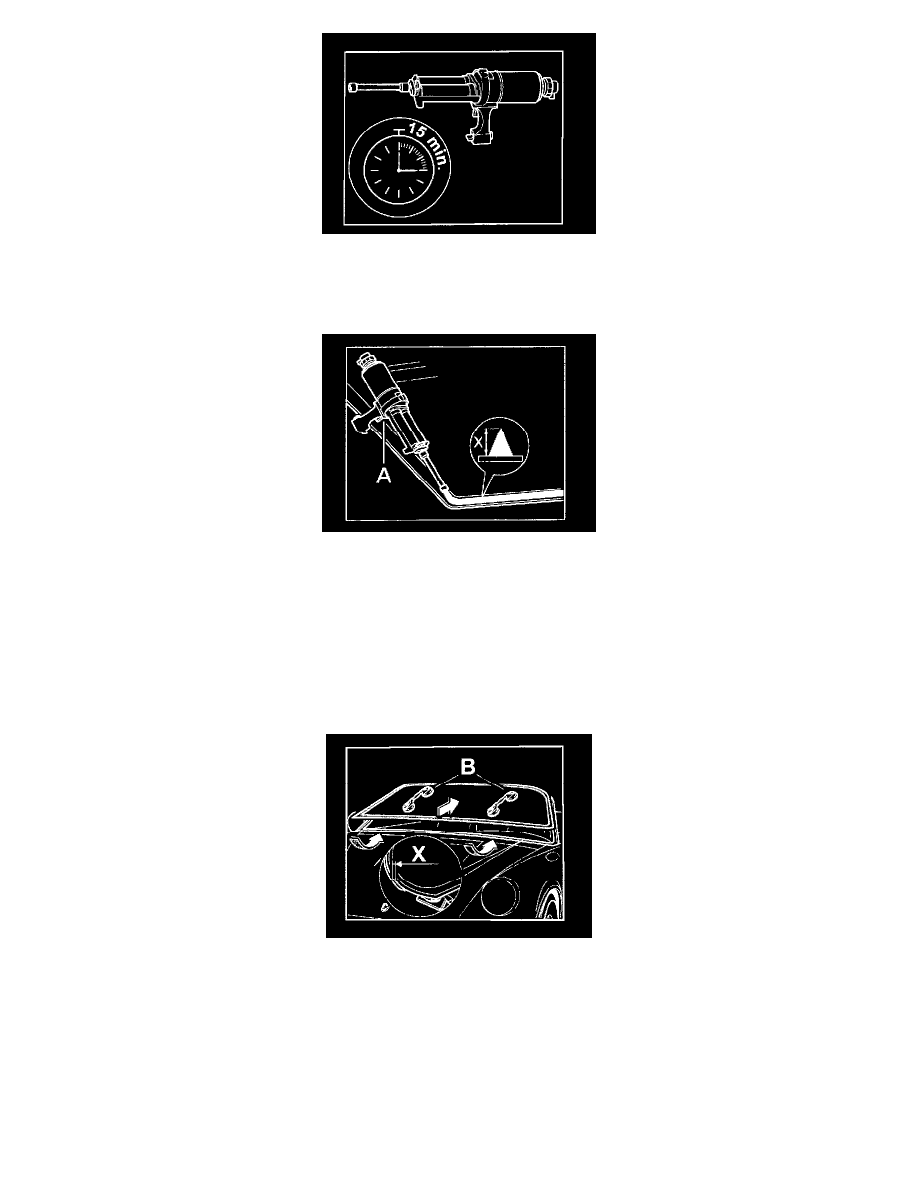
The bonding material has an open time of -15 min-, which means that the bonding material must be applied and the car window must be
assembled within this period of time.
^
In order to ensure that the substance is completely mixed, apply a 30 mm long adhesive run of fresh adhesive to a piece of cardboard before
processing.
2
-
Apply bonding material to the windscreen
-
Apply 2-component bonding material with the adhesive gun -A- to the windscreen along the preliminary layer or on the primer as a triangular run
measuring -x = approx. 10 mm-.
Note!
When applying the adhesive, it is essential to ensure that the adhesive pass overlaps by approx. 30 mm at the beginning and at the end.
3
-
Insert the windscreen into the window frame
Note!
Two persons are needed to insert and adjust the windscreen.
1.
Apply suction cups -B- to the windscreen and insert the windscreen into the window aperture. Position the wind screen on the lower edge
of the window.
2.
Set the dimension -X- at the seam joining line along the lower edge of the window frame 'Test and adjustment values" in 64-15