
911 Carrera 4S Coupe AWD F6-3600cc 3.6L SOHC (1997)
C3 = Mixing cartridge
C4 = Primer
C5 = Activator
C6 = Cleaning solution
C7 = Injector nozzle
C8 = Application nozzle
C9 = Application nozzle
C10 = Filling nozzle
C11 = Touch-in tool
Bonding Rear Spoiler Outer Section and Spoiler Grille
Preparing Bonding Areas
Note: The rear spoiler (outer rear spoiler section) must be painted prior to fitting!
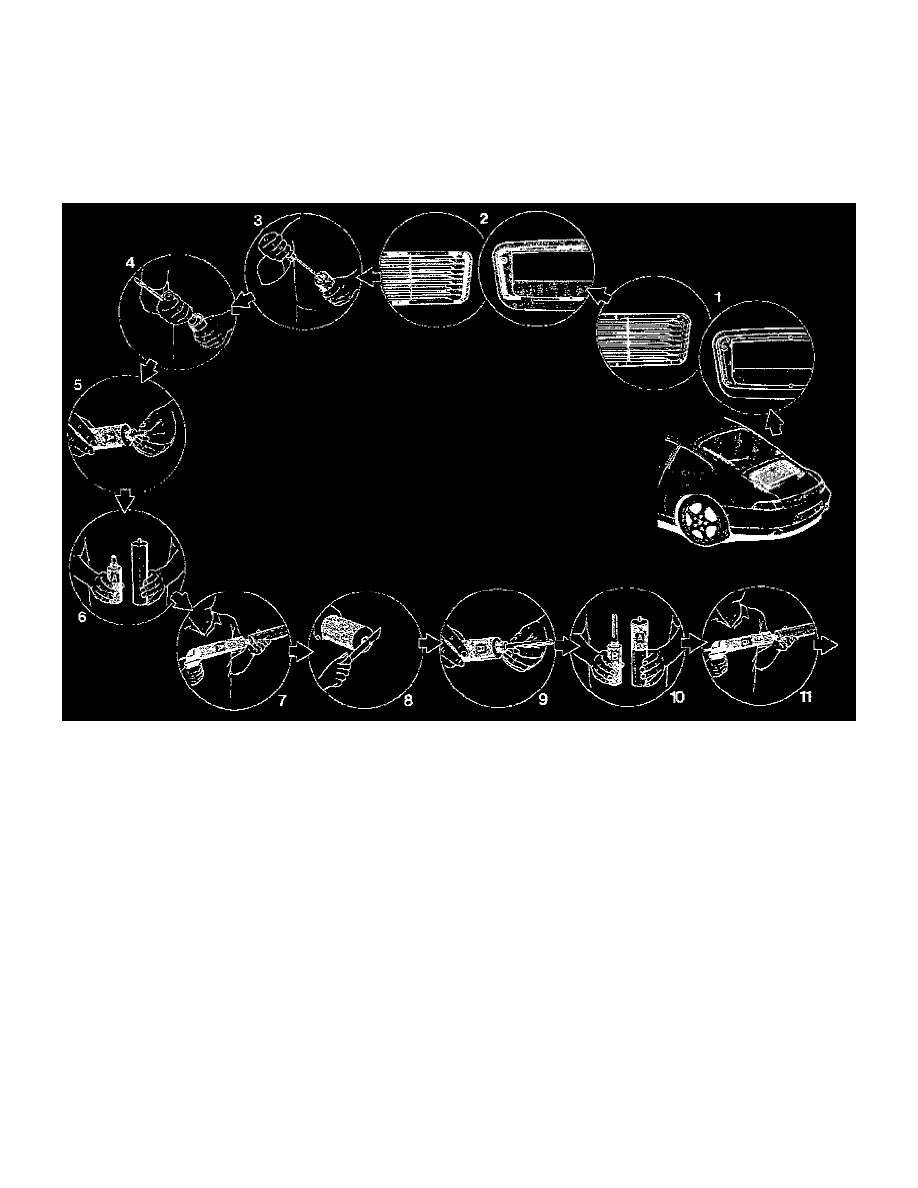
1
Sand down bonding areas
Sand down bonding areas on rear spoiler outer section and spoiler grille with sanding paper, P 80 grit.
Clean sanded areas
Clean sanded areas on rear spoiler outer section and spoiler grille thoroughly with cleaning solution (C6)
Caution: Make sure no cleaning solution residues remain on the spoiler sections!
2
Prime bonding areas
Apply a thin, even coat of primer (C4) to bonding areas of rear spoiler outer section and spoiler grille.
Caution: Allow a flash-off time of at least 10 minutes!
Preparing The Bonding Cartridge for Application of Adhesive
3
Open nozzle fitting on cartridge containing component A
Use a screwdriver to pierce the diaphragm of the nozzle connection of cartridge containing component A (C1).
4
Open flanged cover of cartridge containing component A
Use the screwdriver handle to pierce the flanged cover at the end of the cartridge containing component A (C1).
5
Screw filling nozzle onto cartridge containing component A
Screw filling nozzle (C10) onto cartridge containing component A (C1).