
911 Carrera Targa F6-3600cc 3.6L SOHC (1996)
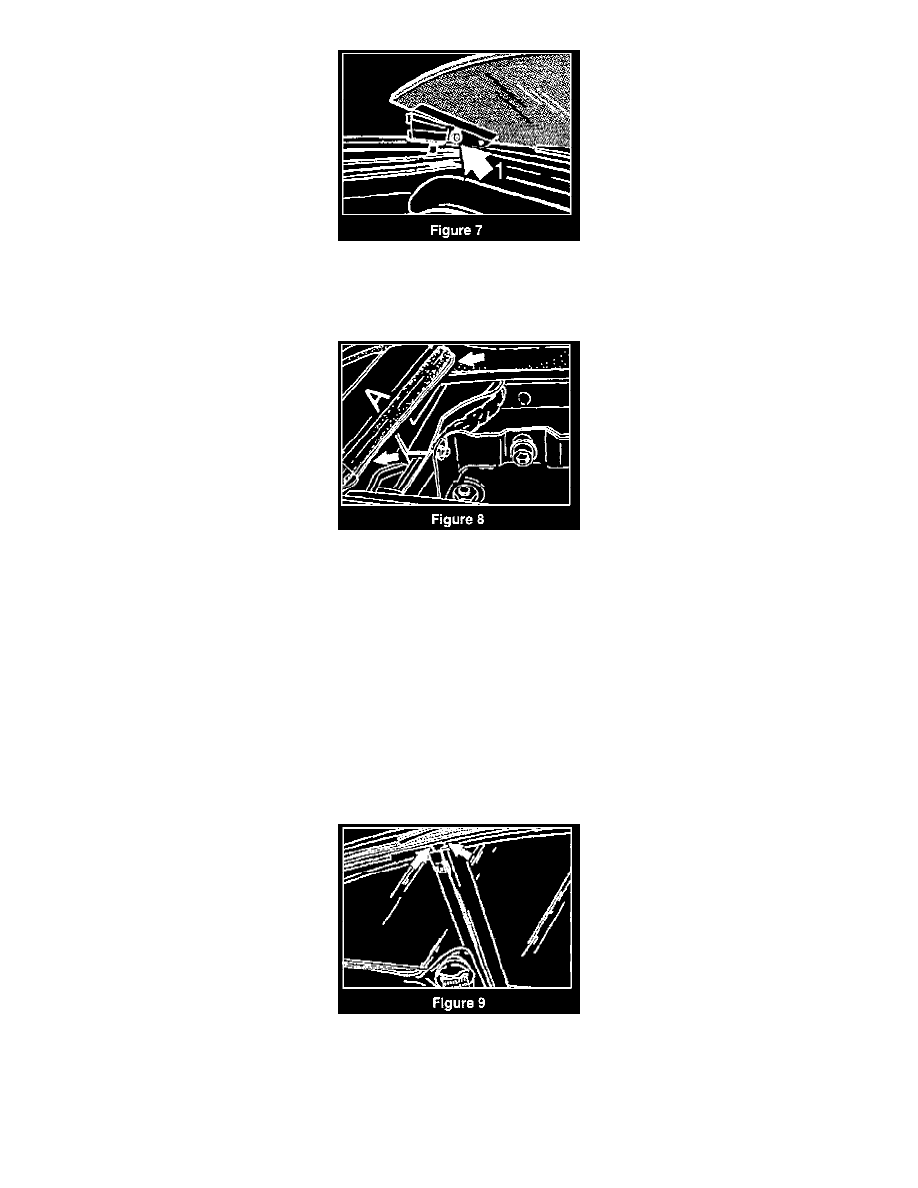
With the air deflector open, loosen the left and right holding nut (arrow 1, figure 7). Adjust the air deflector within the elongated slots so that in the
closed position the deflector places a light preload on the seals.
The air deflector must be even with the glass roof and the side trim after adjustments. Tighten the left and right holding nuts to 5.5 Nm (4 ft lb).
-
Trim the wind deflector seal lip on the left and right sides (arrows, figure 8) for a length of 115 mm (dimension A in figure 8). Approximately 1 mm
should be removed. This will eliminate the possibility of the sealing lip touching the air deflector bracket causing water to run over the seal onto the
air deflector bracket and into the passenger compartment.
Area # 5
Water entry on the top of the left and right "B" pillar.
Possible cause:
A gap in the upper corner of the "B" pillar and roof frame.
Preparation:
-
Remove the inside covers for the windshield frame, rear wall, "B" pillar and roof frame.
Repair:
-
Close the gap on the "B" pillar (arrows, figure 9) to the roof frame in the area above the coat hook using body sealer.
Area # 6
Water entry in the rear "C" pillar area on the left and right sides.
Possible cause: