
911 Turbo AWD F6-3600cc 3.6L SOHC Twin Turbo (1997)
Technology Wheel Steel Valve Core (Part 1 Of 2)
Technology Wheel Steel Valve Core (Part 2 Of 2)
Important Notes On Removal And Installation
-
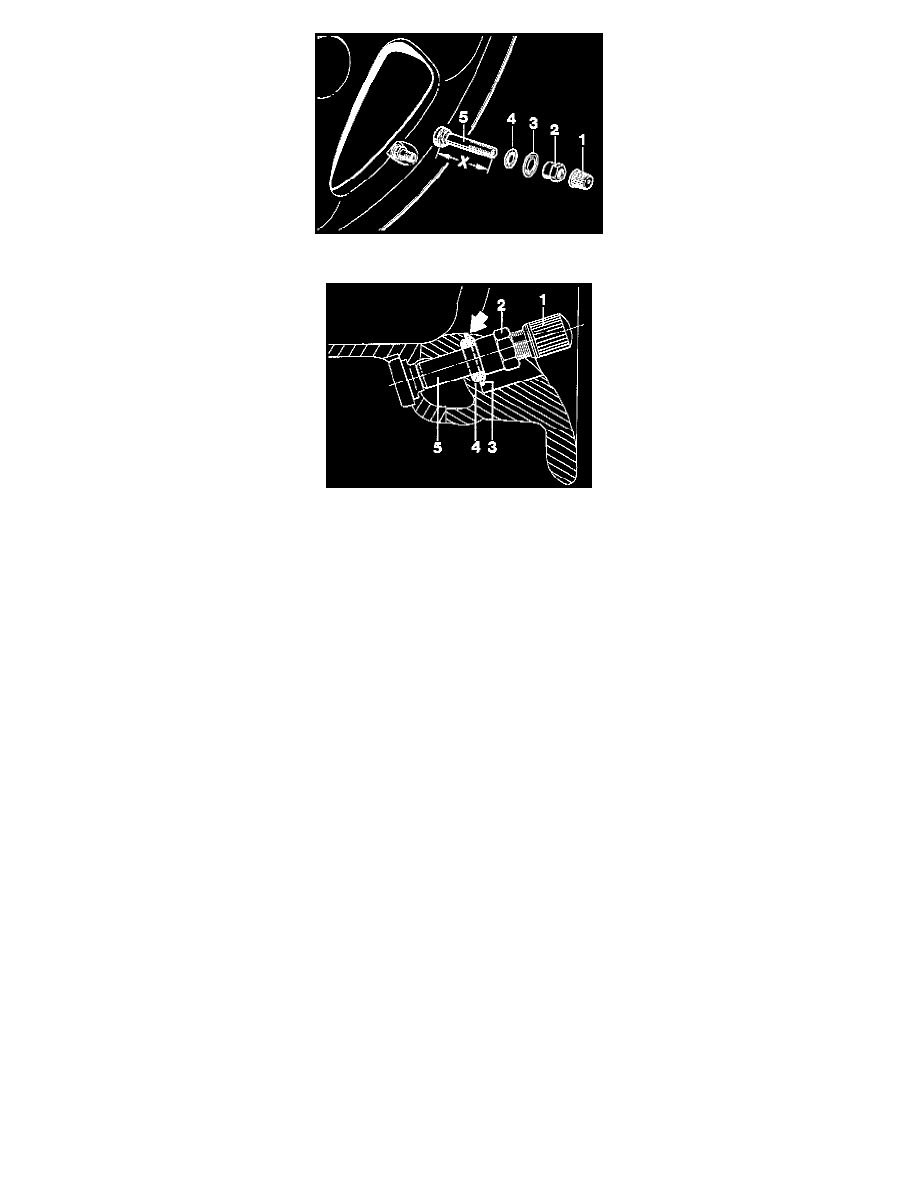
Do not use proprietary steel valves.
The Porsche valves are shorter (dimension X).
In the case of Porsche valves, dimension X is approx. 43 mm.
-
Only the complete valve is available as a spare part.
See spare parts catalog.
-
The valve insert is of a proprietary type.
-
Valve cap No. 1 is equipped with a seal (air-tight).
Do not use a proprietary valve cap.
-
The shank of the fastening nut No. 2 must face the valve base.
Otherwise the valve will not be firmly seated.
-
Observe the position of washer No. 3 (arrow).
If the washer is incorrectly installed, the O-ring will be damaged.
This may cause more serious damage.
-
When loosening and tightening fastening nut No. 2, you must hold a screw driver against the valve base.
There is a slot for a screwdriver in the valve base.
Installation
-
Insert valve No. 5 with base seal (already installed) into wheel.
Push O-ring No. 4 carefully onto valve from outside.
-
Install washer No. 3 in correct position (arrow).
The O-ring will then fit into the recess on the washer.
-
Install fastening nut No. 2 with shank facing valve base.
-
Tighten fastening nut with 3.5 ±0.5 Nm (2.2 ±0.4 ft lb) using a torque wrench.
-
When tightening nut, hold a screwdriver against the valve base.