
911 Turbo AWD F6-3600cc 3.6L SOHC Twin Turbo (1997)
Axle Shaft Assembly: Service and Repair
Front Axle Shafts
Front Drive Shafts Without Centering
NOTE: Procedure Includes:
-
Checking drive shaft runout (constant velocity joint runout) in the case of drive shafts without centering.
-
In the case of drive shafts with centering, it is not necessary to check the runout
Removal
1. Before lifting the vehicle, loosen connection of drive shaft to wheel.
-
When doing so, also apply the brakes.
2. Remove front wheel and underside panel.
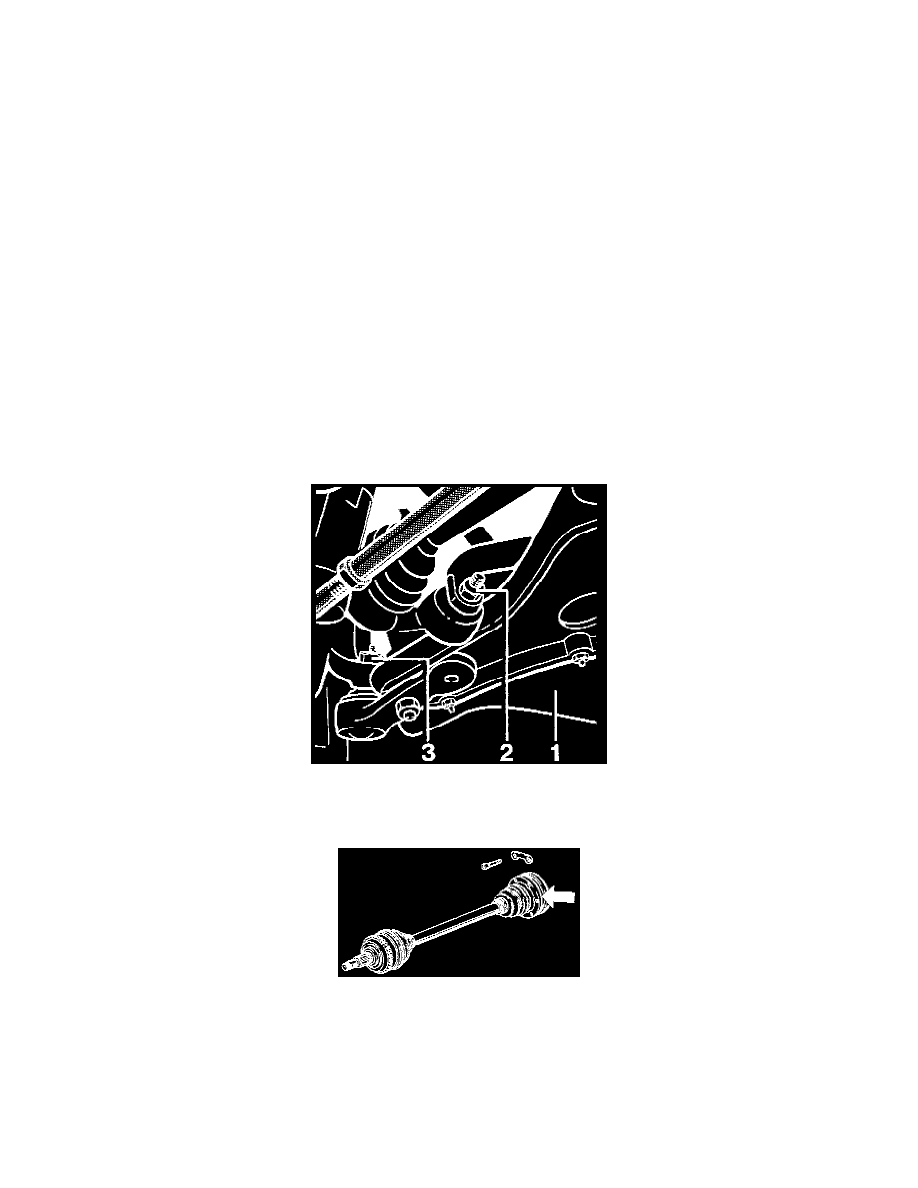
3. Disconnect brake cooling duct from control arm (1).
-
Disconnect stabilizer mount from stabilizer (2).
-
Loosen joint carrier (ball joint) from wheel carrier (3). When loosening the fastening nut, hold Torx screwdriver (special tool 9546) against
bolt.
-
Press off ball joint with puller (ball joint extractor) - special tool 9560.
NOTE: To prevent damage to rubber sleeve of ball joint, apply tire mounting paste to sleeve and extractor in area concerned. Then insert the
extractor from the front.
4. Unscrew pan head screws of drive shaft from transmission flange.
NOTE:
-
The CV joint may fall apart if the dust cover holder (arrow) is removed or damaged.
-
The joint must therefore be protected against falling apart by 2 ea. 8 mm bolts and nuts during removal, installation and shipment.
5. Pull out drive shaft.
NOTE:
-
As considerable force is needed to move the drive shaft in the teeth of the wheel hub, loosen the drive shaft using a copper drift.
-
With unfavorable tolerances, it may be necessary to push the drive shaft out of the hub using a wheel hub puller (e.g. a Klann or Schrem tool)
Installation
1. Grease the drive shaft teeth with Optimoly HT.