
944 S L4-2479cc 2.5L DOHC (1987)
b.
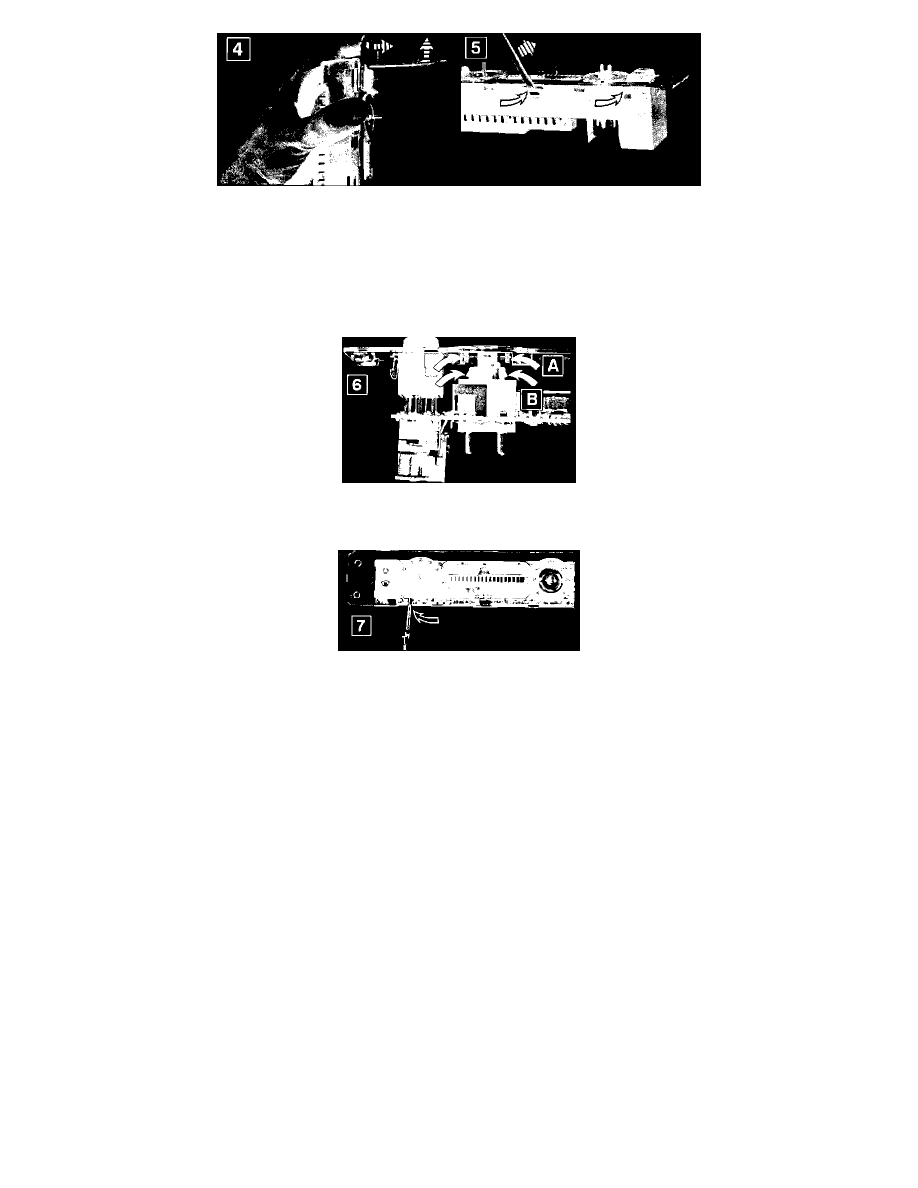
Removing rear housing
-
remove nut (10 mm wrench size) located behind temperature knob.
-
disengage housing with use of small screwdriver (Figures 4 & 5).
Important:
Disengage locking tabs on short side first.
Disengage locking tabs with small screwdriver and, at the same time, push clear face plate away from housing to prevent reengagement of locking tabs
(Figure 4). Then disengage locking tabs on long sides (Figure 5).
Repair Information (cont.):
c. Removing clear face plate to replace push switches and bulbs:
-
two brackets (Figure 6, Arrow A) are engaged in locking tabs on the fan switch (Figure 6, Arrow B).
-
to remove, use small scribe or similar tool to push back brackets and disengage clear face plate (Figure 7).
Note:
Be certain to avoid stressing the temperature potentiometer during removal of the clear face plate.
d.
The push switches can now be disengaged and bulbs can be pulled out.
During assembly, make sure all locking tabs are properly engaged.
Warranty Information:
Warranty Information:
Complete new style Air Regulator Control assemblies submitted under warranty for push switch and/or bulb
failure will not be accepted since these components are available separately. Complete assemblies submitted for
these conditions will be returned as Field Repairable. Labor should be claimed using actual time as necessary.
Caution:
Part numbers given in this bulletin are for reference only. Always check with your Parts Department for the
latest parts information.