
900 L4-1985cc 2.0L SOHC Turbo VIN S FI (1984)
Clutch Master Cylinder: Service and Repair
To Dismantle/Assemble
TO DISMANTLE
Pull the dust cover towards the rear and use a pair of pliers to remove the circlip. Remove the push-rod and washer. The piston and seal will now
be visible. Remove the piston, washer, piston seal and spring. Carefully remove the seal from the piston. Examine the cylinder bore. If it is smooth
and unscratched, new seals can be fitted. But if the cylinder bore is uneven, fit a new cylinder. If the old seals on the piston are too large and have
swelled, they have probably been contaminated with mineral oil. This is the most common fault on master cylinders. Natural rubber seals are very
sensitive to mineral oil, and even small quantities may cause them to swell in time. If this is suspected, change all of the seals and flush the system
with clean hydraulic fluid.
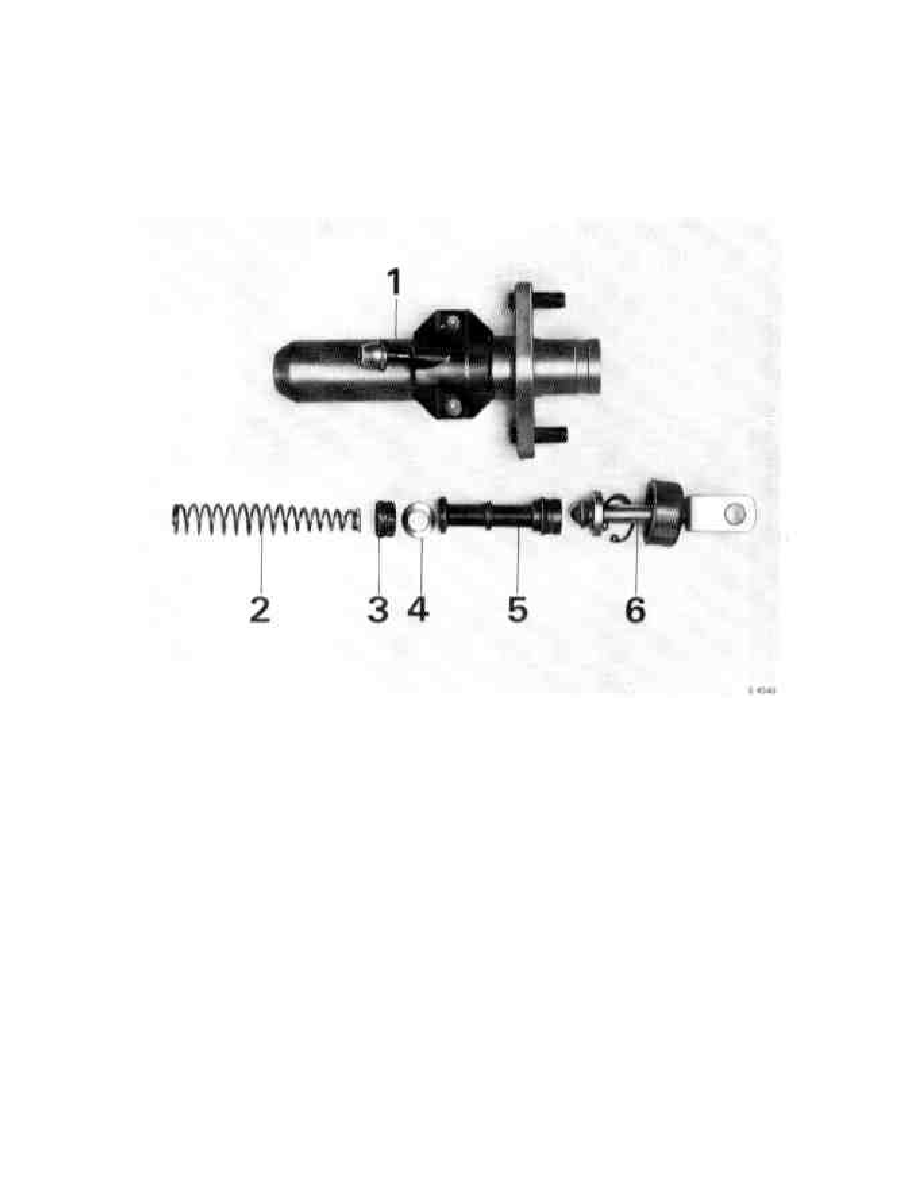
COMPONENTS OF THE CLUTCH MASTER CYLINDER
1. Housing
2. Spring with seat
3. Seal
4. Washer
5. Piston with rear seal
6. Push-rod with stop washers, Circlip and dust cover
TO ASSEMBLE
Fit the return spring and spring seat. Lubricate the piston and seals thoroughly with Wakefield Girling Rubber Grease 3, and fit the seal, washer
and piston with seals.
NOTE: Fit the washer with the convex side towards the piston as shown in the figure.
Fit the push-rod into the cylinder, and then fit the washer and circlip, making sure that the circlip is in the cylinder housing groove. Refit the dust
cover or fit a new cover if the old one is damaged.