
Astra L4-1.8L (2009)
Canister Vent Valve: Service and Repair
Evaporative Emission Canister Vent Solenoid Valve Replacement
Evaporative Emission Canister Vent Solenoid Valve Replacement
Removal Procedure
1. Open the hood.
Warning: Refer to Battery Disconnect Warning (See: Starting and Charging/Battery/Service Precautions).
2. Disconnect the battery.
3. Raise the vehicle all the way.
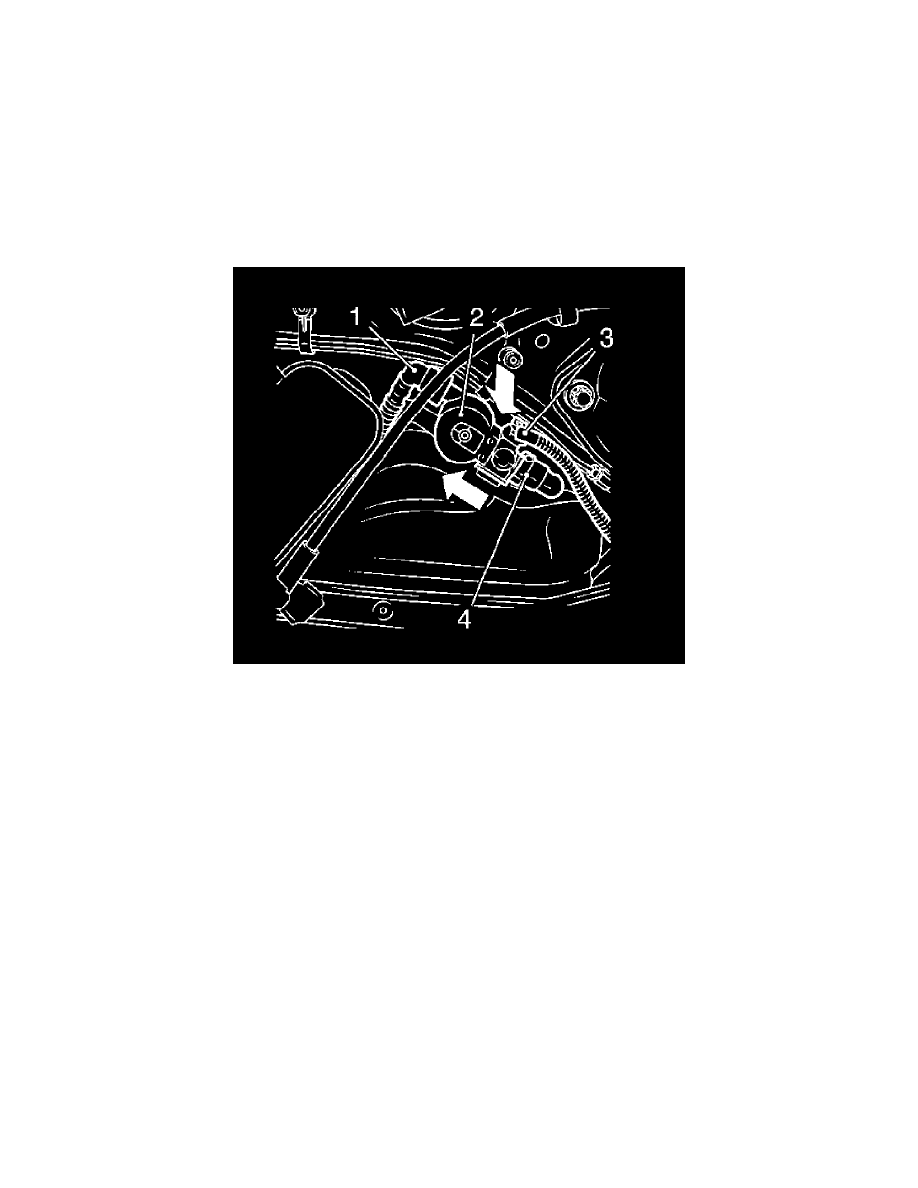
4. Remove the rear purge valve (2).
*
Remove the vent line from carbon canister to the rear purge valve (4).
Disconnect the quick-release fitting.
*
Remove the vent line from the rear purge valve (1).
Disconnect the quick-release fitting.
*
Disconnect the wiring harness of the rear purge valve (3).
Disconnect the wiring harness plug.
*
Release the bracket and remove the rear purge valve (arrows).
Installation Procedure
1. Install the rear purge valve.
*
Install the rear purge valve at the bracket.
*
Install the wiring harness at the rear purge valve.
Connect the wiring harness plug.
*
Install the vent line at the rear purge valve.
Connect the quick-release fitting.
*
Install the vent line at the carbon canister to the rear purge valve.
Connect the quick-release fitting.
2. Lower the vehicle all the way.
Caution: Refer to Fastener Caution (See: Service Precautions/Vehicle Damage Warnings/Fastener Caution).
3. Install the battery.