
Astra L4-1.8L (2009)
Note:
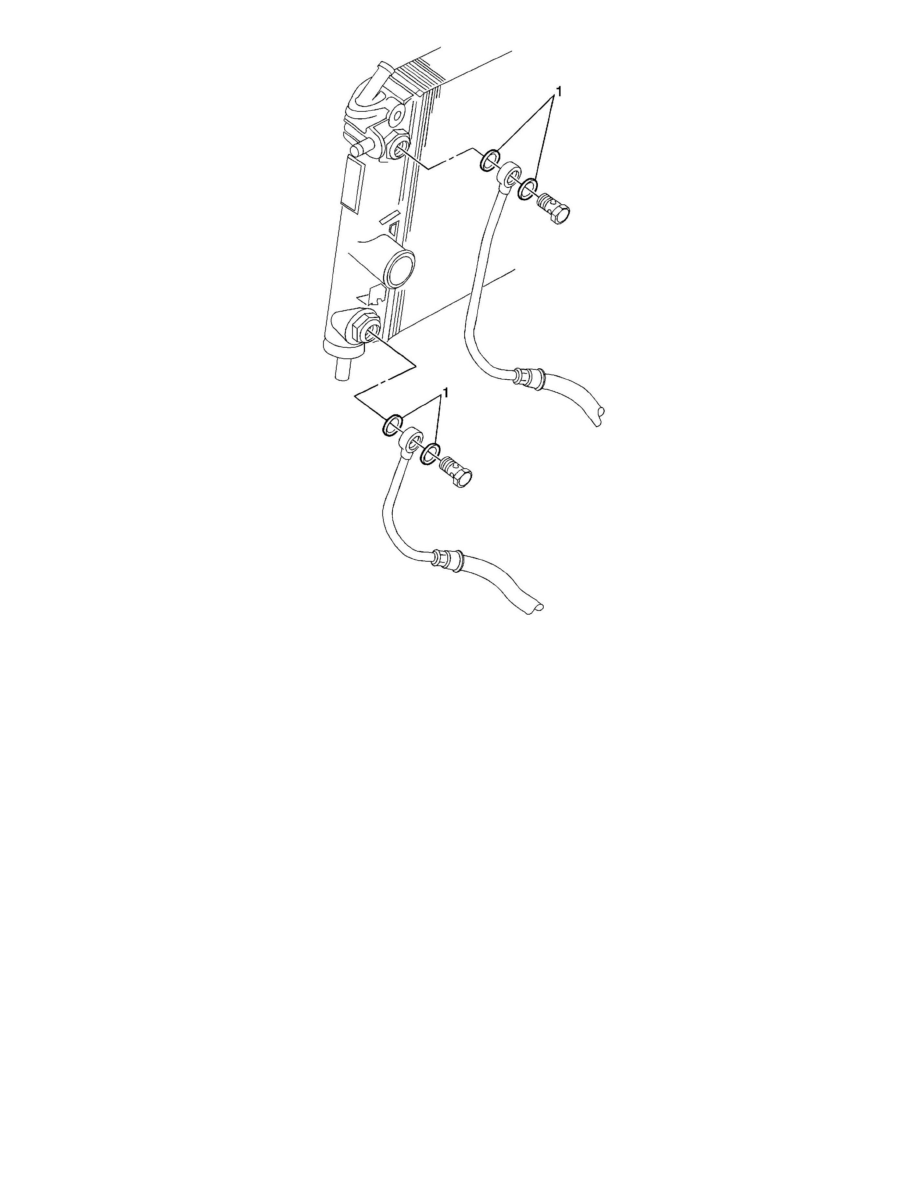
Always use new transmission fluid cooler pipe seals (1) when removing the upper and/or lower transmission oil cooler lines.
2.
Install the upper oil cooling line and/or lower oil cooling line with the connecting hose and seals (1) on the oil cooler at the radiator.
Note:
Make sure the connecting hoses are not kinked or twisted when installing the bolts.
3.
Install the oil cooler line "banjo" bolt(s) to the radiator and hand tighten bolt(s).
Tighten
Tighten the bolt(s) to 7 Nm (62 lb in) on the first pass.
Caution:
DO NOT bend the oil cooler lines.
4.
Verify the oil cooler lines are properly positioned and the upper line is located in the bracket assembly.
5.
Once the lines are properly positioned, tighten the "banjo" bolt(s) to the radiator.
Tighten
Tighten the bolt(s) to 25 Nm (18 lb ft).
Important:
NEVER bend the oil line to correct its position. In such a case, loosen the "banjo" bolt(s), correct the oil line position and retighten to 25 Nm
(18 lb ft).
6.
Lower the vehicle.