
ION L4-2.2L VIN F (2004)
Control Arm Bushing: Service and Repair
Front
Lower Control Arm Bushings Replacement
-
Tools Required
-
KM-906B Bushing Remover/Installer Kit
Removal Procedure
1. Raise and support the vehicle. Refer to Vehicle Lifting.
2. Remove the lower control arm.
3. Wrap the control arm with a shop towel and place it in a vise.
Important: Note the depth and orientation of the old bushing before removal.
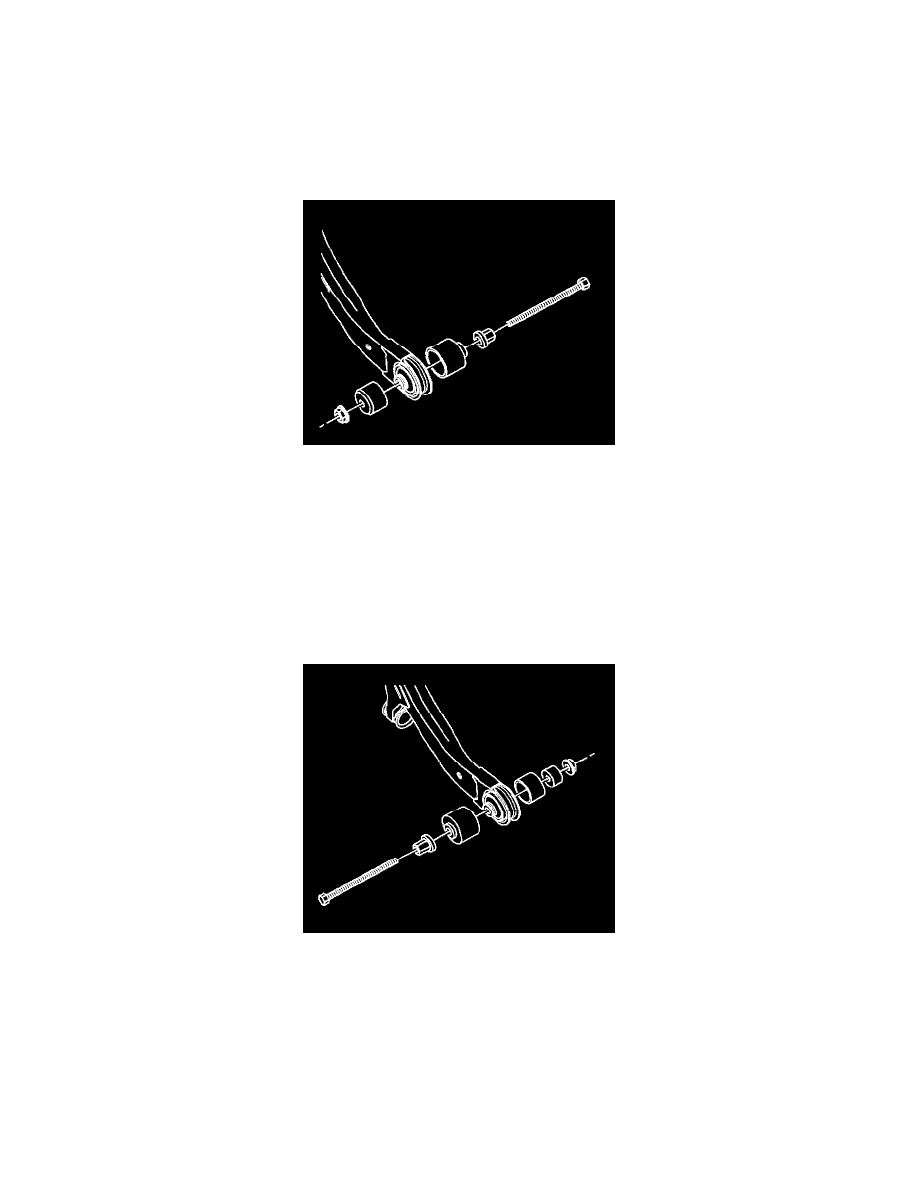
4. Using the KM-906B, install the KM-906-70, 906-42, 906-41 and 906-62 onto the control arm bushing.
5. Hold the hex end of the threaded shaft while turning the large nut in order to pull the bushing through the control arm.
6. Disassemble the tools and remove the bushing.
Installation Procedure
1. Place the NEW bushing to the tapered side of the control arm.
2. Using the KM-906B, install the KM-906-70, 906-42, 906-41 and 906-62 from the opposite direction.
3. Hold the hex end of the threaded shaft while turning the large nut in order to pull the bushing into the control arm.
4. Install the bushing to the same depth and orientation as noted during removal.
5. Remove the KM-906-B from the control arm.
6. Install the control arm.