
L300 V6-3.0L VIN R (2001)
Driver, Passenger, Left Curtain, and/or Right Curtain
Deployment inside vehicle is proper when the vehicle is to be destroyed or salvaged for component parts. This includes, but is limited to, the following
situations.
^
Vehicle has completed its useful life.
^
Vehicle has been damaged beyond repair in a non-deployment-type accident.
^
Vehicle has been stripped or damaged beyond repair in a theft.
^
Vehicle will be salvaged for component parts to be used on a different vehicle identification number (VIN) as opposed to being rebuilt as the same
VIN. This is done to ensure SIR system integrity since ONLY NEW SIR COMPONENTS MAY BE USED IN SERVICING AN SIR EQUIPPED
VEHICLE. Never use SIR components from another vehicle. Always replace SIR components with NEW COMPONENTS.
CAUTION: WHEN YOU ARE DEPLOYING AN INFLATOR MODULE FOR DISPOSAL, PERFORM THE PROCEDURES IN THE
ORDER LISTED. FAILURE TO FOLLOW THE PROCEDURES IN THE ORDER LISTED MAY RESULT IN PERSONAL INJURY.
^
WEAR SAFETY GLASSES THROUGHOUT THE ENTIRE PROCEDURE
^
SELECT A DEPLOYMENT AREA CLEAR OF PEOPLE, LOOSE OBJECTS, OR FLAMMABLE MATERIAL.
Deployment Procedure
Procedures for deployment of a live (undeployed) inflator module within the vehicle are as follows:
1. Lower driver and passenger windows. Turn ignition switch Off and remove the ignition key.
2. Check that all inflator modules which will be deployed are mounted securely.
^
driver inflator module is secured to steering wheel
^
passenger inflator module is secured to instrument panel
^
left curtain inflator module is secured to left roof rail
^
right curtain inflator module is secured to right roof rail
3. Remove all loose objects from front seat and inflator module covers.
4. Disable the SIR System.
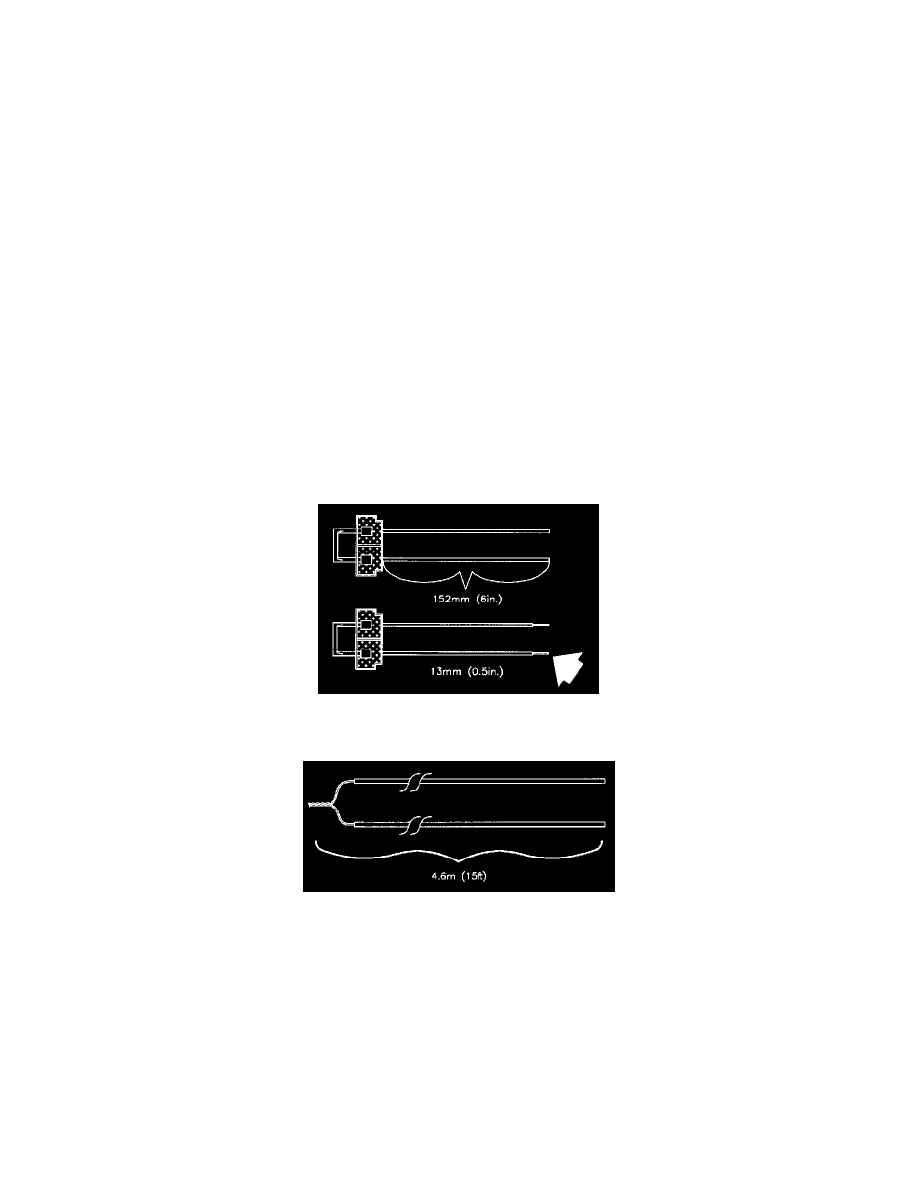
5. Cut the two wires of each yellow two-way connector away from the vehicle harness leaving at least 150 mm (6 in.) of wire at connector.
6. Strip 13 mm (1/2 in.) of insulation from each of the connector wire leads.
7. Cut two 4.6 m (15 ft.) deployment wires from multi-strand wire (18 gage or thicker). These deployment wires will be used to fabricate a
deployment harness.
8. Strip 13 mm (1/2 in.) of insulation off both ends of each deployment wire cut in the previous step.
9. Short the two deployment wires by twisting together one end from each. Deployment wires shall remain shorted and not be connected to a power
source until the air bag is to be deployed.