
Sky L4-2.4L (2007)
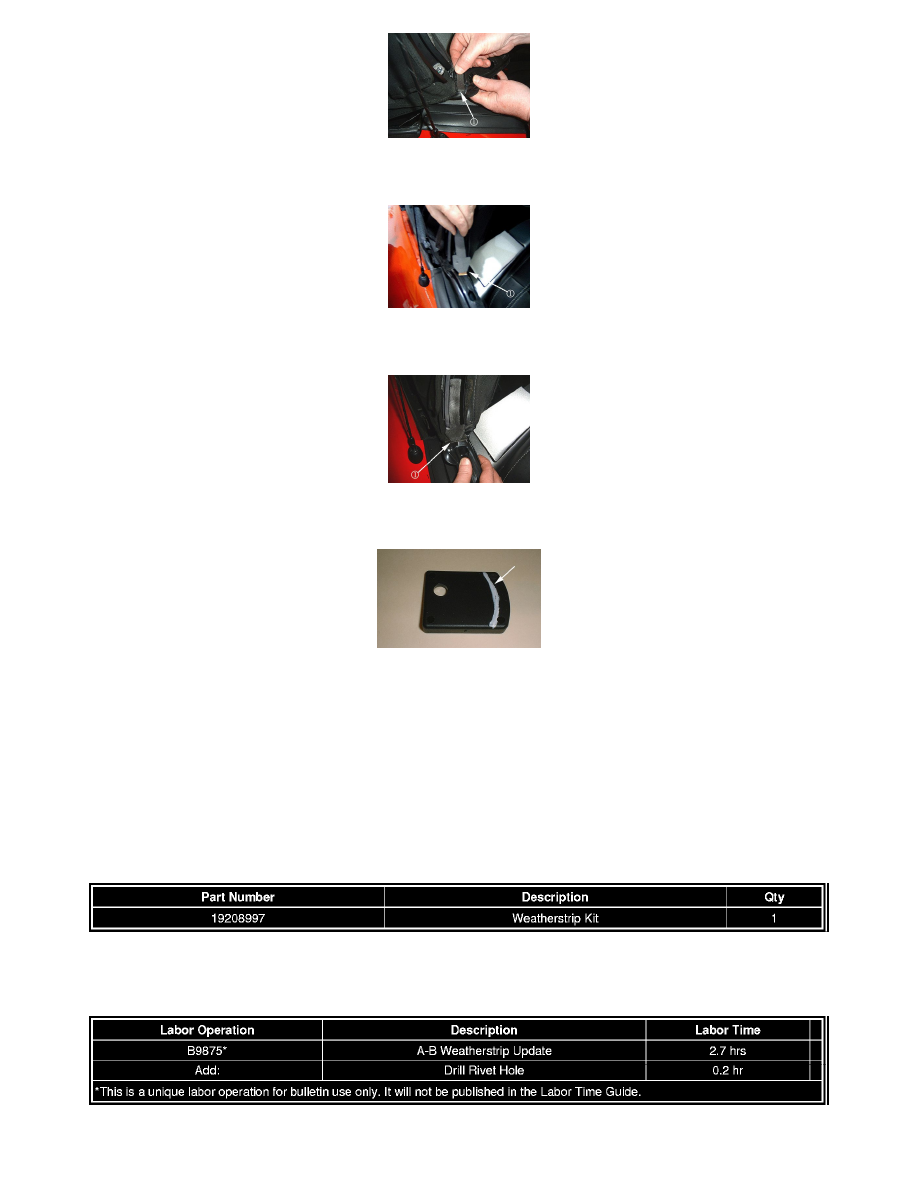
15. The new rear weatherstrips come with two adhesive seals. A small rectangular seal needs to be installed at the base of the weatherstrip (1). Fold
the weatherstrip back to expose the flat spot on the bottom of the weatherstrip. Clean the area and install the seal (1).
16. With the rear weatherstrip still folded back, install the arrow-shaped seal in the retainer with the large edge of the arrow out and the top of the
arrow tucked up to the bottom edge of the retainer (1).
17. With the arrow-shaped foam seal installed in the retainer, the head of the arrow will lay across the rear of the rectangular seal installed in Step 16.
Fold the weatherstrip up and install it in the retainer. (1).
18. The new rear side weatherstrip service part comes with a plastic cover that is screwed to the top of the weatherstrip. This part needs to be revised
(1).
Trim 5 mm (0.20 in) from the leading edge of the cover using a suitable tool. Clean off any rough edges. It is not necessary to follow the curved
shape of the original part.
19. Install the cover using the provided fastener.
20. Cycle the top and verify proper function and latching of the folding top rear latches. If adjustment is necessary, refer to Folding Top Adjustment
and Door Window Adjustment in SI.
21. Verify the operation and travel of both door glass. Make adjustments as required.
Parts Information
Warranty Information
For vehicles repaired under warranty, use the table.